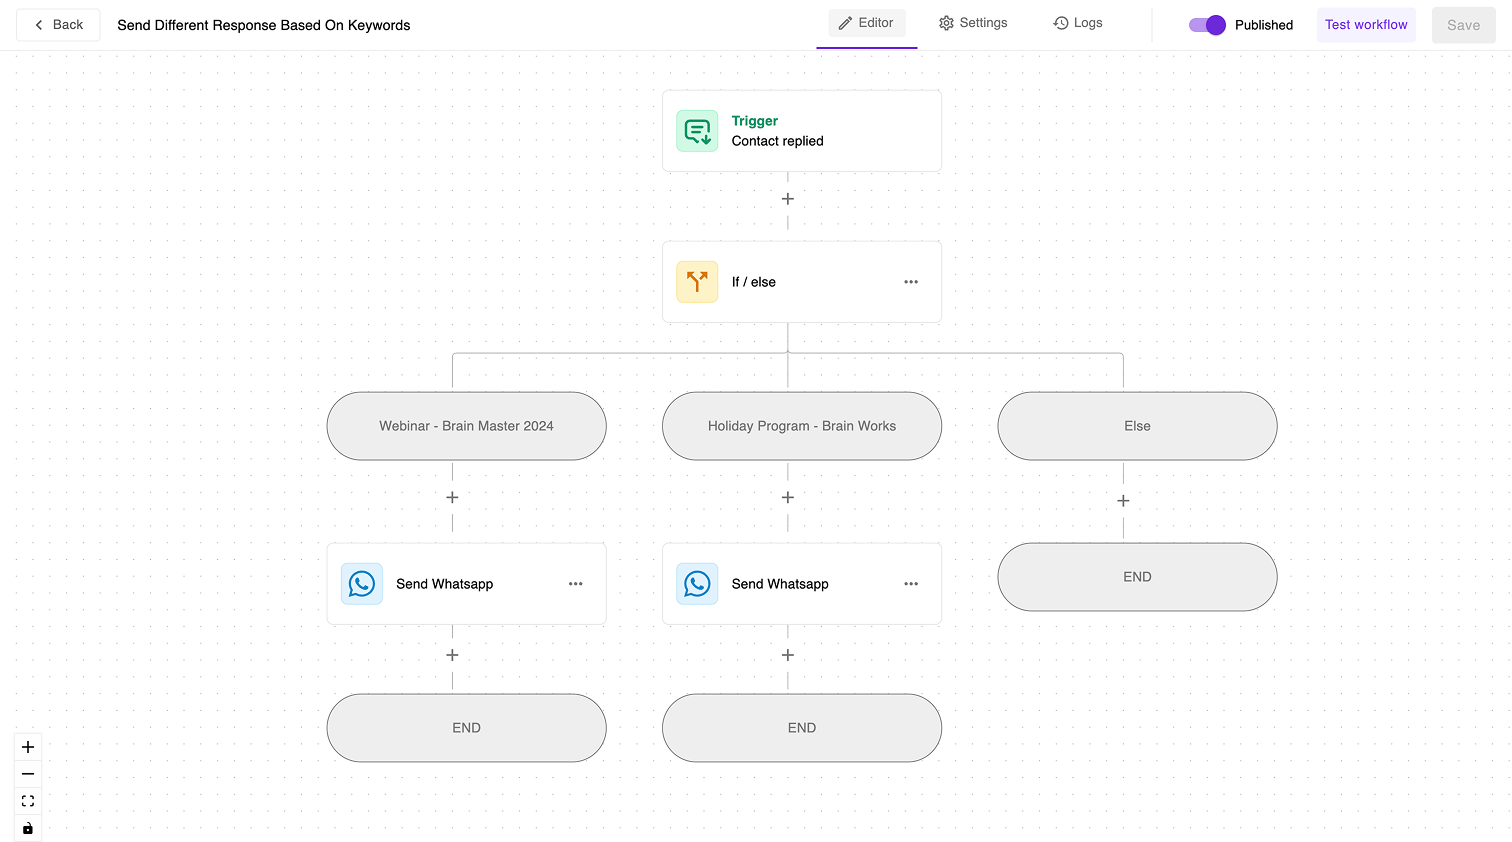
Send Different Responses Based on Keywords
Automatically send different WhatsApp responses depending on keywords in incoming messages. This is useful when running multiple campaigns that each need a specific auto-reply.
Example scenario
You have two campaigns with different WhatsApp widget messages:
Campaign A (Webinar): Incoming message contains sign up for your Webinar - Brain Mastery 2024
Campaign B (Holiday Program): Incoming message contains interested in your Holiday Program - Brain Works
Steps
-
Create a new workflow with Contact Replied as the trigger.
-
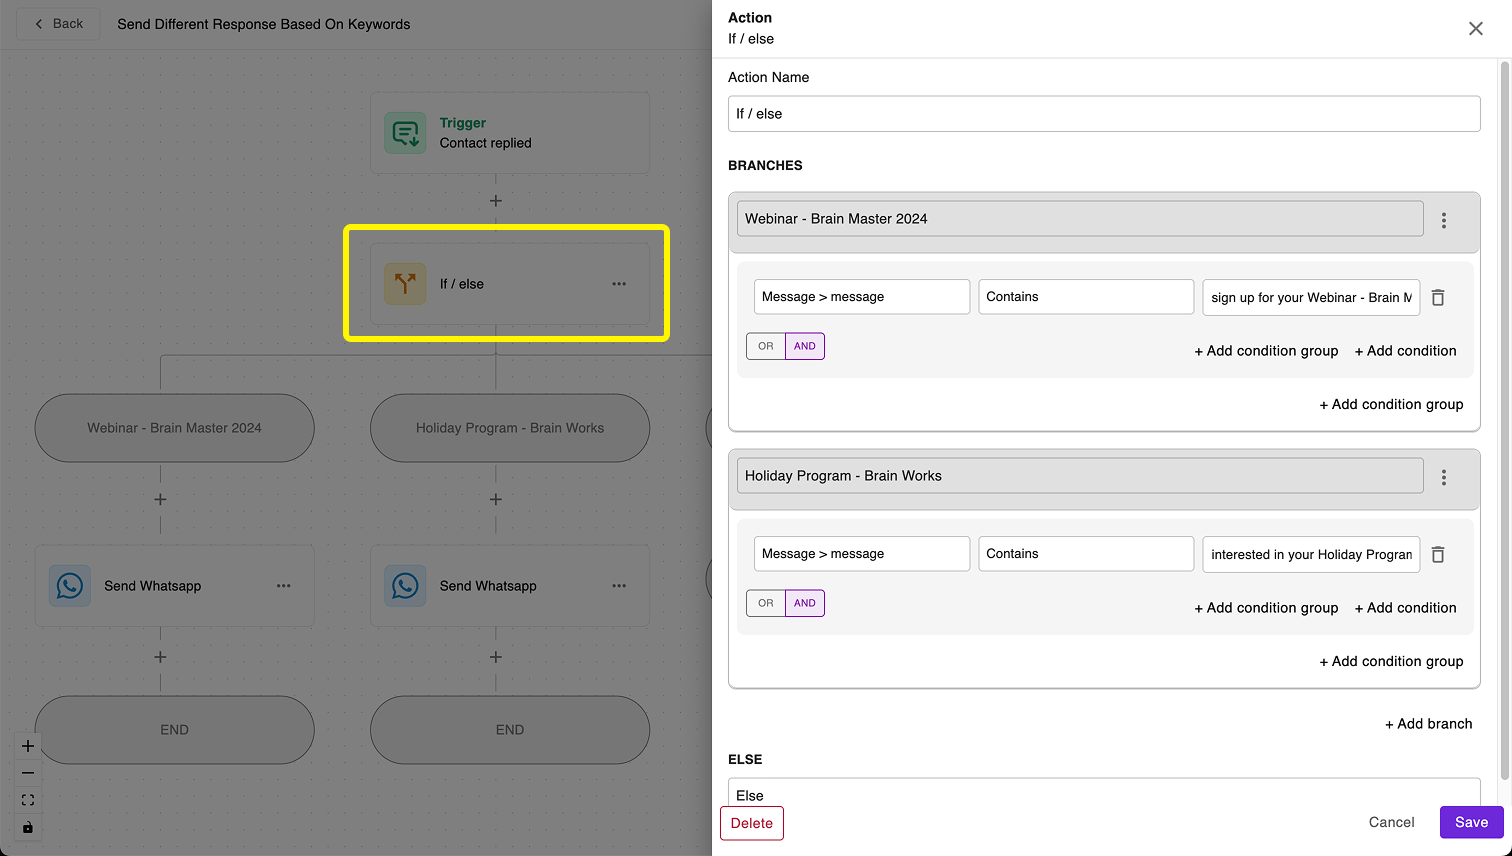
Add an IF/ELSE action with two branches:
- Branch 1 (Webinar): Condition —
Message > messagecontainssign up for your Webinar - Brain Mastery 2024 - Branch 2 (Holiday Program): Condition —
Message > messagecontainsinterested in your Holiday Program - Brain Works
 info
infoThe system checks branches left to right. If a message matches multiple branches, only the first match is followed.
- Branch 1 (Webinar): Condition —
-
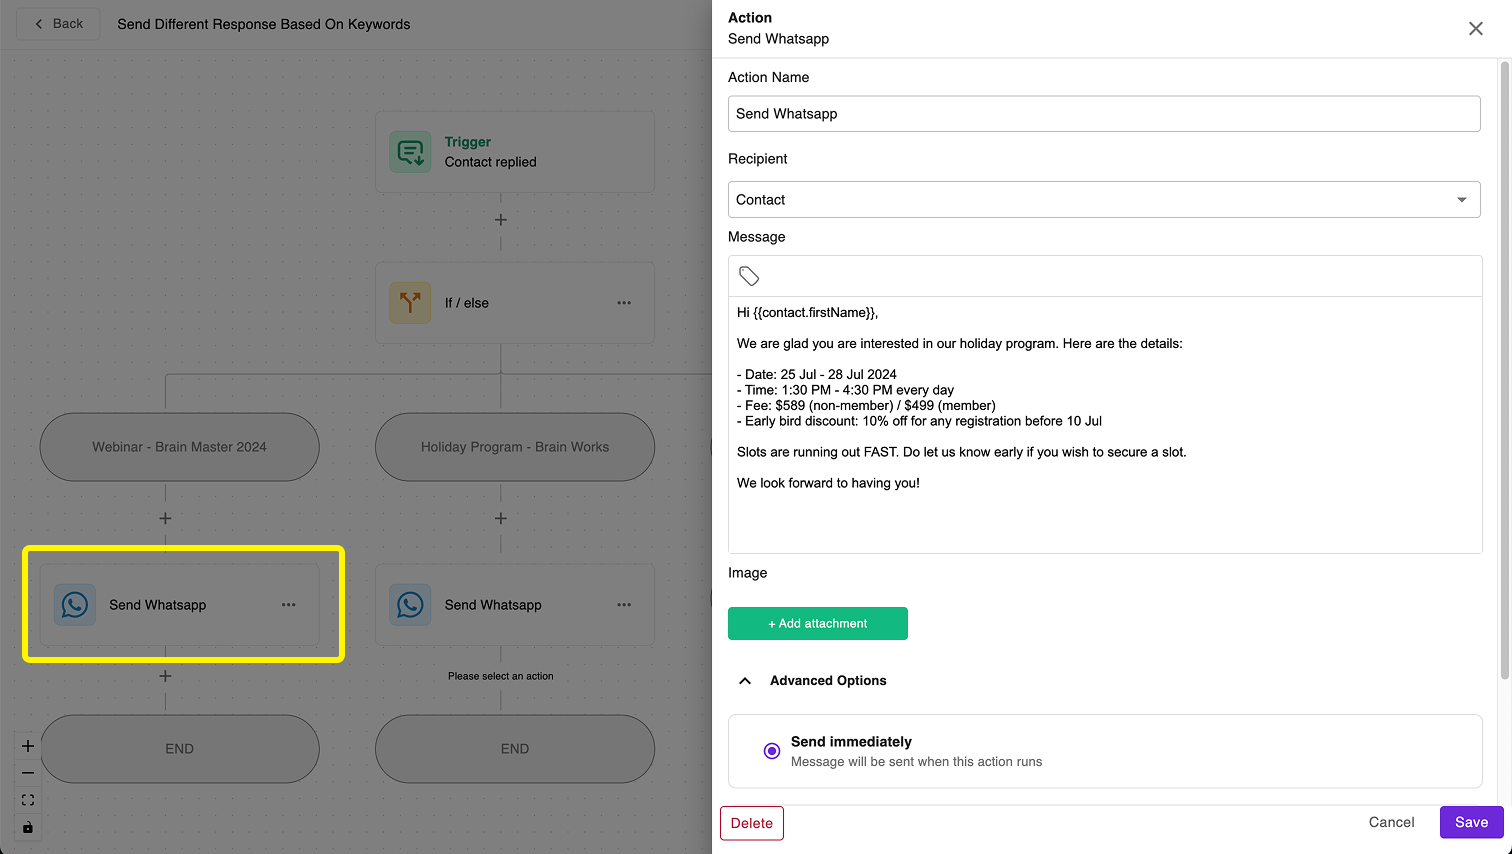
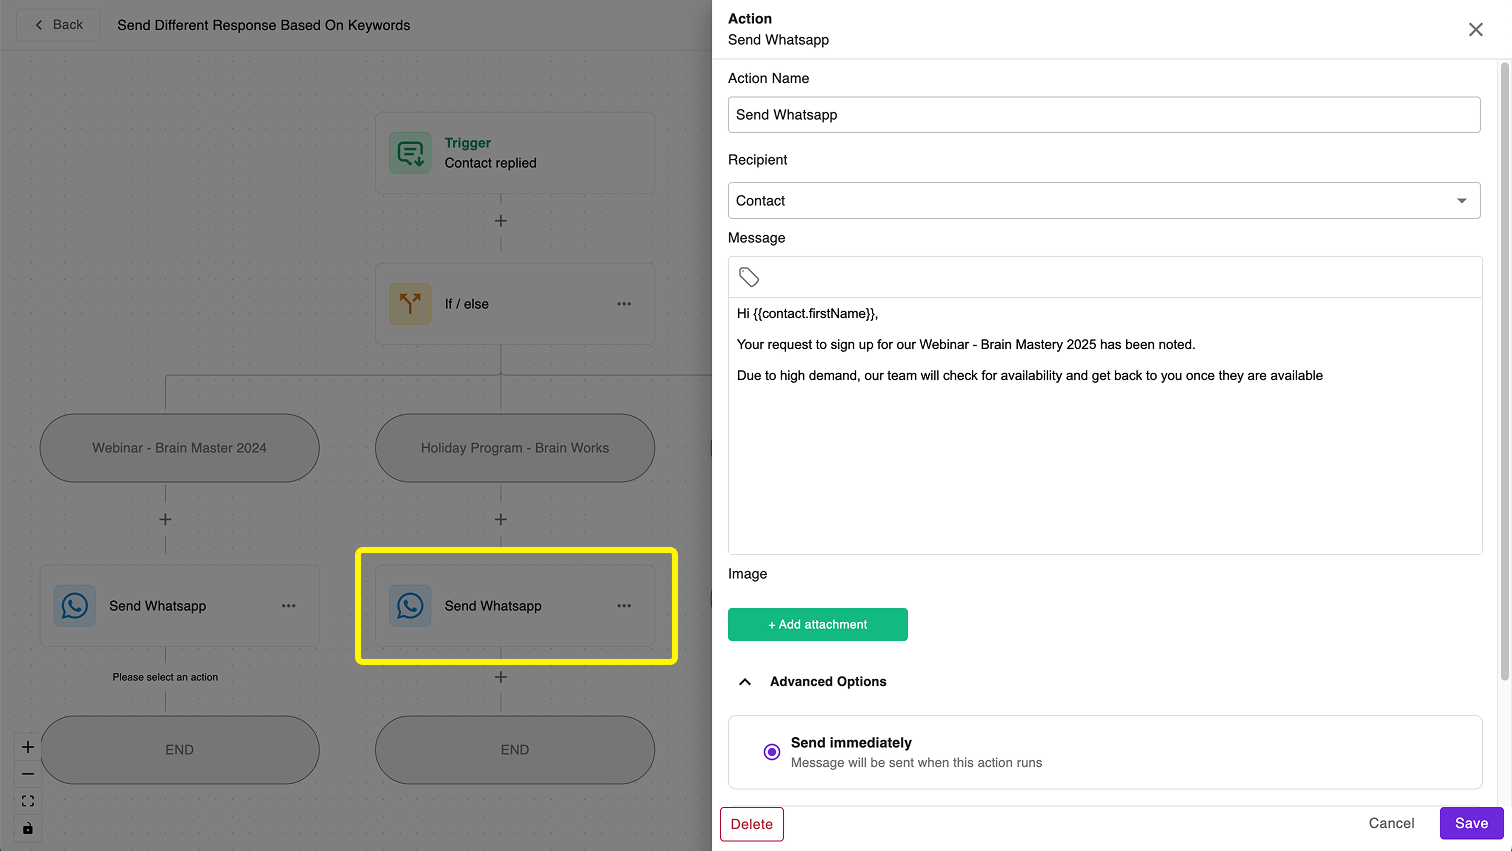
Under each branch, add a Send WhatsApp action with the appropriate response.
-
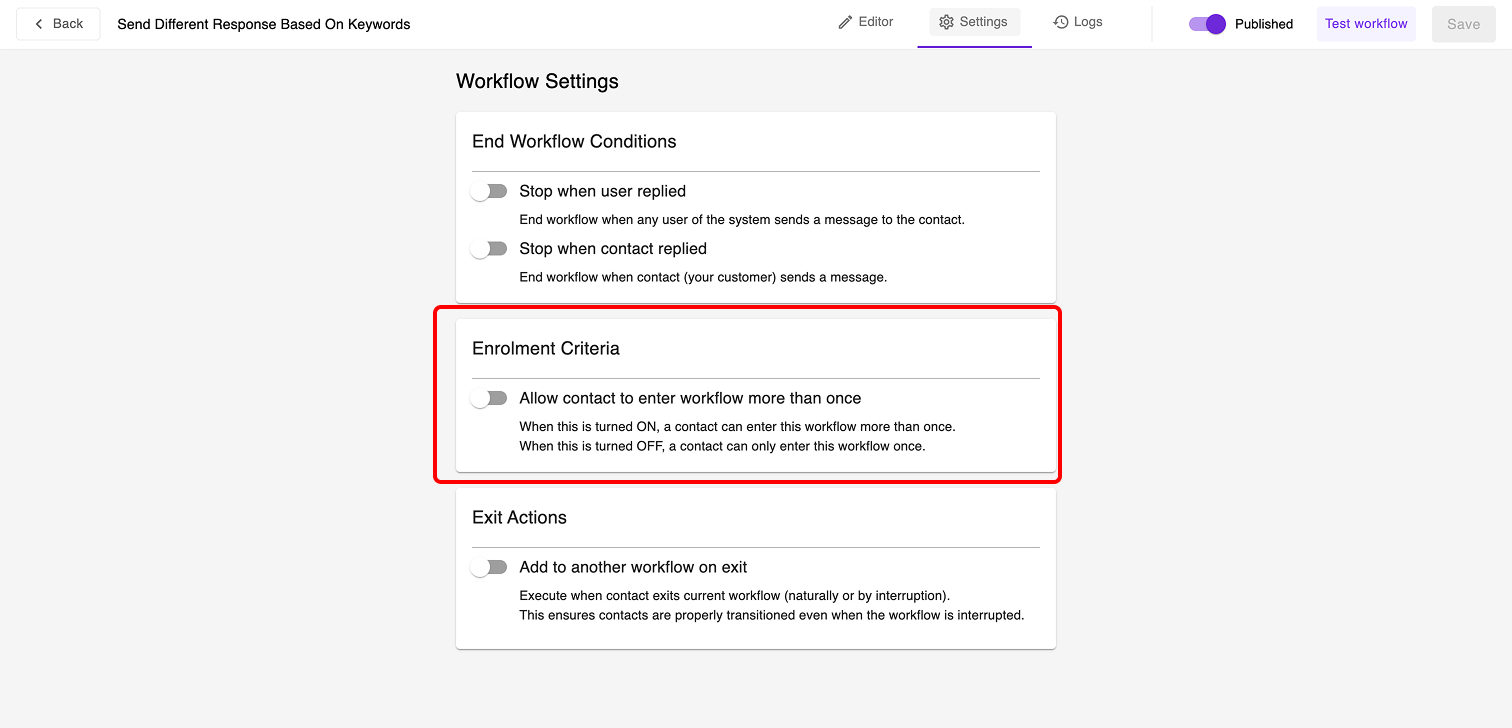
In workflow Settings, toggle Allow contact to enter workflow more than once to ON.
-
Publish and test by sending messages containing each campaign's keywords.
Troubleshooting
No automatic response sent? Check that the keywords match exactly, including capitalisation.
Wrong response sent? Your keywords may be too generic. Use specific, unique phrases.
Workflow only triggers once per contact? Ensure "Allow contact to enter workflow more than once" is ON in workflow settings.