Navigating the Workflow Builder
Now that you know what workflows are, let’s get familiar with the Exabloom Workflow Builder interface. In this guide, we’ll show you where to find your workflows, how to create a new one, and how to navigate the builder with ease.
Where to Find Your Workflows
-
Log in to your Exabloom account.
-
In the left-hand menu, click on Workflows.
This will take you to the Workflow Dashboard, where you’ll see a list of all your existing workflows.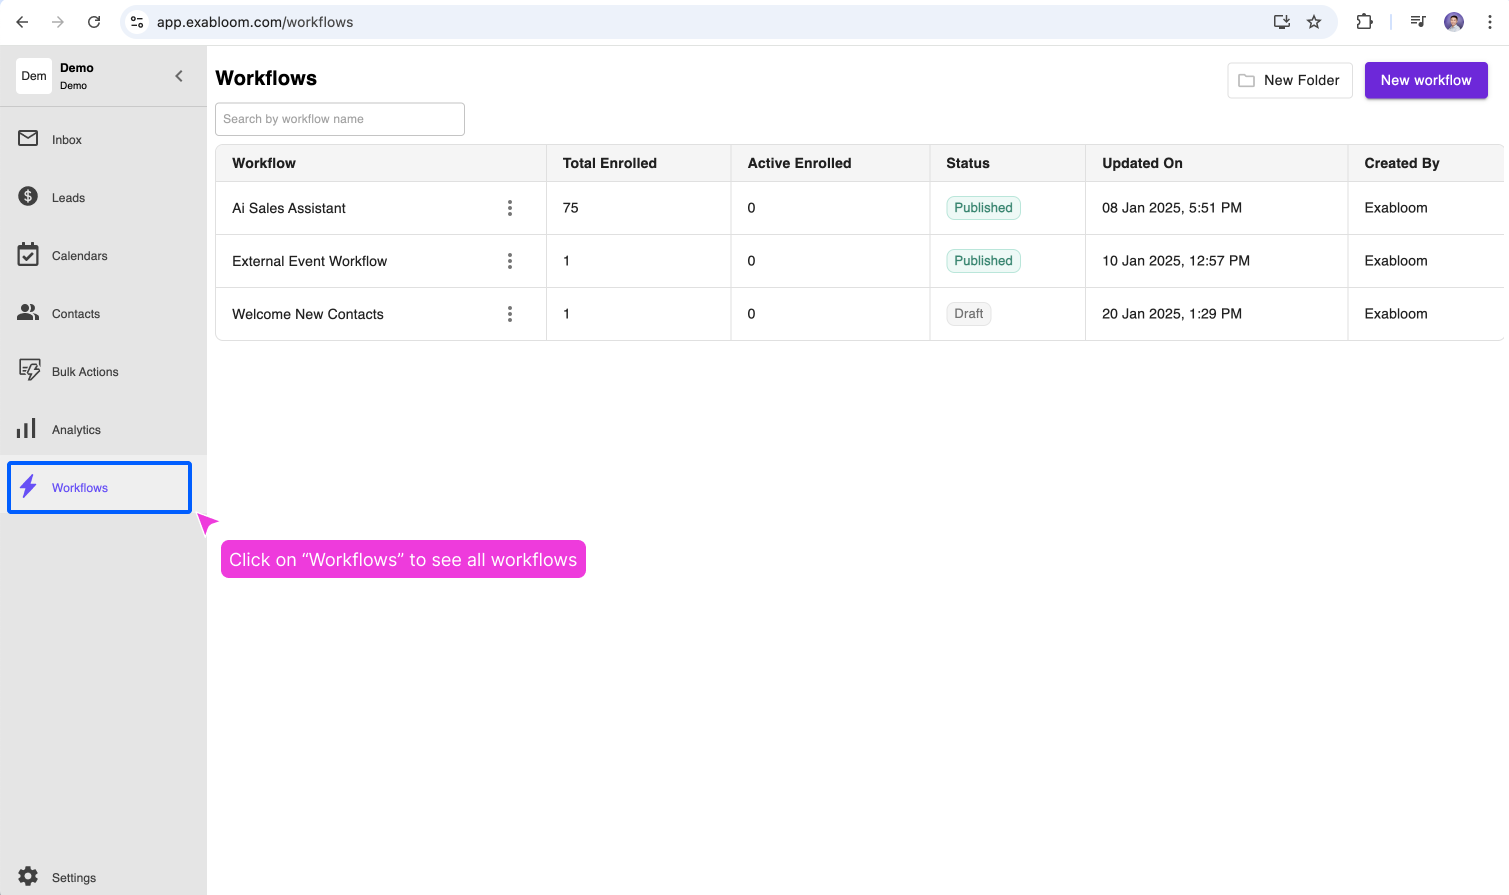
Understanding the Workflow Dashboard
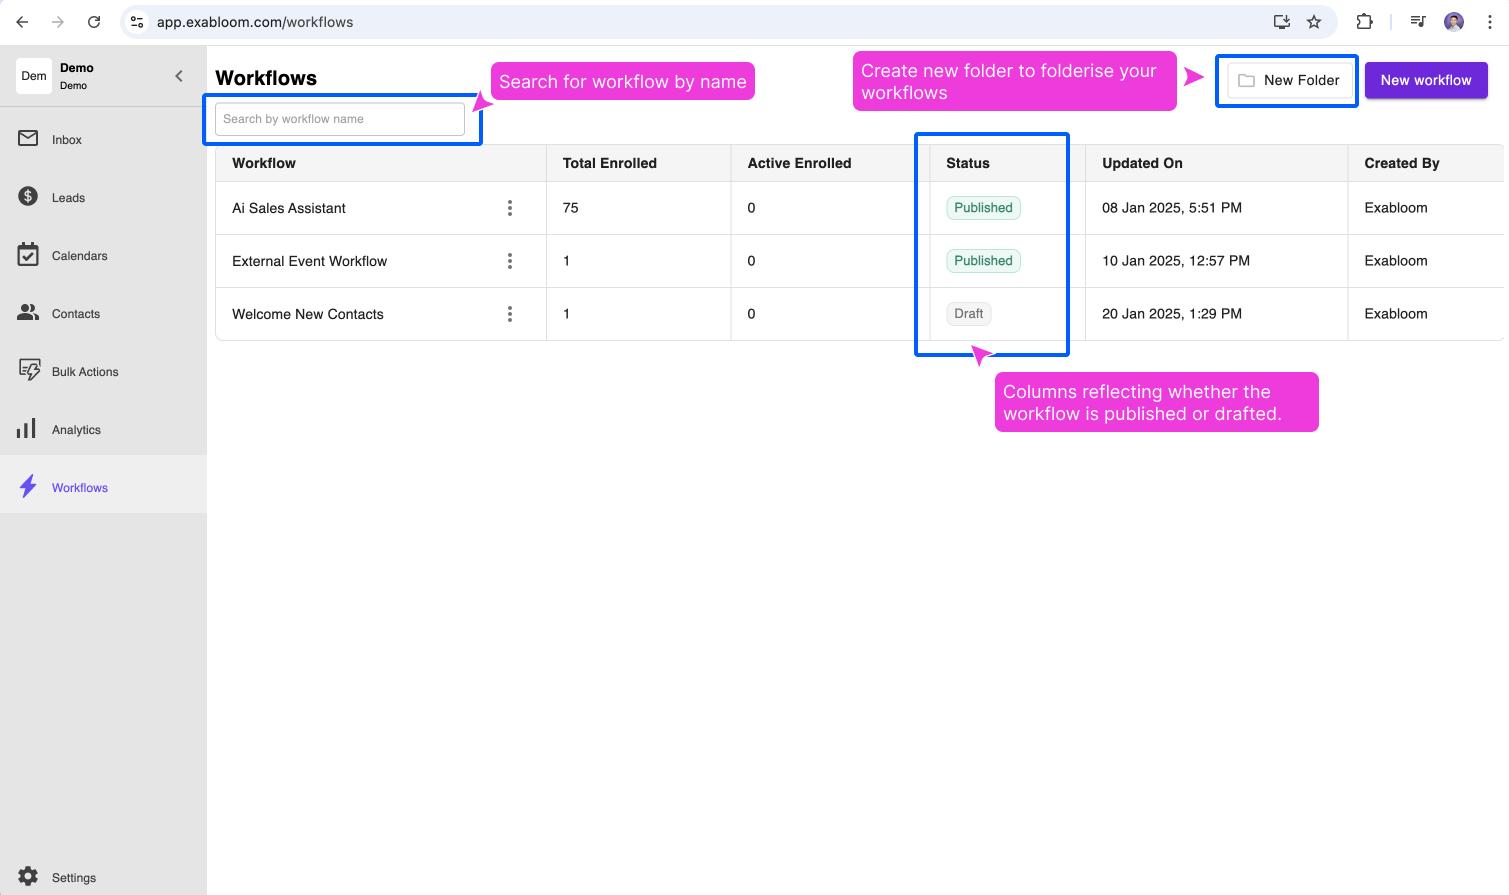
The Workflow Dashboard is your central hub for managing workflows. Here’s what you’ll see:
- Published Workflows: Workflows that are currently running.
- Draft Workflows: Workflows that are still being set up and not yet published.
- Search Bar: Quickly find a specific workflow by name.
- Create Workflow Button: Start building a new workflow.
- Folderizing Option: Organize your workflows into groups for better organization.
How to Create a New Workflow
On the Workflow Dashboard, click the New Workflow button.
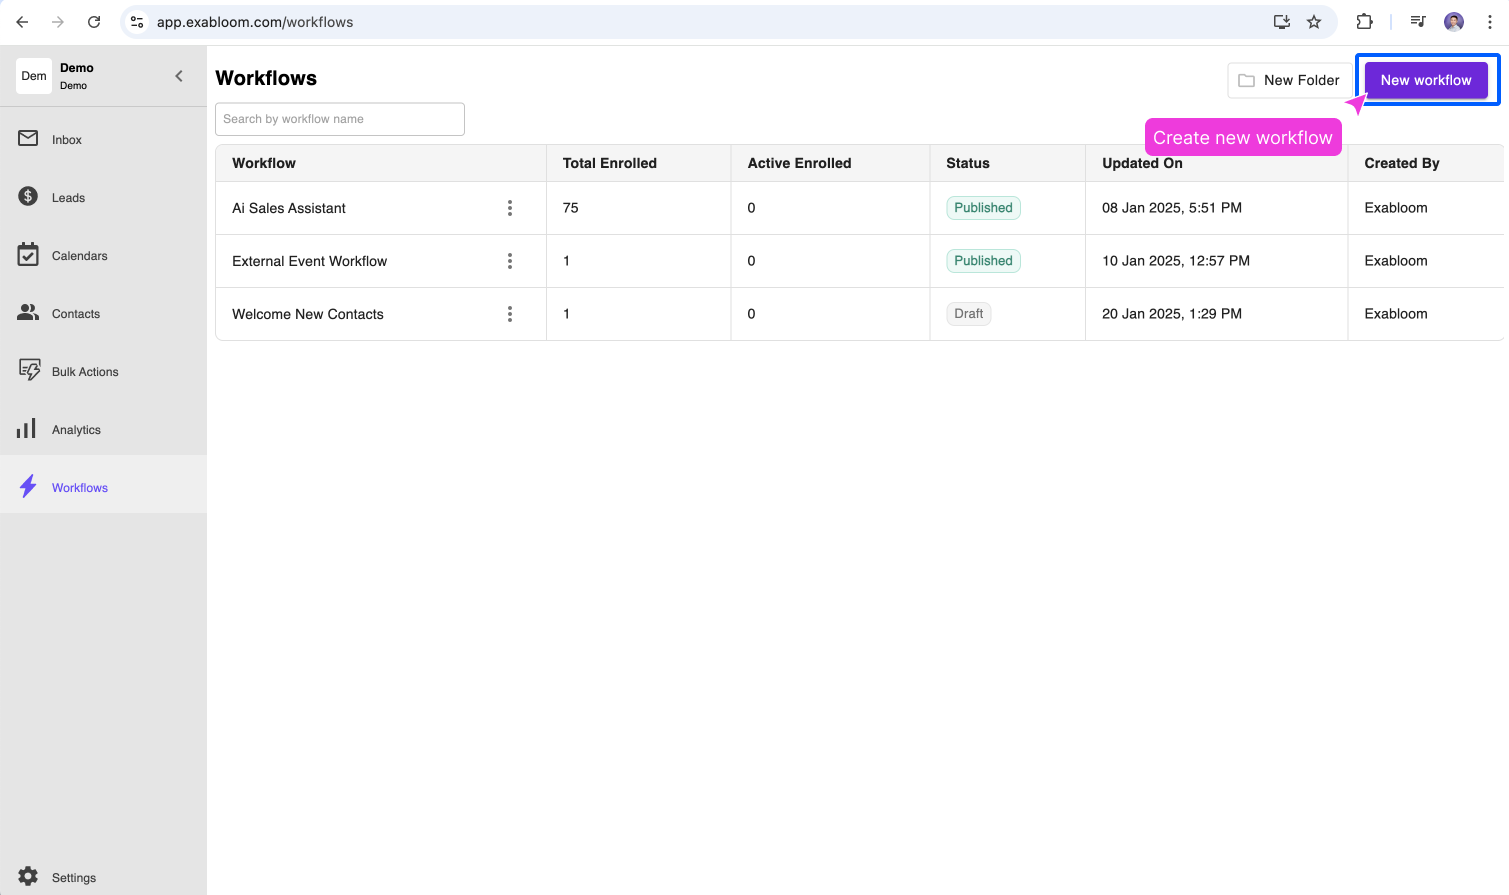
This will open the Workflow Builder, where you can start adding triggers and actions.
Exploring the Workflow Builder
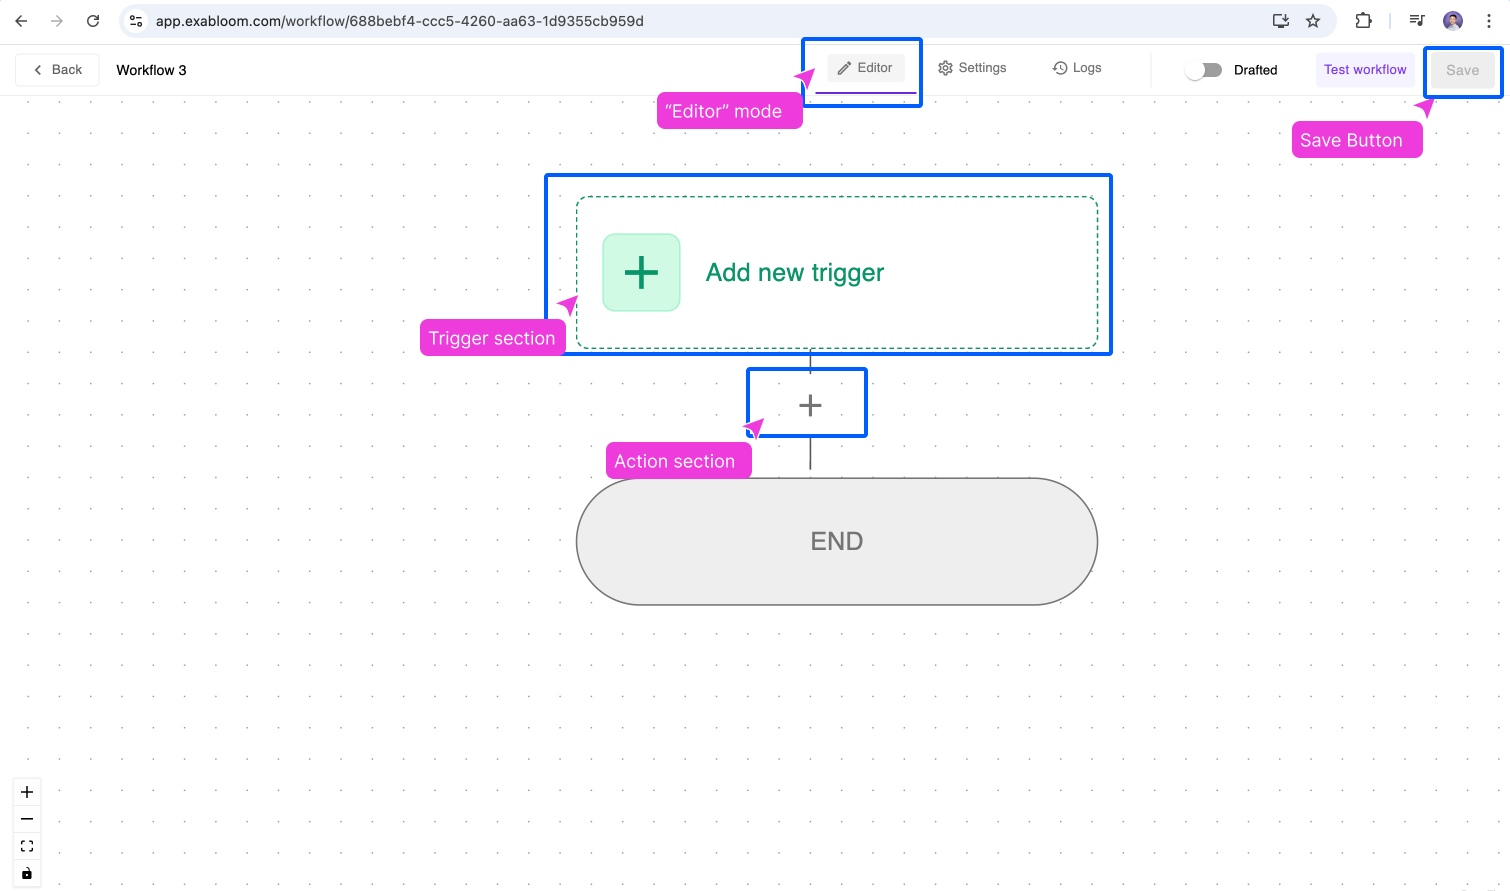
The Workflow Builder is where you’ll design your workflows. Here’s a quick overview of the interface:
- Trigger Section: This is where you define what starts the workflow (e.g., a new contact being added).
- Action Section: This is where you define what happens after the workflow is triggered (e.g., sending a message).
- Editor: The main area where you add and remove triggers and actions to build your workflow.
- Save Button: Always remember to save your progress as you build your workflow.
What’s Next?
Now that you know how to navigate the Workflow Builder, you’re ready to create your first workflow! In the next guide, we’ll walk you through setting up a simple workflow step-by-step. Let’s go!