Send Data Out of Exabloom
Use webhook actions in workflows to send Exabloom data to external systems like CRMs, email marketing tools, or custom applications.
Steps
1. Create a workflow
- Go to Workflows and click Create New Workflow.
- Name your workflow (e.g., "Send New Contacts to CRM").
2. Choose a trigger
The trigger determines what data you can send. Common triggers:
- Contact Created / Contact Updated — access to contact data
- Lead Created / Lead Updated — access to lead and contact data
3. Add a webhook action
-
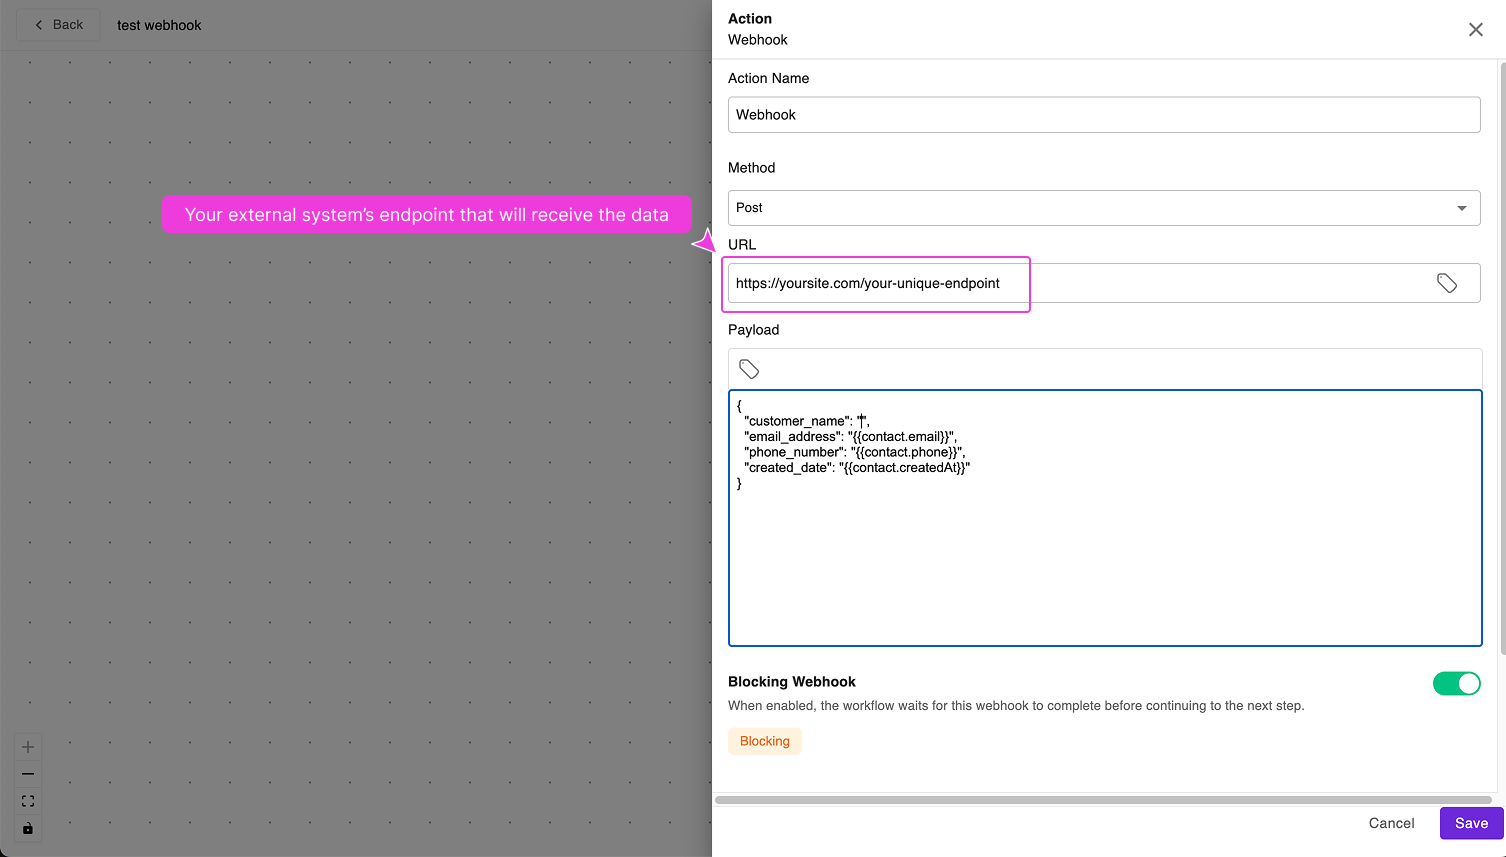
Click Add Action and select Webhook.
-
Set the Method to POST.
-
Enter the URL of your external system's endpoint.
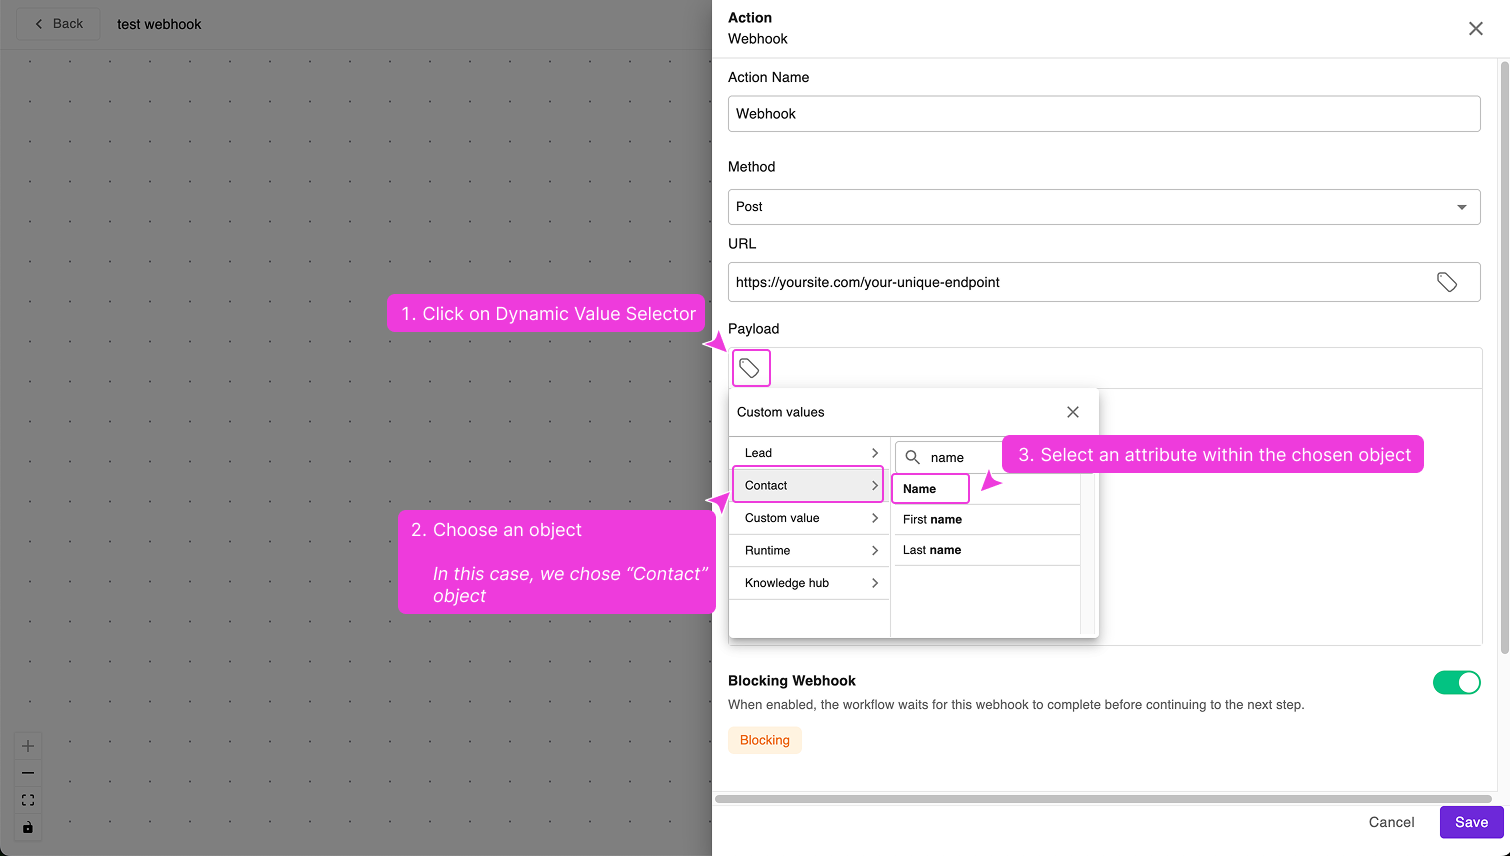
4. Map your data
-
In the webhook body field, click the Tag icon to open the Dynamic Value Selector.
-
Select the object (e.g., Contact) and the attribute you need.
Example JSON payload:
{
  "customer_name": "{{contact.name}}",
  "email_address": "{{contact.email}}",
  "phone_number": "{{contact.phone}}",
  "created_date": "{{contact.createdAt}}"
}
Dynamic values must be wrapped in double quotes. Without quotes, the JSON will be invalid.
5. Test the workflow
Publish the workflow first, then trigger it manually (e.g., create a new contact if using "Contact Created" as the trigger). Check that the receiving system received the data payload.
If things don't work as expected, check the Workflow Logs.
Troubleshooting
Webhook not firing?
- Check that your workflow is published
- Verify the trigger conditions are met
- Review workflow execution logs
External system not receiving data?
- Verify the webhook URL is correct
- Confirm the JSON payload format matches what the external system expects
Data mapping issues?
- Use the Tag icon instead of typing field names manually
- Ensure dynamic values are enclosed in double quotes