Edit Pre-Set Filters
Update the pre-set filters on your Leads page to match your current criteria (e.g., changing date ranges from 2024 to 2025).
Steps
-
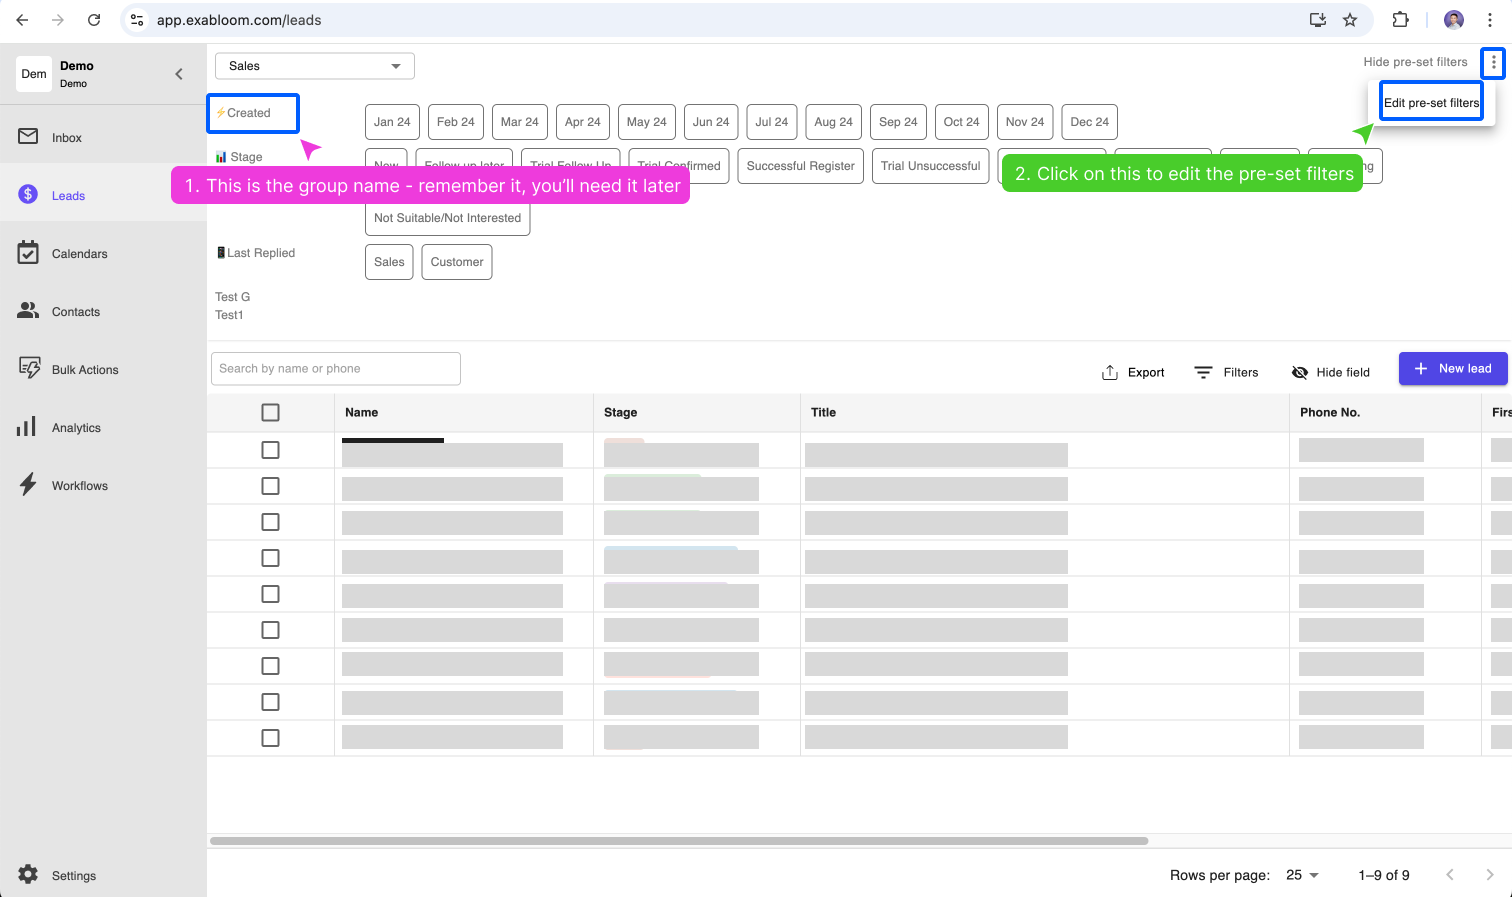
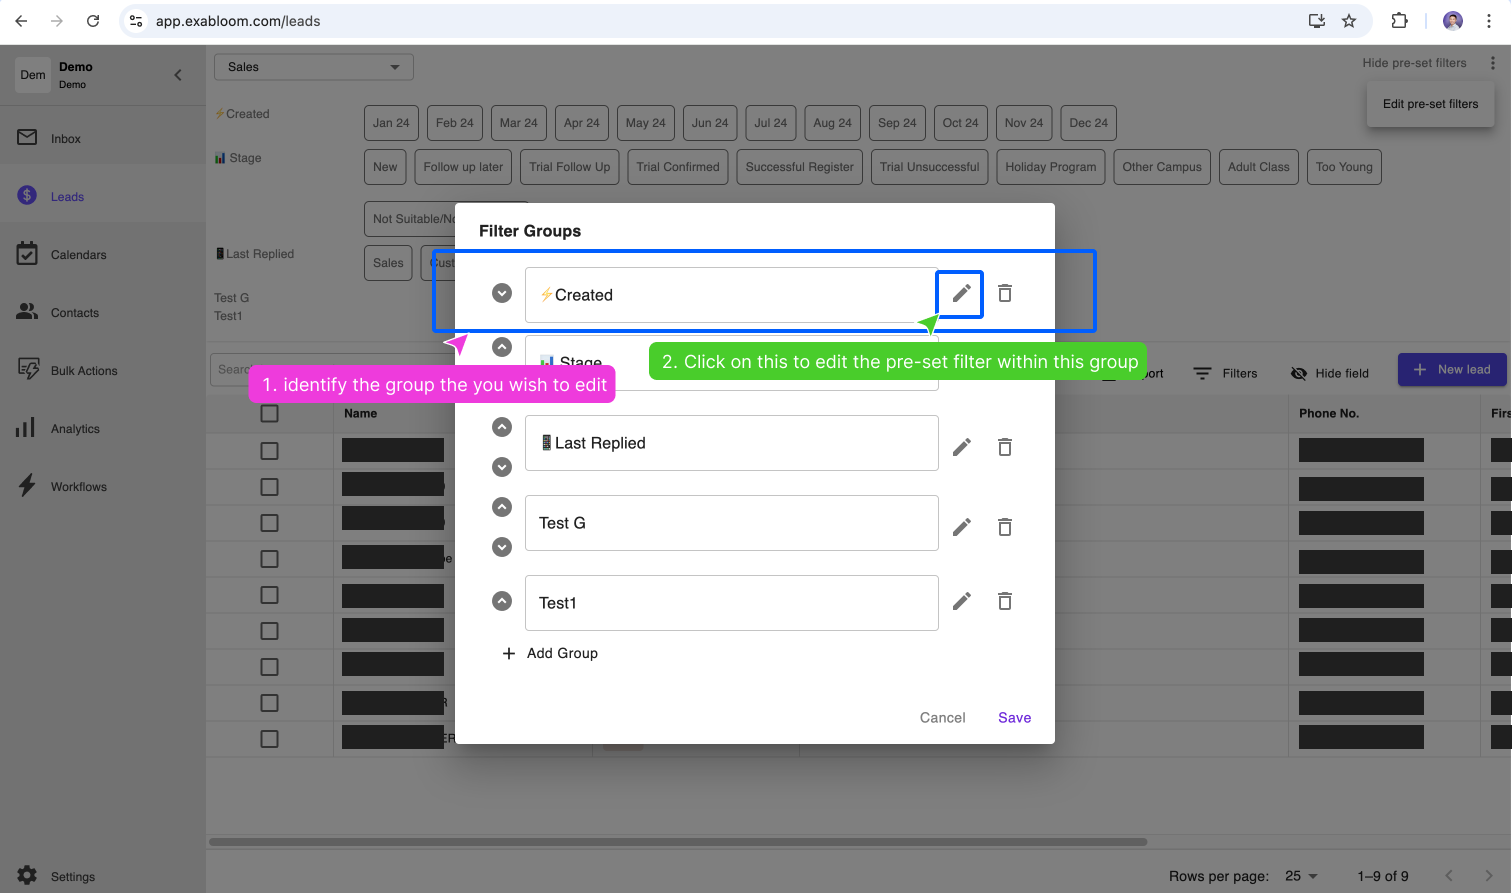
On the Leads page, find the filter group you want to edit (e.g., "Created").
-
Click the three dots (...) next to the group name and select Edit pre-set filters.
-
Click the edit icon on the specific filter group you want to change.
-
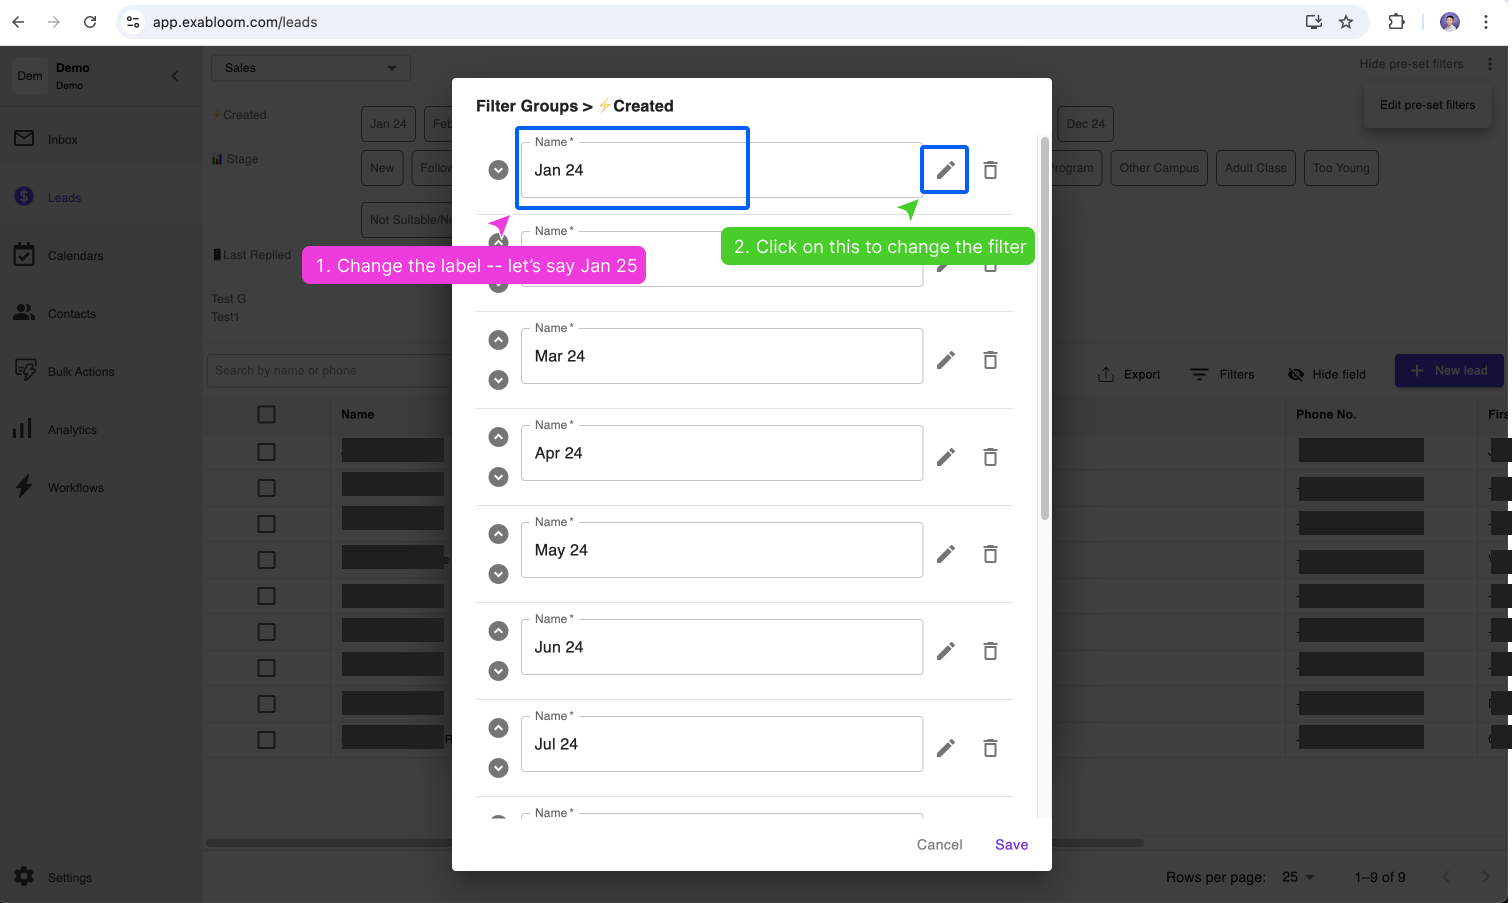
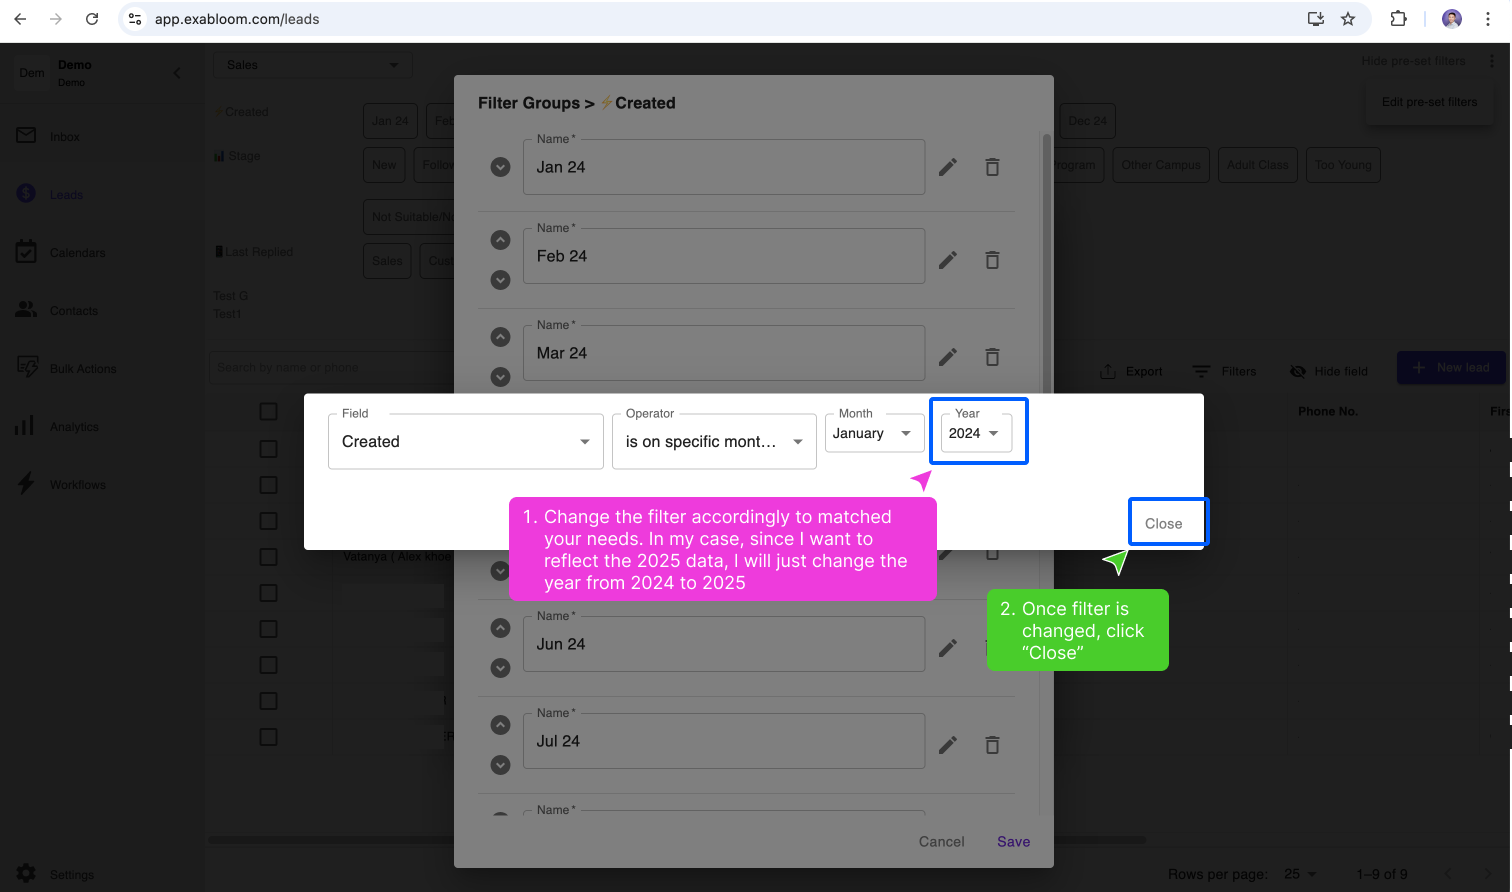
Update the label (e.g., "Jan 24" to "Jan 25"), then click the edit icon next to it to modify the filter criteria.
-
Update the filter values (e.g., change the year from 2024 to 2025) and click Close.
-
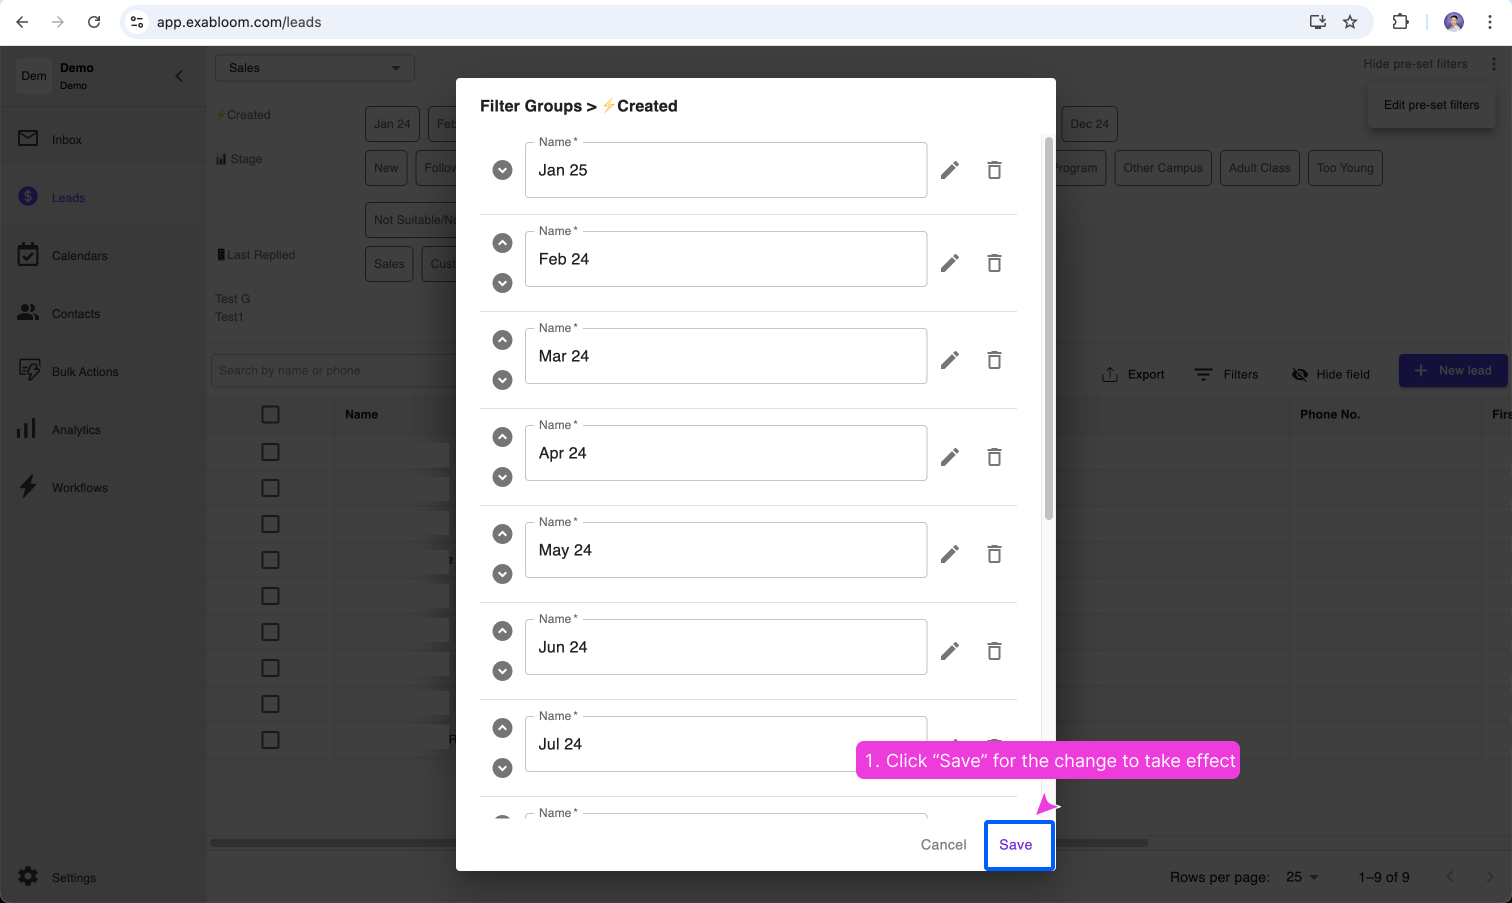
Click Save.
-
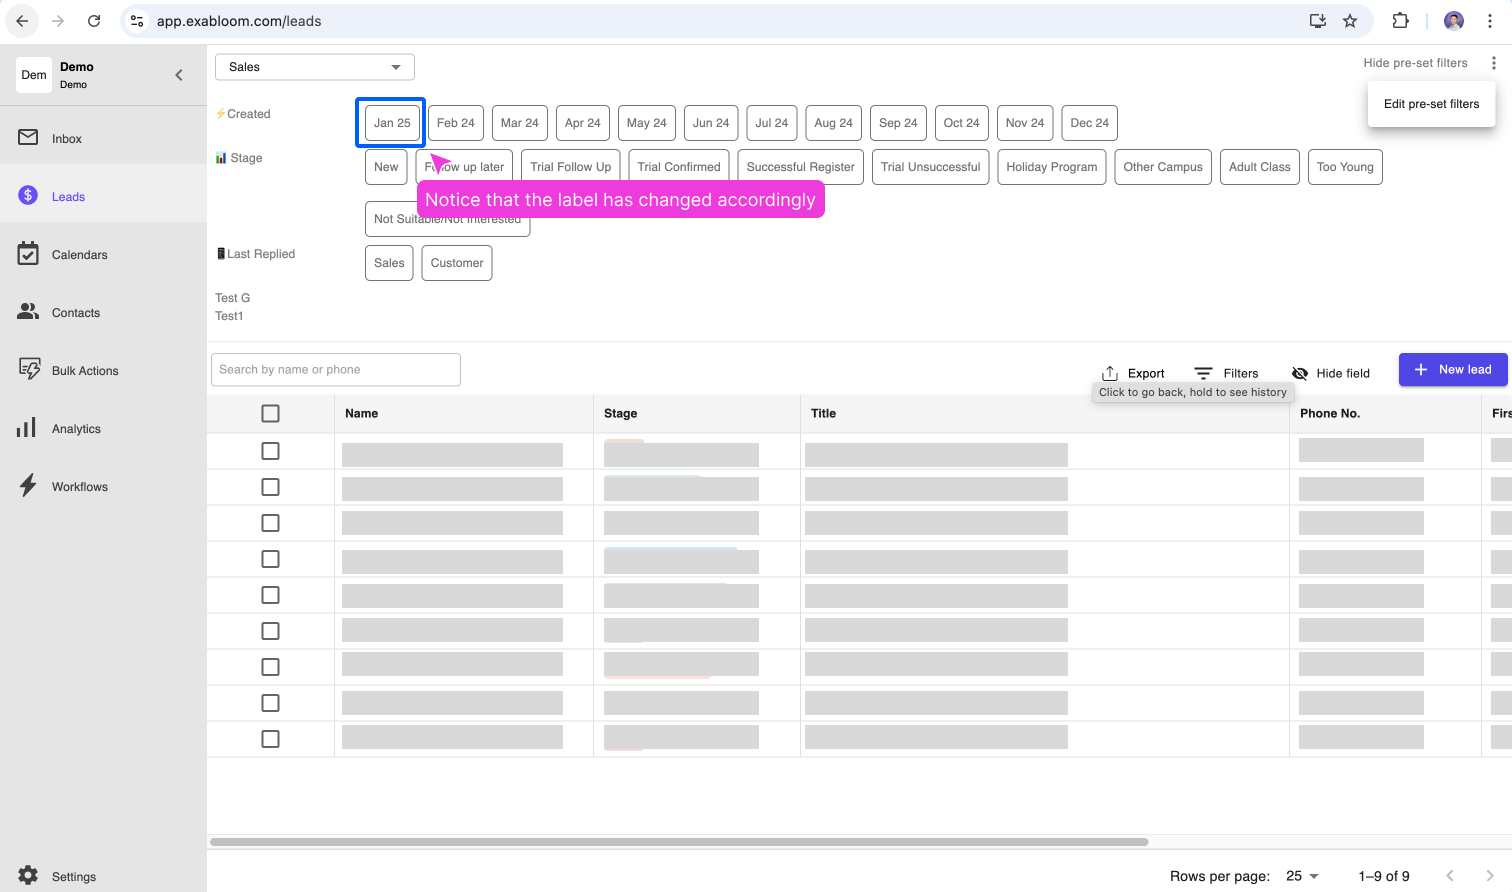
Verify the updated filter shows the correct data.