Part 1: Connecting WhatsApp Business to Exabloom
Understanding What We're About to Do
In this section, we're going to link your WhatsApp Business account with Exabloom. Think of this like connecting two apps on your phone so they can share information—once connected, all your WhatsApp conversations will appear in Exabloom's inbox, and you'll be able to send and receive messages directly through Exabloom.
Exabloom helps you manage all your customer conversations in one place, assign chats to team members, track response times, and much more. Instead of juggling multiple devices and apps, your whole team can collaborate on customer messages from one central dashboard.
Step 1: Prepare Your Workspace
Let's get your computer and phone ready.
- On your laptop or desktop computer, open your preferred web browser (Chrome, Safari, Edge—any will work)
- Keep your mobile phone nearby—you'll need it in just a few minutes to scan a QR code
Step 2: Log Into Exabloom
- In your browser, navigate to https://app.exabloom.com/login
- Enter your login credentials and sign in
- Once logged in, look at the top navigation area. You'll see the name of your current organization. If you manage multiple organizations, click on the organization name dropdown and switch to the organization where you want to connect this WhatsApp Business account
An organization in Exabloom is like a workspace. If you run multiple businesses or departments, each one might have its own organization to keep conversations and contacts separate.
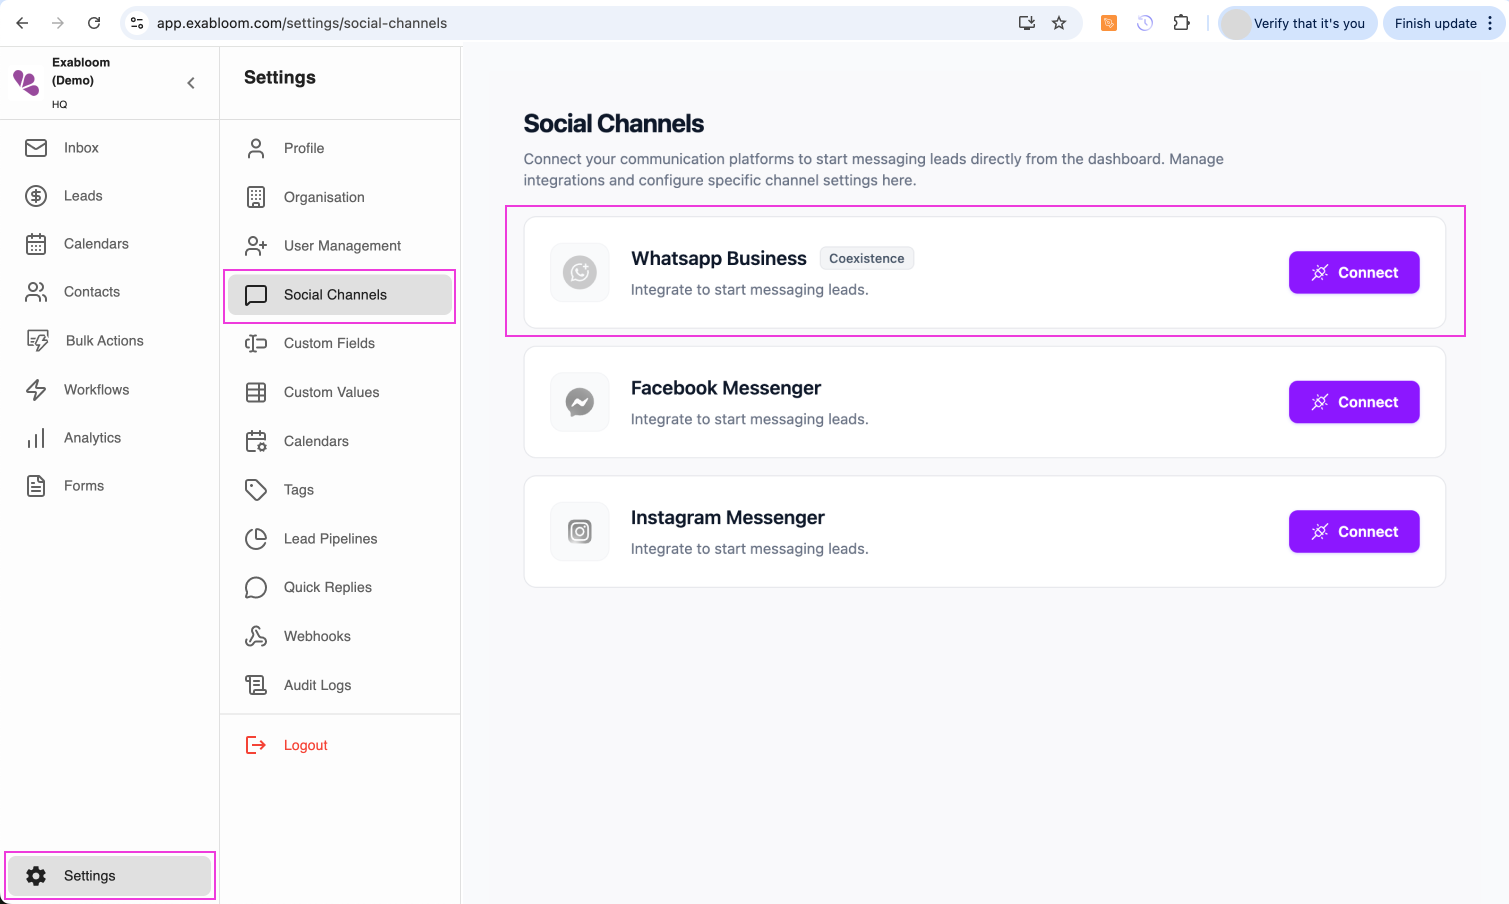
Step 3: Navigate to Social Channel Settings
Now we'll tell Exabloom that we want to add a new messaging channel.
-
While viewing your chosen organization, look for "Settings" in the left sidebar or top menu
-
Click on "Settings", then find and click on "Social Channel"
-
On this page, you'll see a list of messaging platforms you can connect. Locate "WhatsApp Business (Coexistence)"
-
Click the "Connect" button next to WhatsApp Business
After clicking "Connect," a new window will open. This is Facebook's official connection tool, which ensures a secure and authorized connection between your WhatsApp and Exabloom.
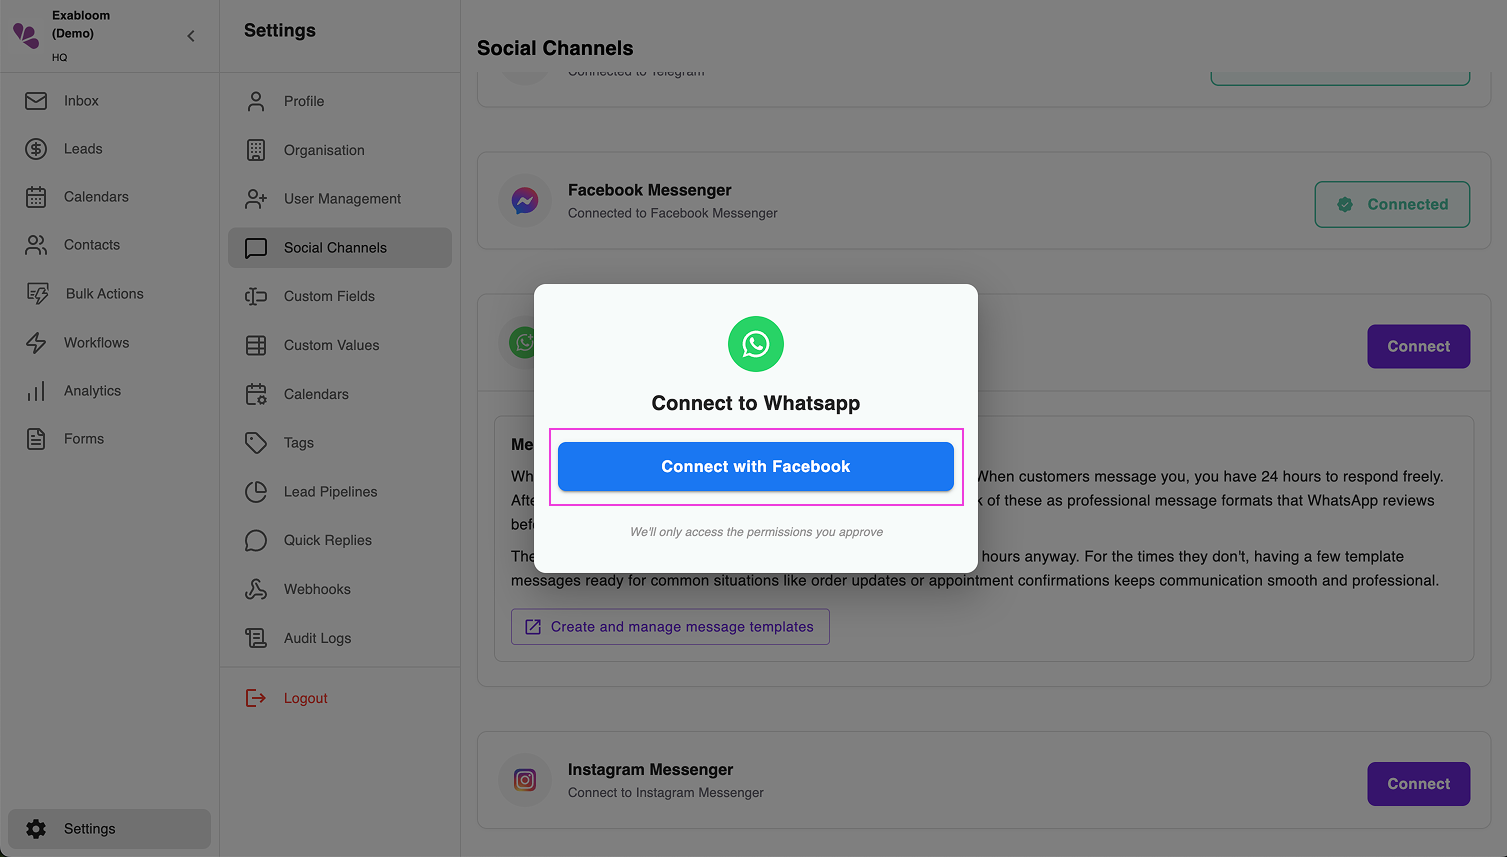
Step 4: Start the Facebook Connection Process
A popup window will appear—this is Facebook's official flow for connecting third-party apps to WhatsApp Business. Let's walk through it together.
-
Click the blue button that says "Connect with Facebook"
-
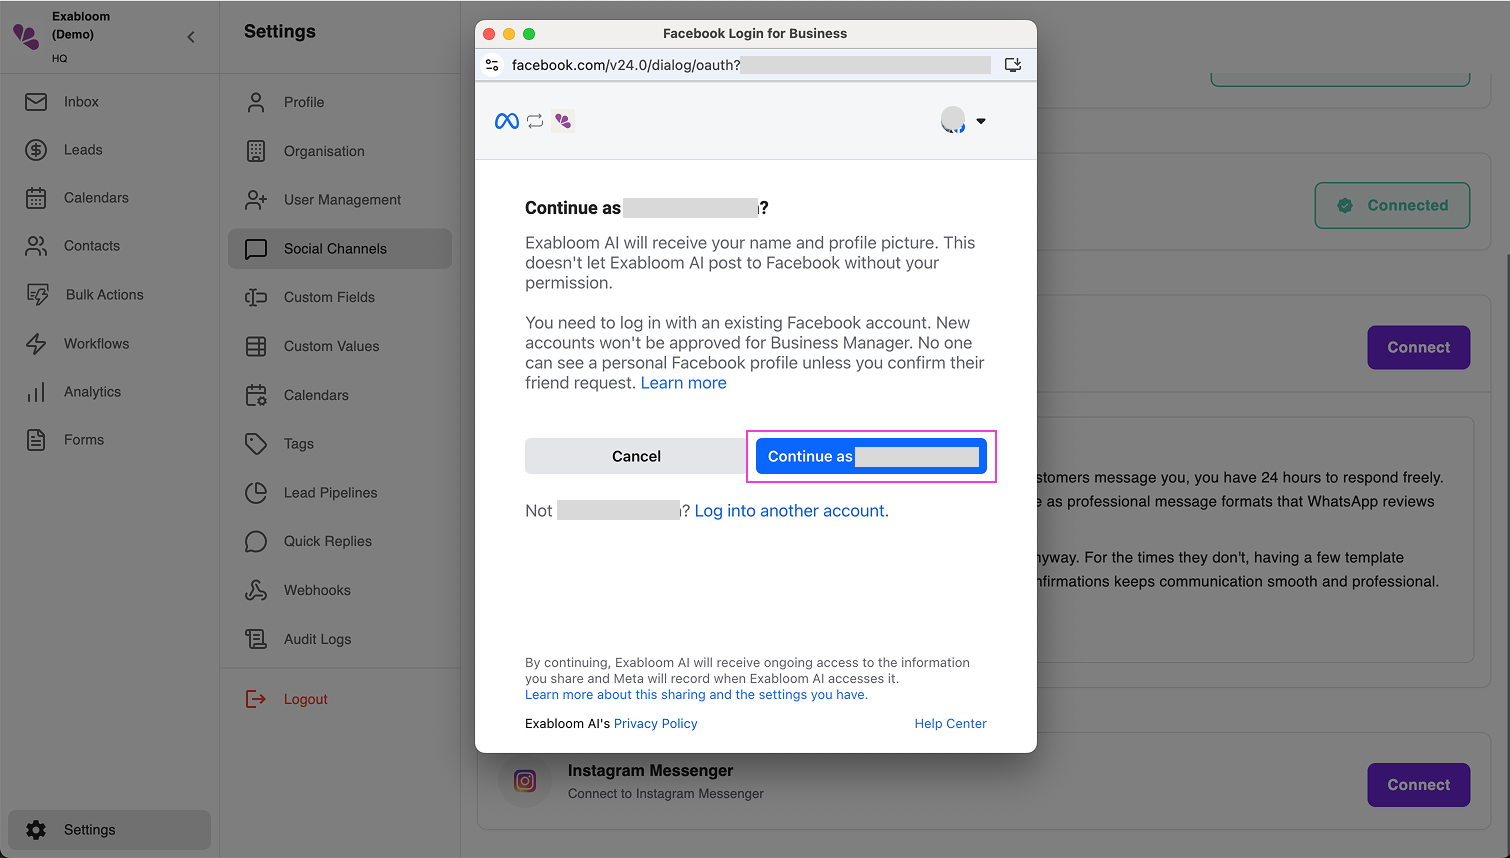
A login screen will appear. Log in using the Facebook account that has full access to the business portfolio you verified earlier
-
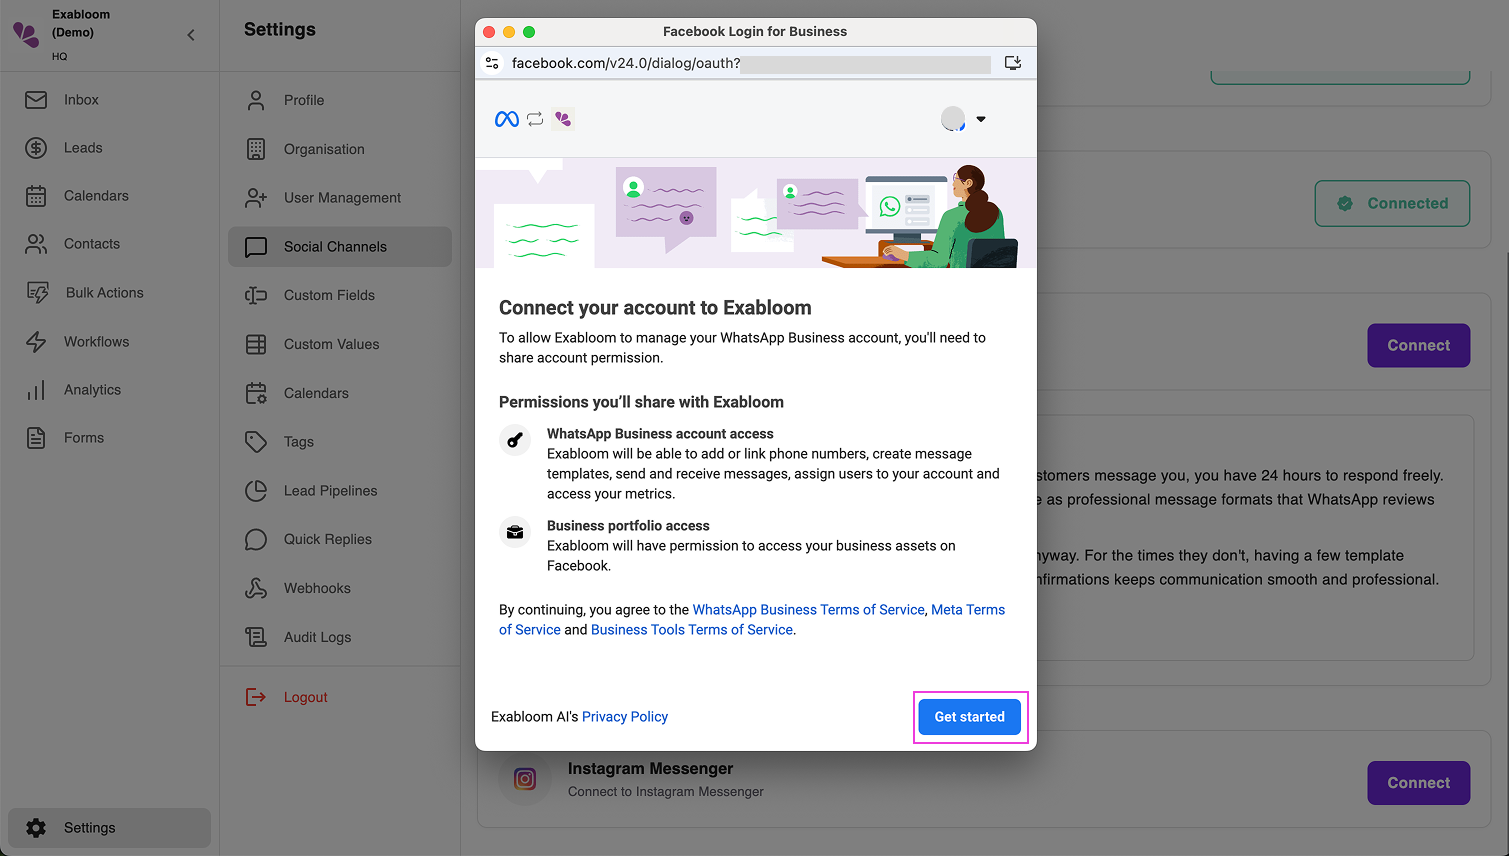
After logging in, you'll see a welcome screen. Click the "Get Started" button
Step 5: Select Your Verified Business
-
Facebook will show you a list of business portfolios connected to your account
-
Choose the verified business portfolio you want to use (the one you verified in Part 1)

-
Click "Next"
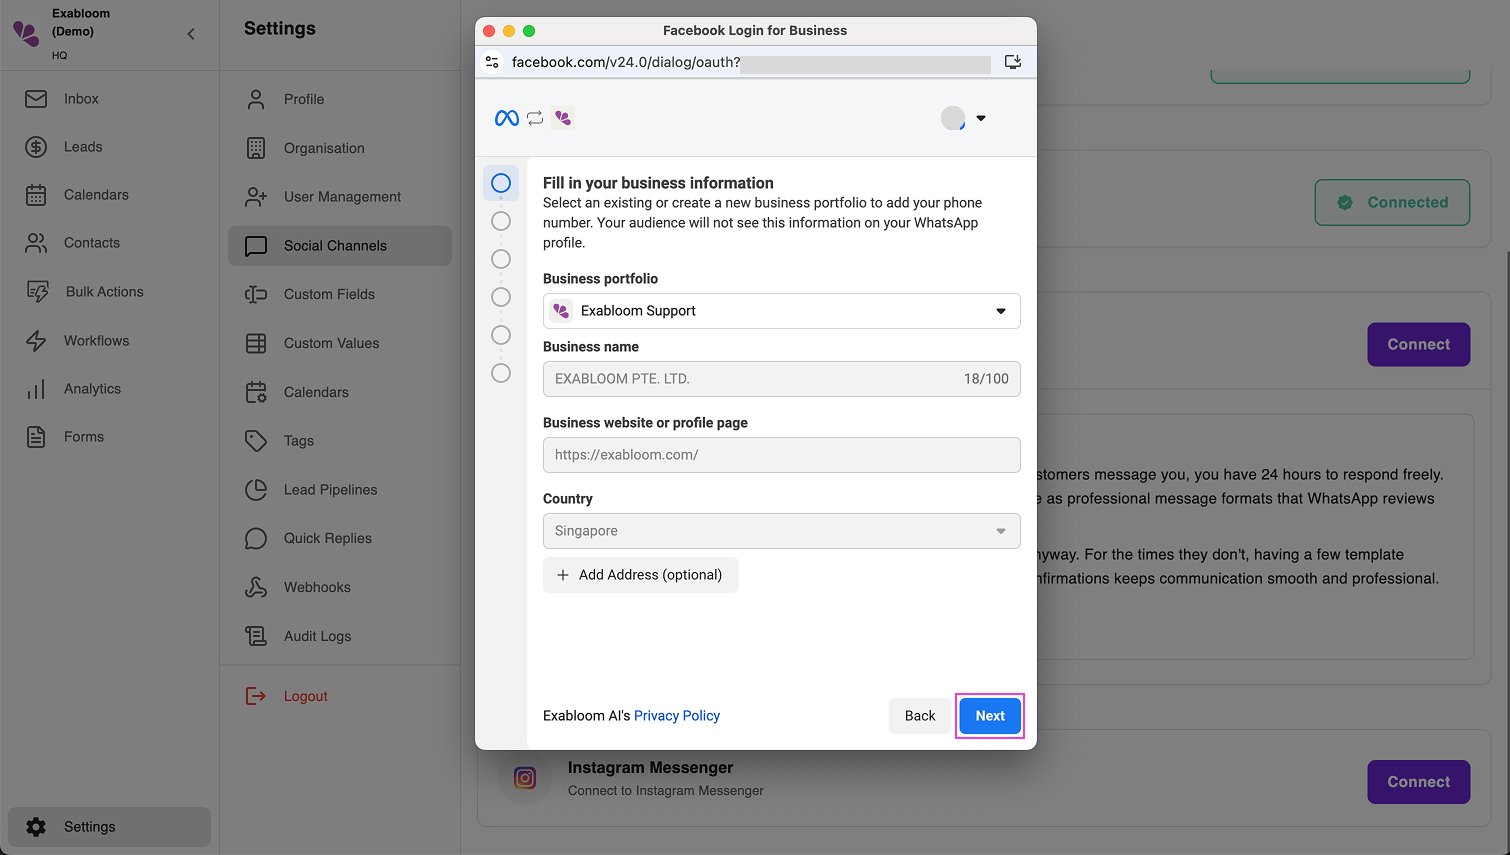
Make sure you select the same business portfolio that you verified earlier. If you choose a different, unverified portfolio, the connection will fail.
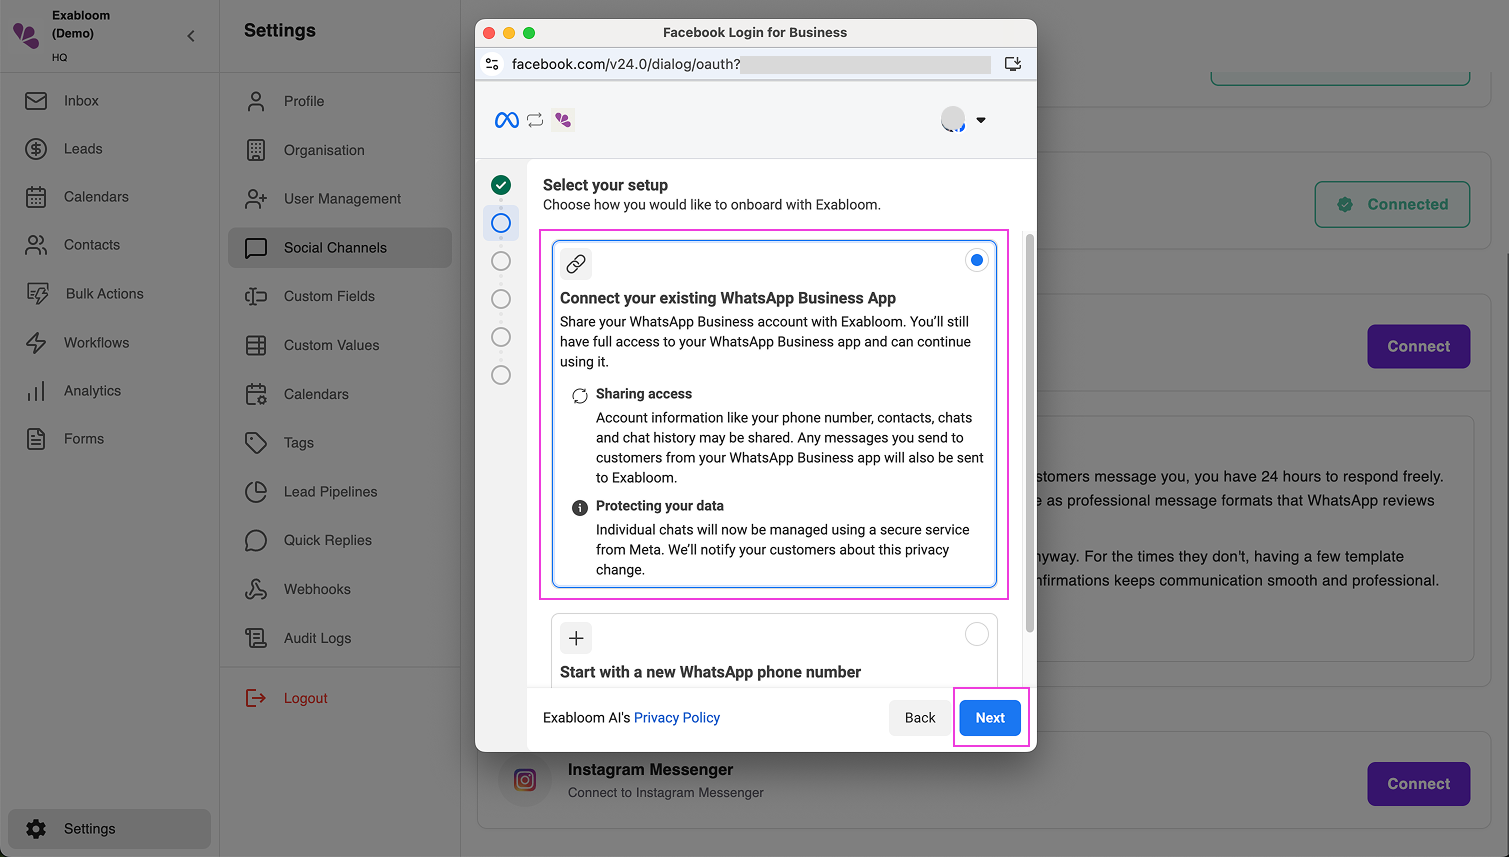
Step 6: Choose Your Setup Type
You'll now see a screen asking about your "setup type." Since you already have a WhatsApp Business account that you're using on your phone, we'll connect that existing account.
-
Select the option that says "Connect your existing WhatsApp Business App"
-
Click "Next"
If you selected this by mistake and don't actually have WhatsApp Business installed on your phone yet, you'll need to go back and download the WhatsApp Business app from your phone's app store first. The regular WhatsApp app won't work for this.
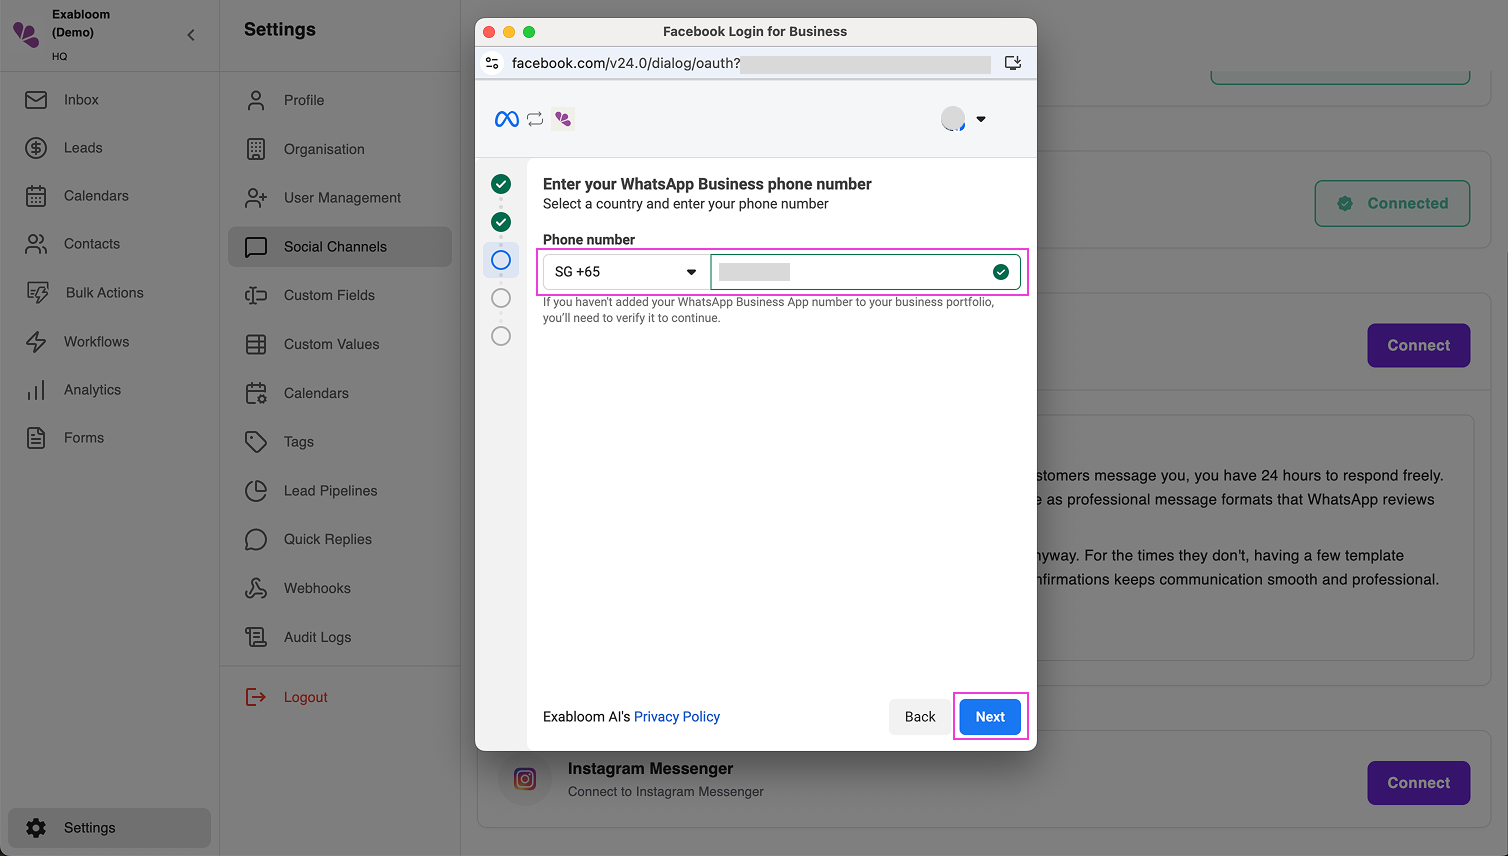
Step 7: Enter Your WhatsApp Business Phone Number
Now Facebook needs to know which phone number you want to connect.
-
You'll see a phone number input field with a country code dropdown
-
First, select your country code from the dropdown (for example, Singapore is +65, United States is +1, United Kingdom is +44)
-
Then type your WhatsApp Business phone number (without the country code, since you already selected it)
-
Double-check that everything is correct—the country code AND the phone number
-
Click "Next"
Make absolutely sure this phone number is correct and matches the number on your WhatsApp Business app. If you enter the wrong number, the connection won't work, and you'll have to start over.
Step 8: Scan the QR Code (The Most Important Step!)
This is where we bring your mobile phone into the process. The screen will now show a QR code (a square barcode).
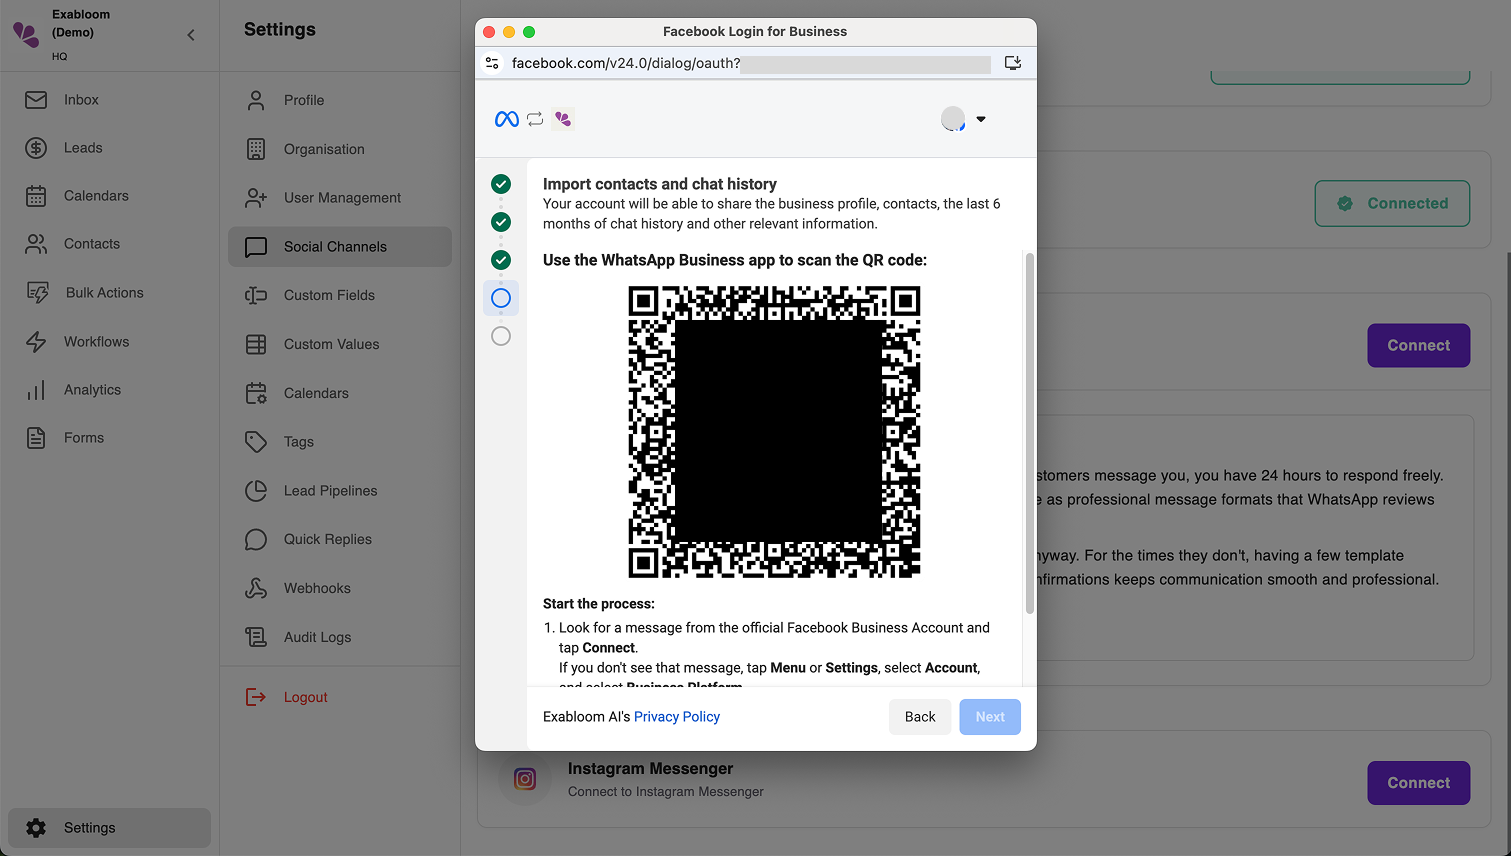
Before you scan, let's prepare your phone:
-
Pick up your mobile phone with WhatsApp Business installed
-
Open the WhatsApp Business app
-
Look for a new message from "Facebook Business" in your chat list
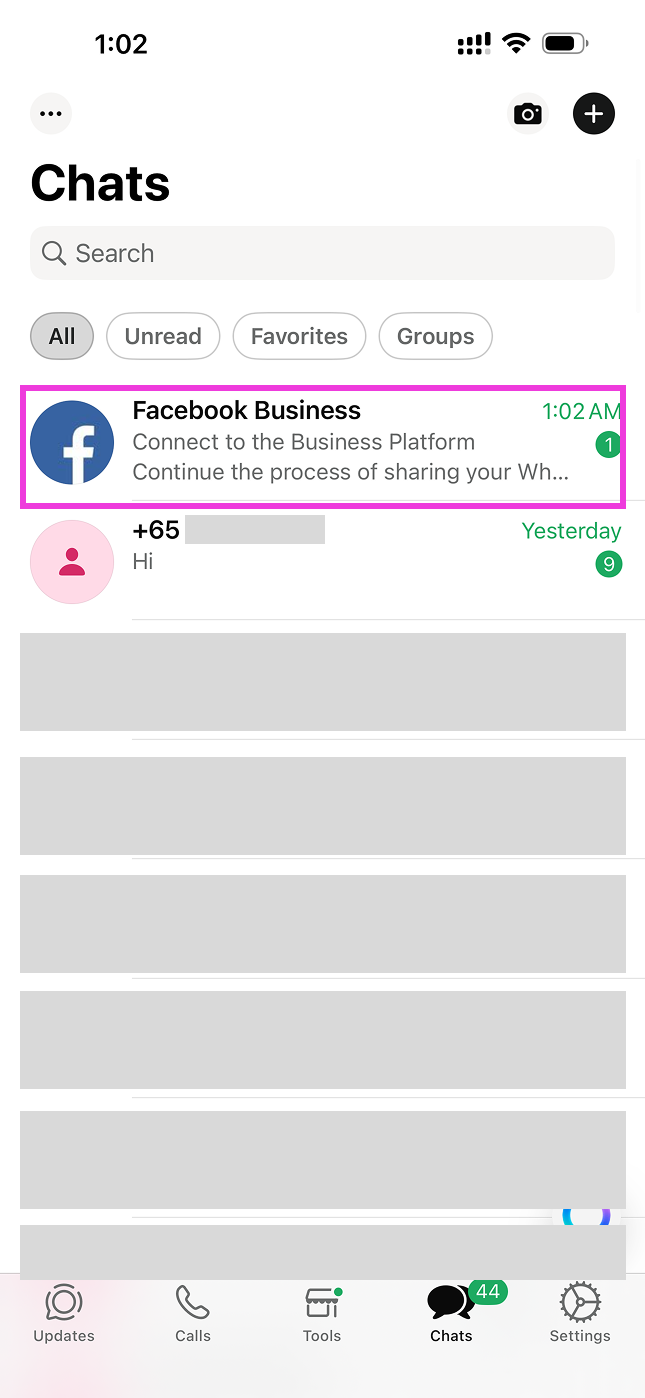
- This message will have appeared automatically when you started this connection process
- It might be at the top of your chats or in your unread messages
-
Open that message from Facebook Business
-
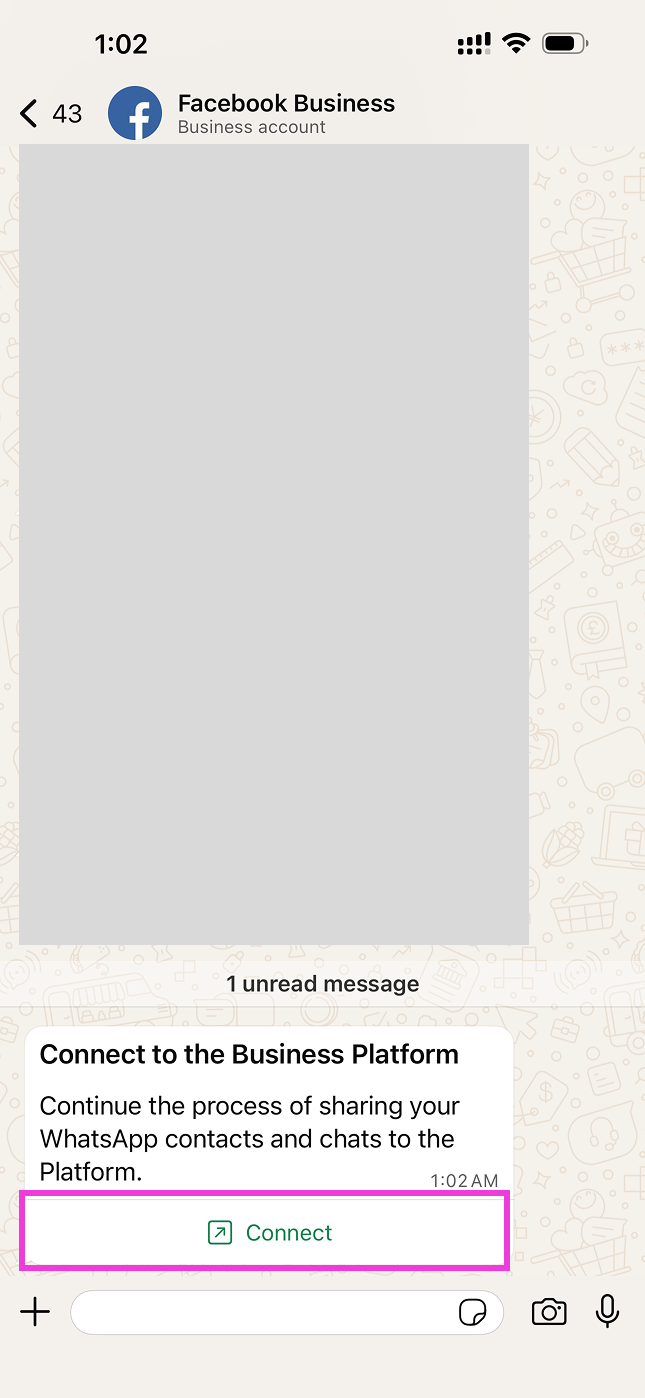
You'll see a button in the message that says "Connect"—tap it
-
A new screen will open on your phone with information about connecting to Exabloom
-
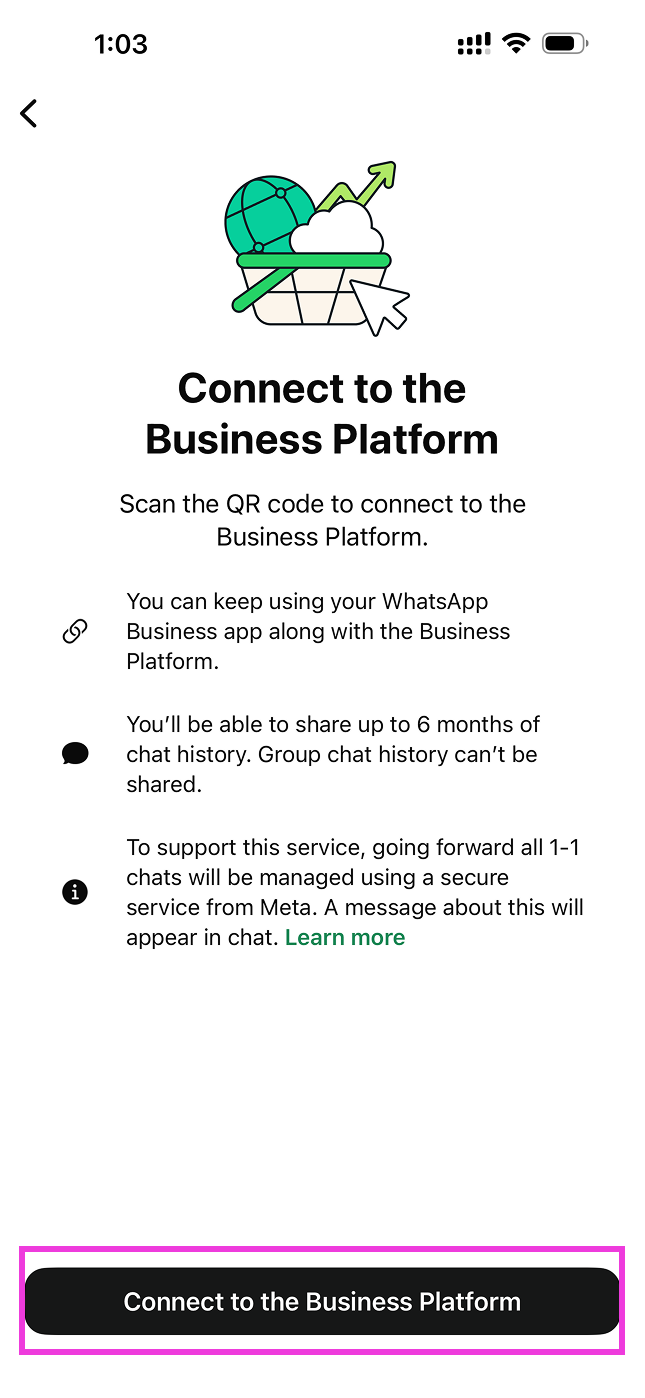
Tap the button that says "Connect to the Business Platform"
-
You'll see options about sharing chats—select "Share all chats" > Tap "Confirm"

This option allows Exabloom to sync your conversation history from the last 6 months. This means your team can see the full context of customer conversations, which is incredibly helpful for providing better service. Your data remains secure and is only shared with your authorized Exabloom account.
-
Your phone's camera will now open, ready to scan a QR code
-
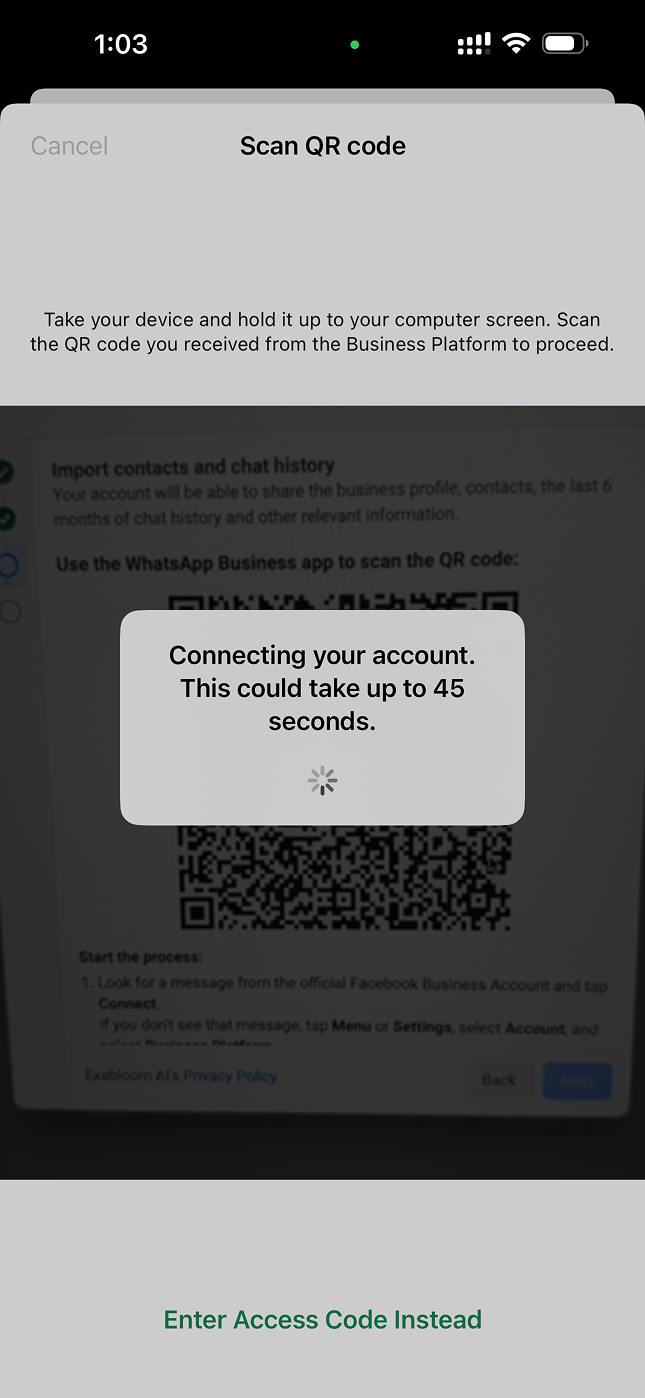
Point your phone's camera at the QR code on your computer screen
The phone should automatically scan it—you don't need to take a photo
-
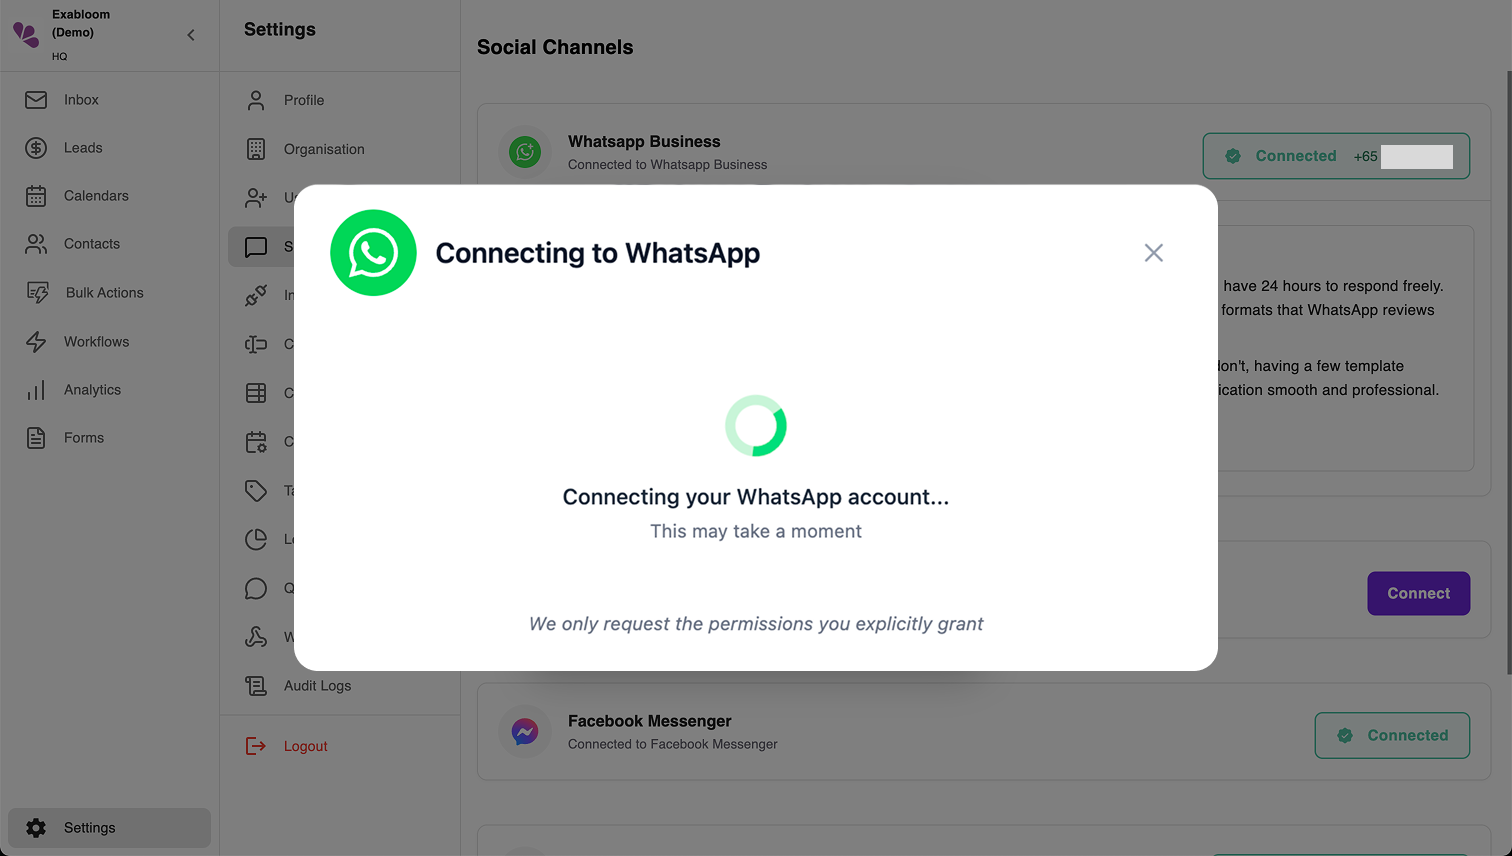
Now, be patient! After scanning, you'll see a "Connecting..." message. This can take up to 45 seconds. Don't close anything or press any buttons—just wait
Your WhatsApp Business is securely communicating with Facebook's servers, which are then communicating with Exabloom. Think of it like a three-way handshake to establish a secure connection. The system is also beginning to sync your conversation history from the past 6 months.
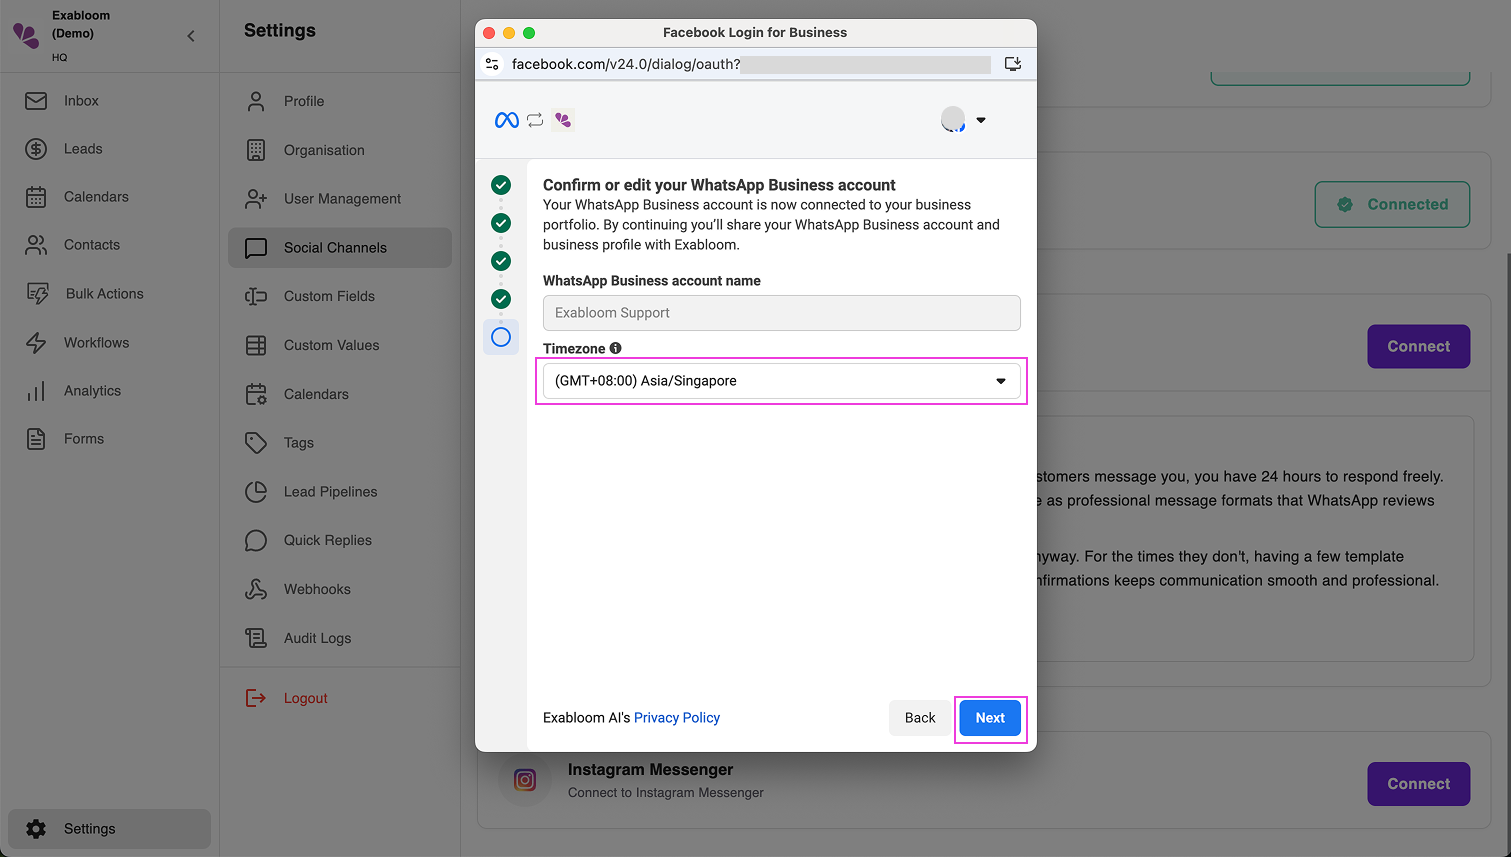
- Set the Timezone for your WhatsApp Business account when prompted, then click "Next"
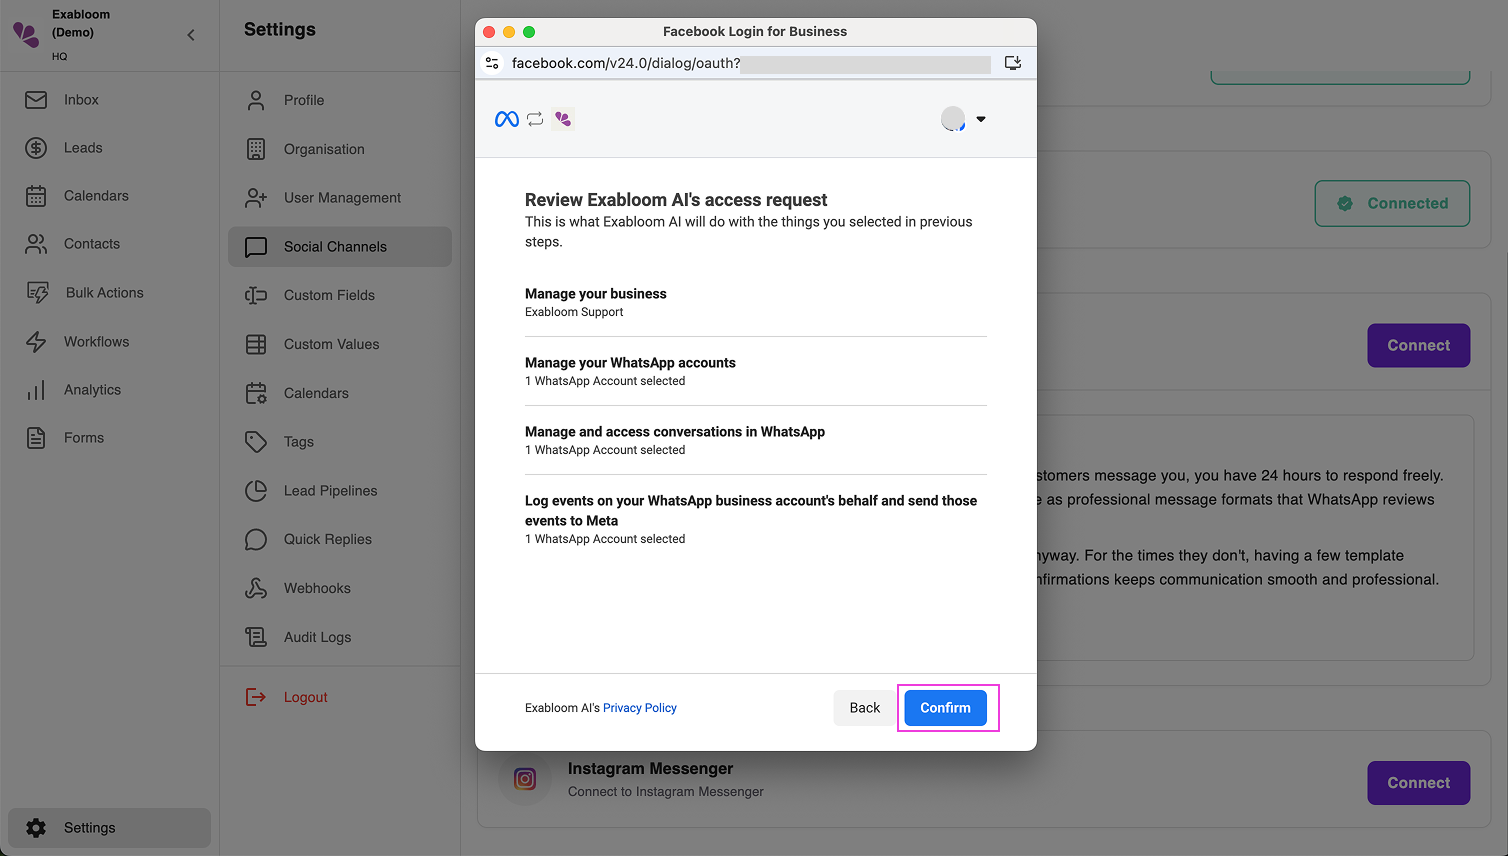
- Review access request, then click "Confirm"
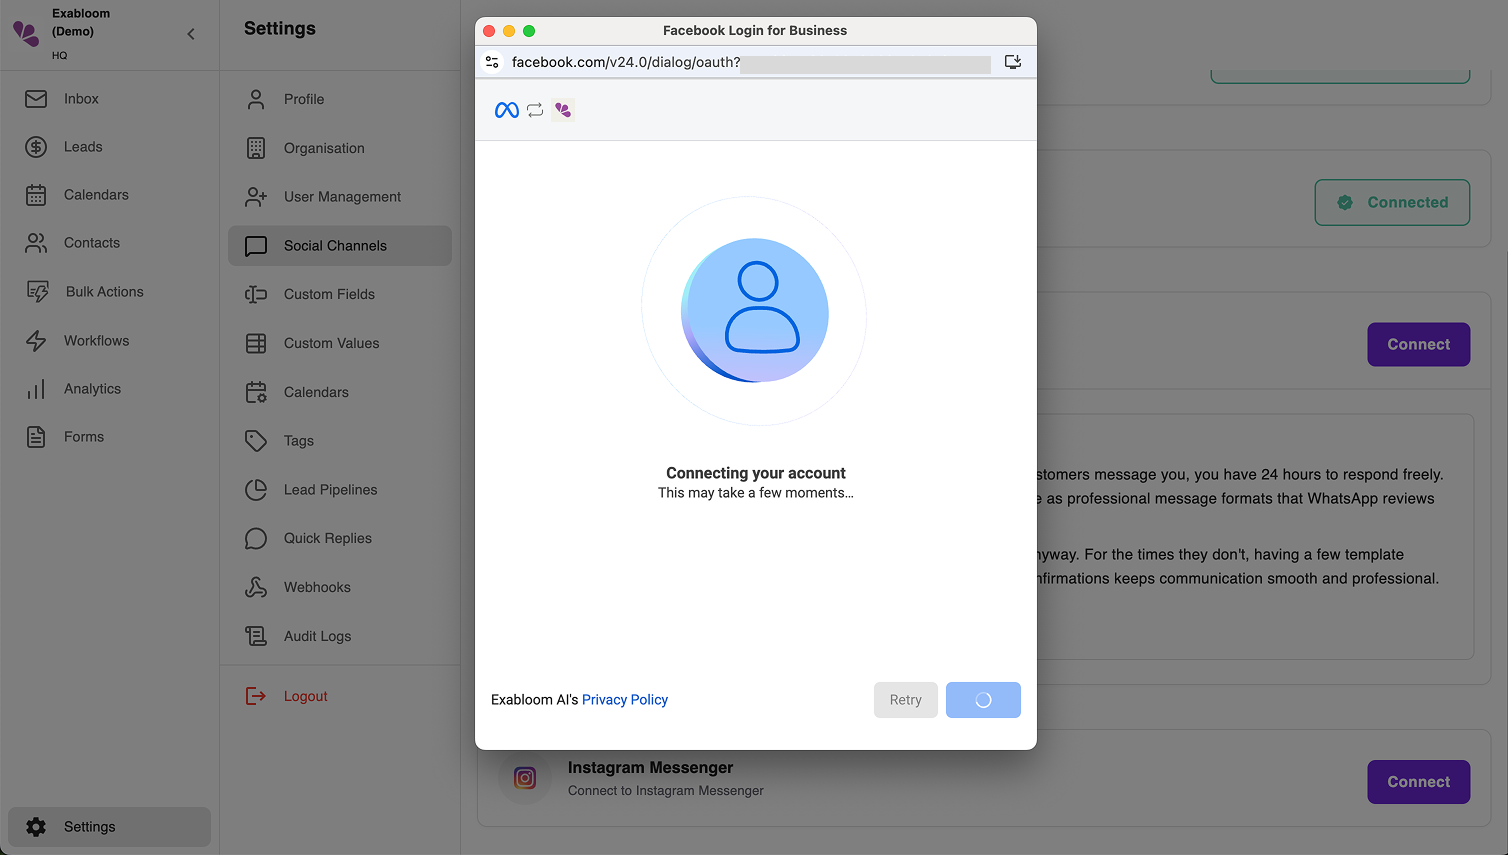
- Wait for the connection to complete...
Step 9: Confirm the Connection Was Successful
After the connection process completes, you should see success messages on both devices:
On your mobile phone:
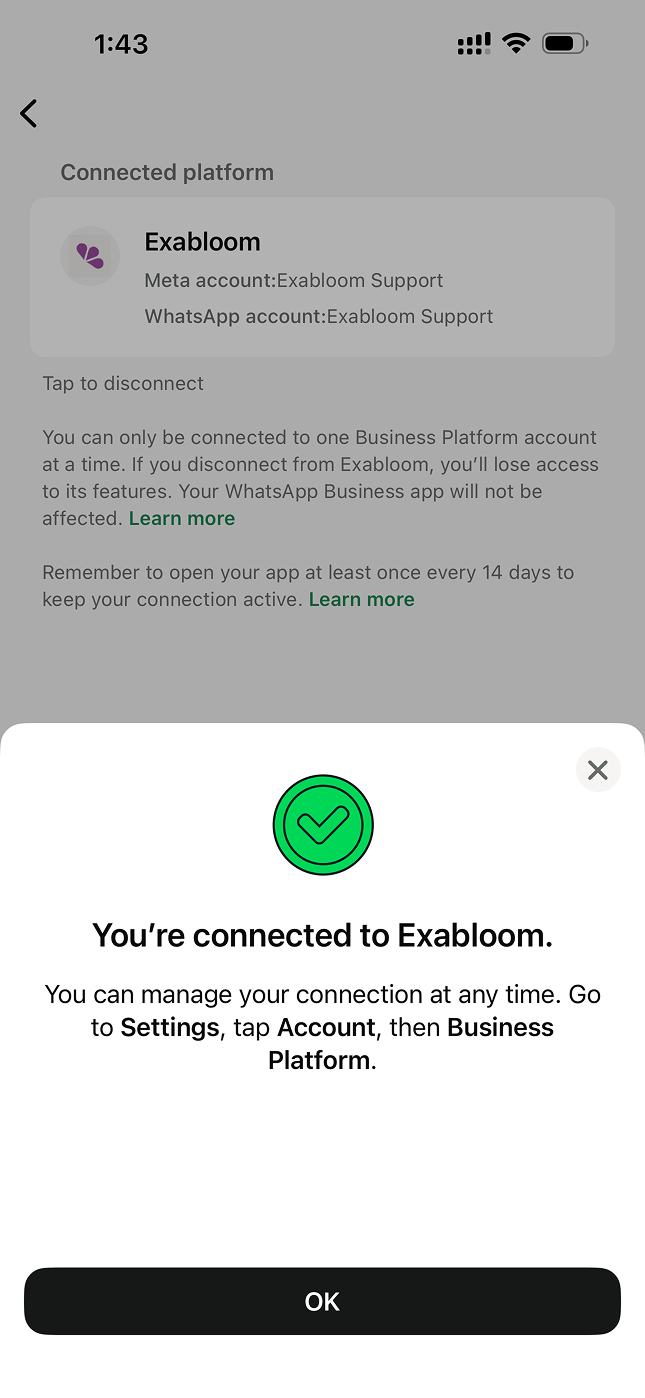
- A message saying "You're connected to Exabloom" or similar
On your computer screen:
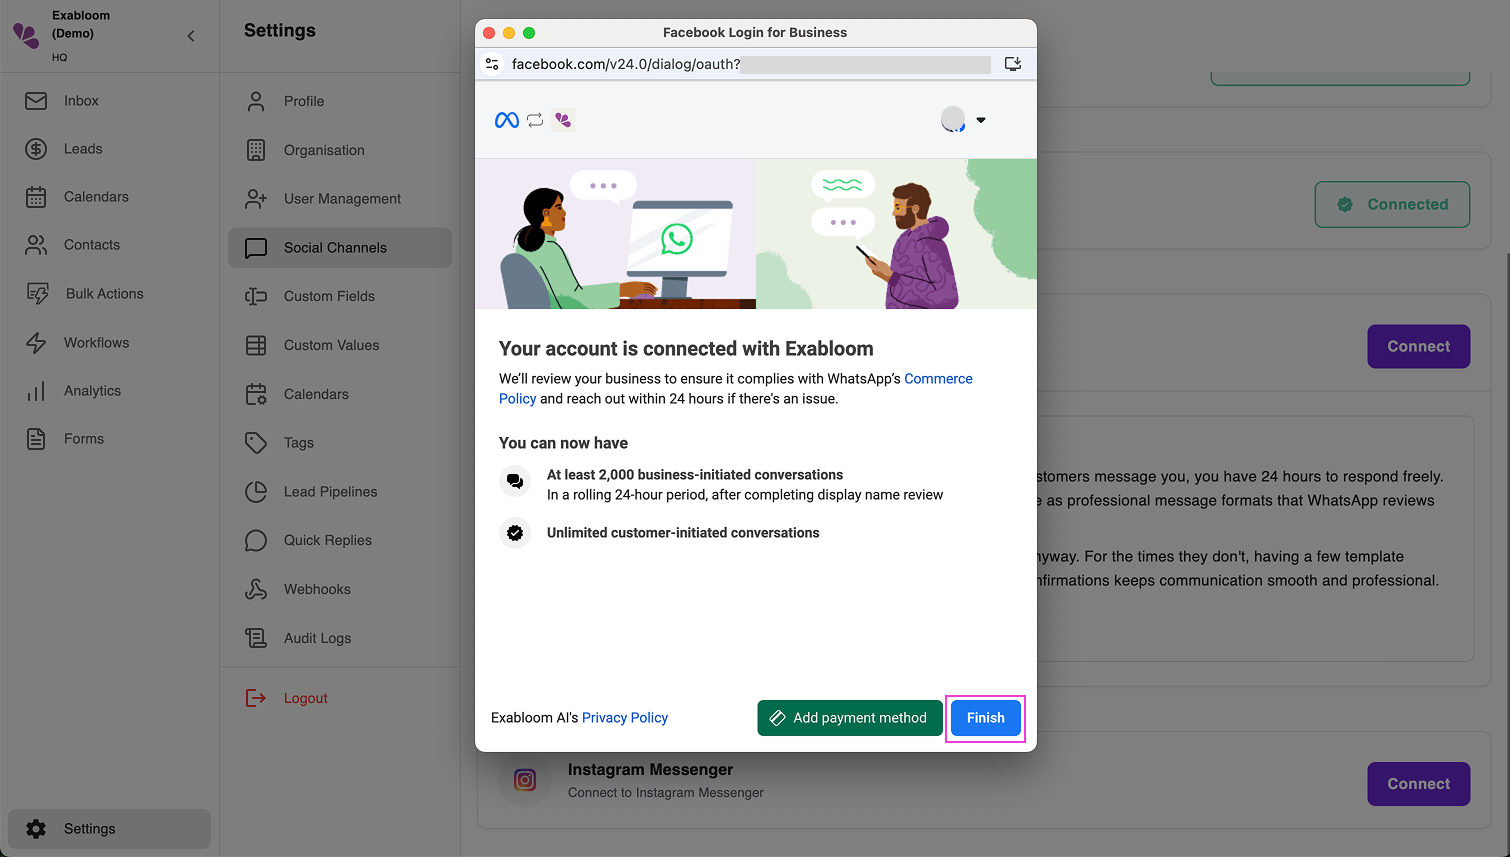
- A message saying "Your account is connected with Exabloom"
If you see both of these messages, congratulations! The connection worked.
-
On your computer, click the "Finish" button
-
Then wait a few moments for Exabloom to finish the connection
If after 45 seconds you haven't seen confirmation on both devices, something went wrong. Common issues include:
- Wrong phone number entered
- Not using the Facebook account with full access to the business portfolio
- Poor internet connection on either device
- Using regular WhatsApp instead of WhatsApp Business
Try closing the popup and starting again from Step 4. Make sure you carefully follow each step, especially verifying the phone number and country code.