Grant Pipeline Permissions
Control which pipelines a team member can access. Only admins can manage pipeline permissions.
Steps
-
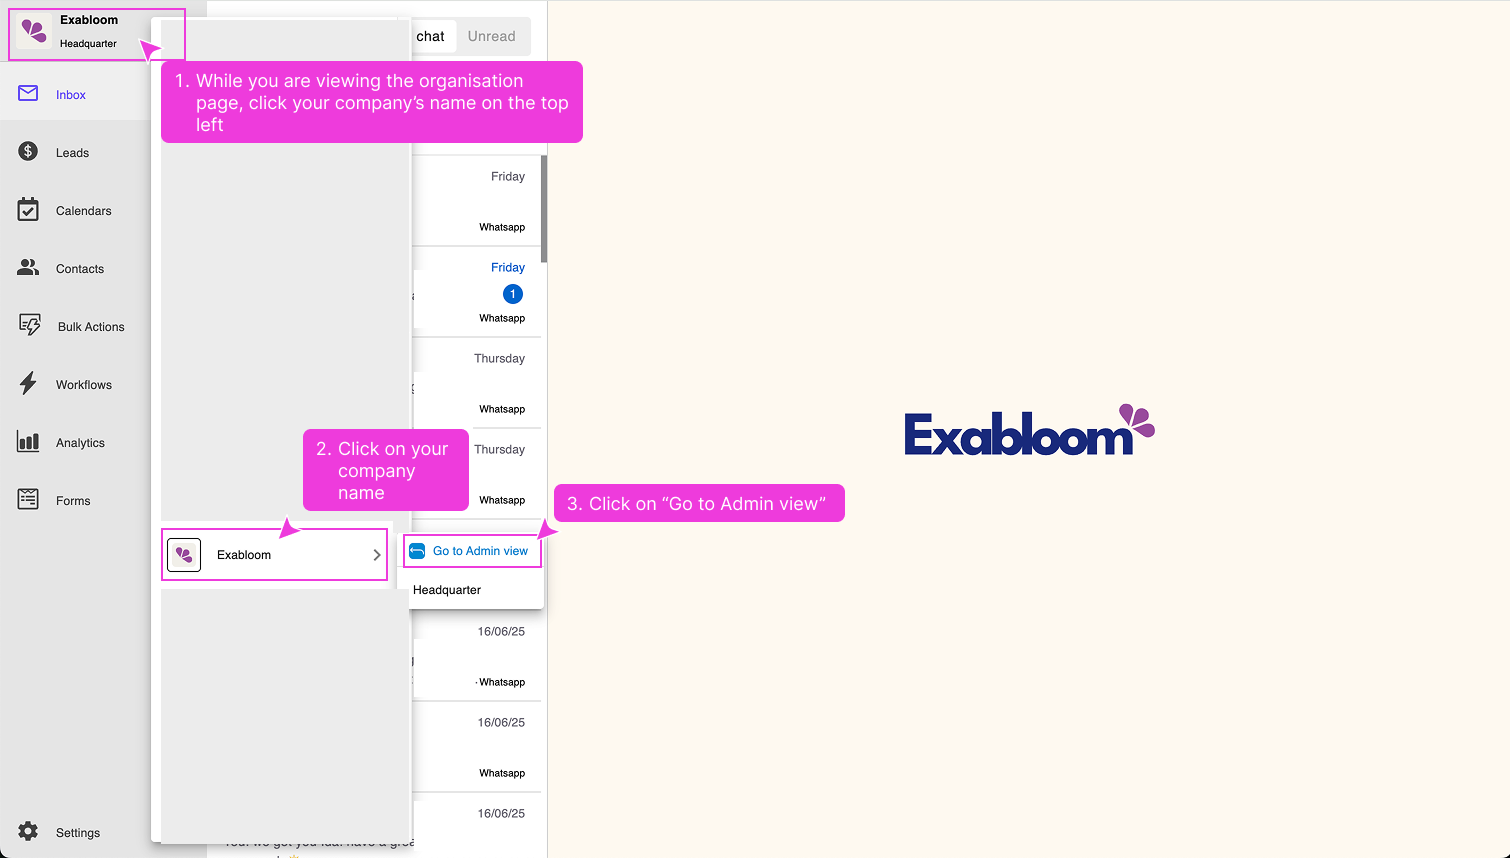
Click your company name in the top-left corner and select Go to Admin view.
-
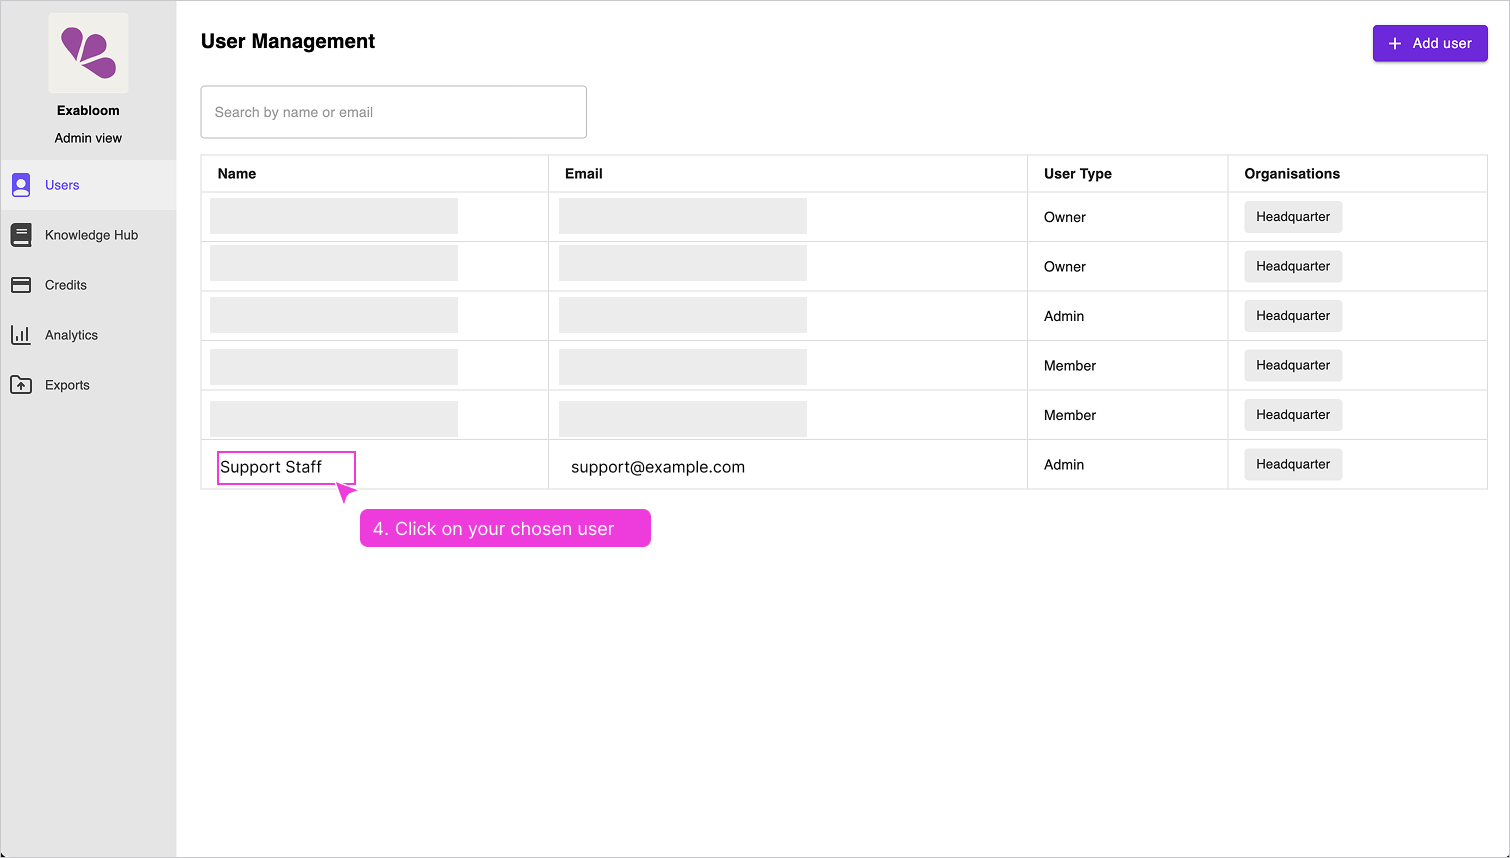
On the Users page, click the user's name to open their profile.
-
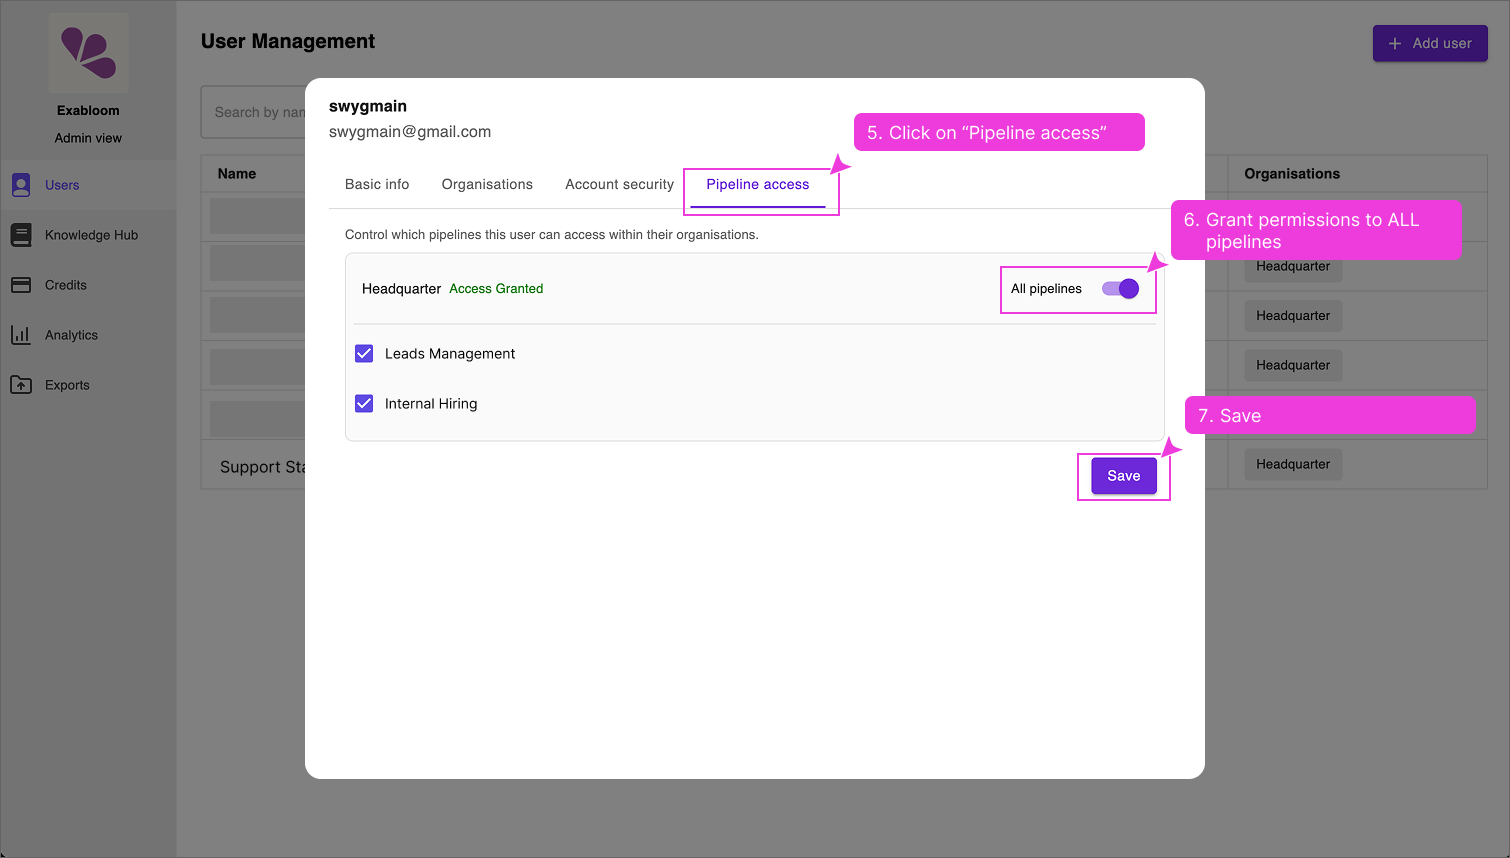
Go to the Pipeline access tab.
-
Toggle All pipelines to ON to grant access to every pipeline, or check individual pipelines for selective access.
-
Click Save.
The user may need to refresh their browser to see the updated permissions.