Send WhatsApp When Form Submits
Set up a workflow to automatically send a WhatsApp message whenever someone submits your form.
Prerequisites
- A working form (see Create a Form)
- WhatsApp connected to Exabloom
Steps
-
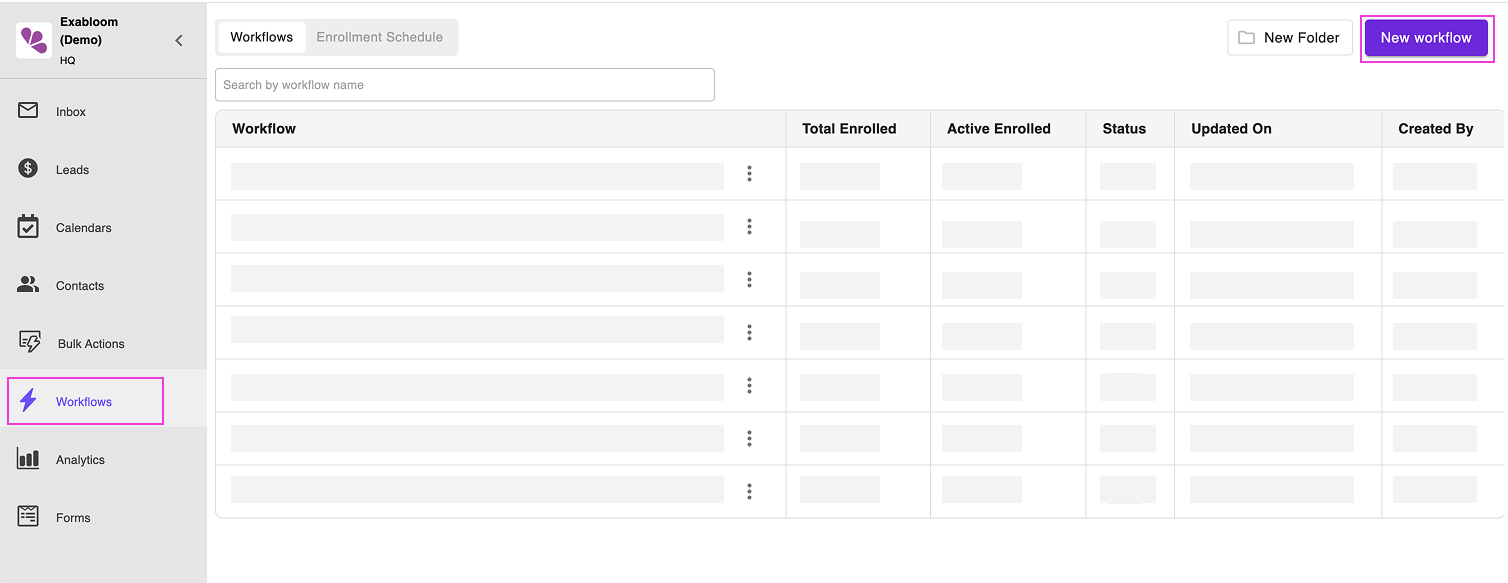
Go to Workflows and click New Workflow.
-
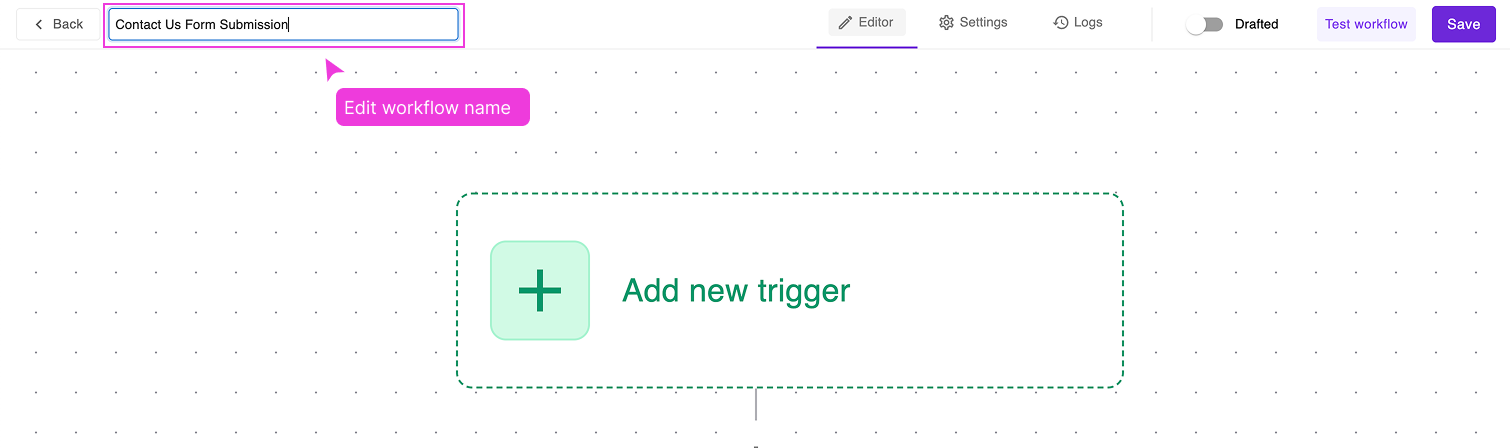
Name the workflow (e.g., "Contact Us Form Submission").
-
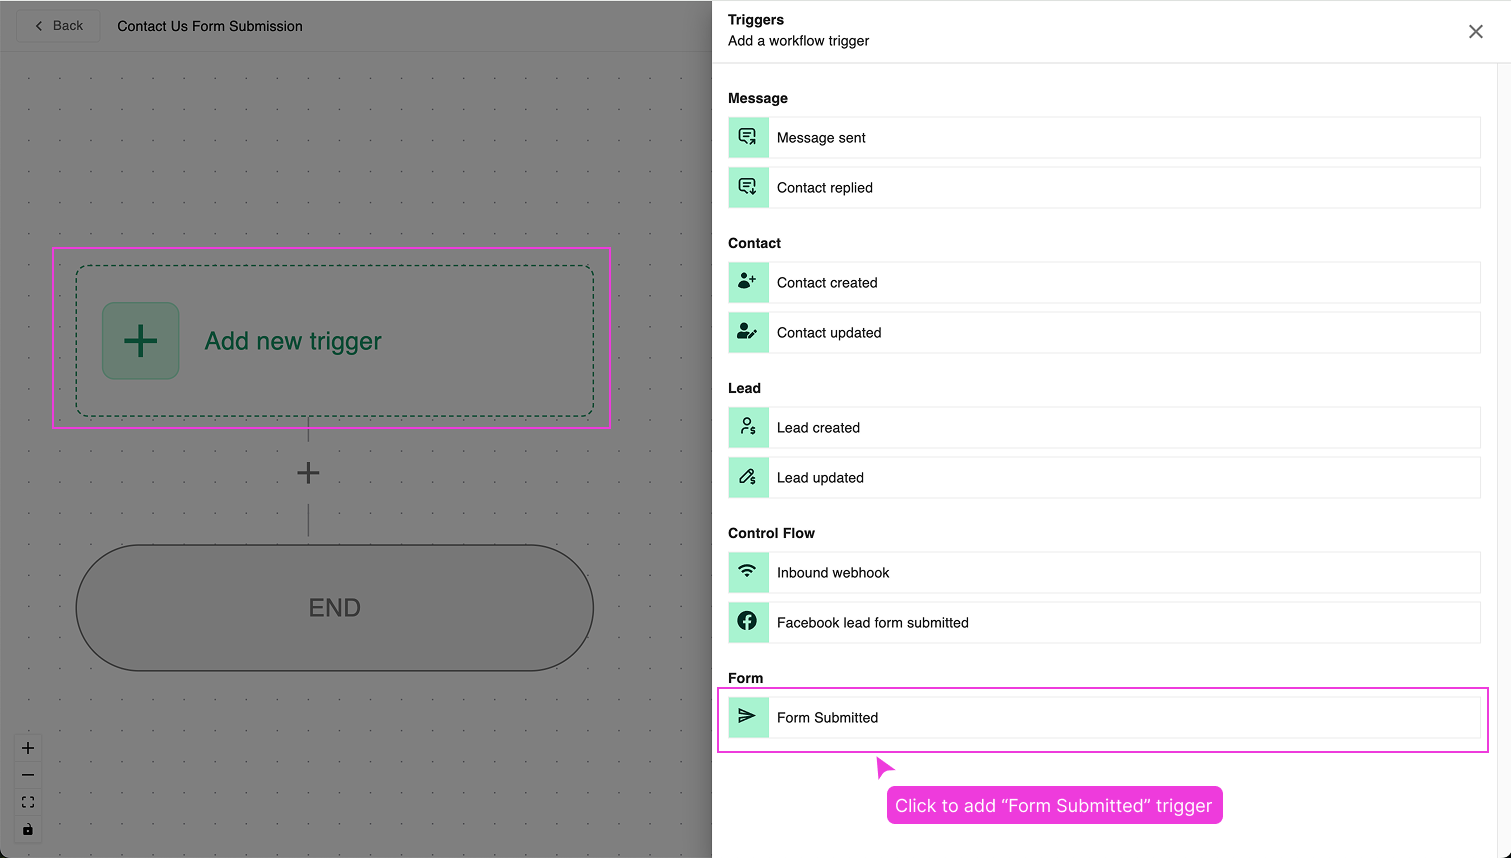
Click Add new trigger and select Form Submitted.
-
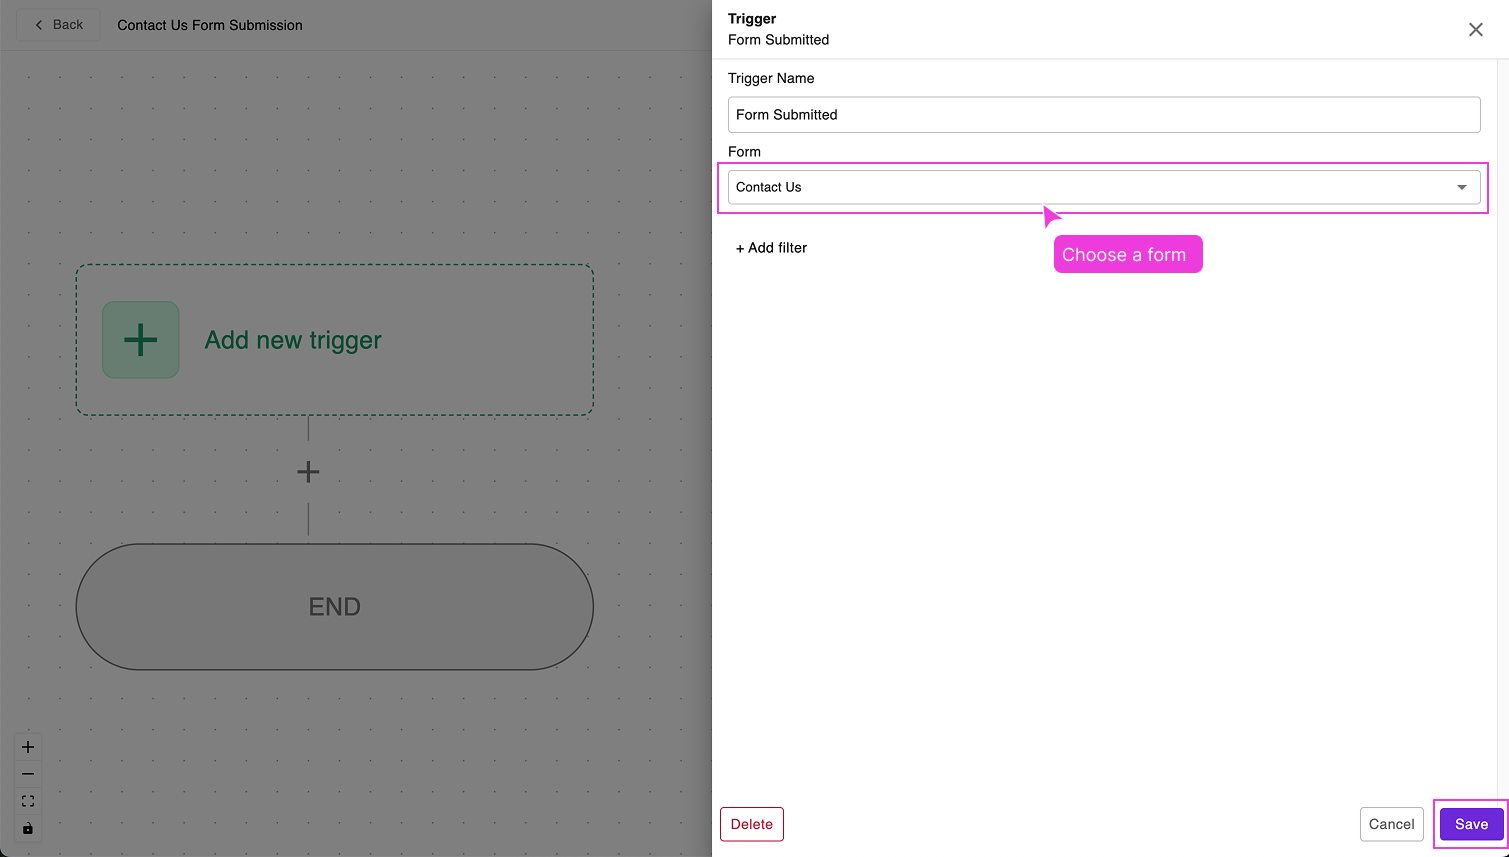
In the trigger settings, set Form to your form name (e.g., "Contact Us") and click Save.
-
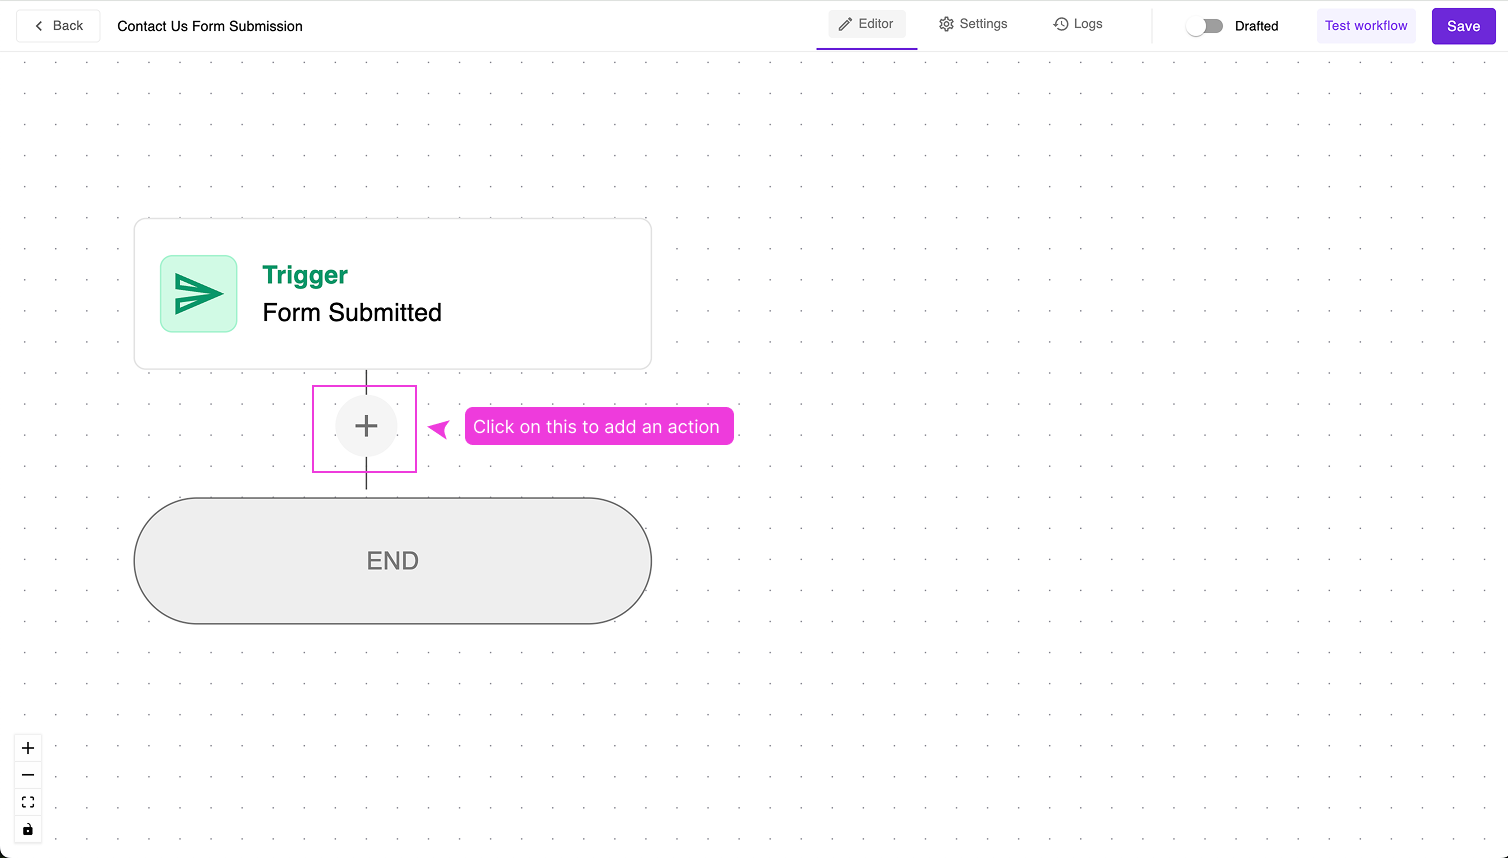
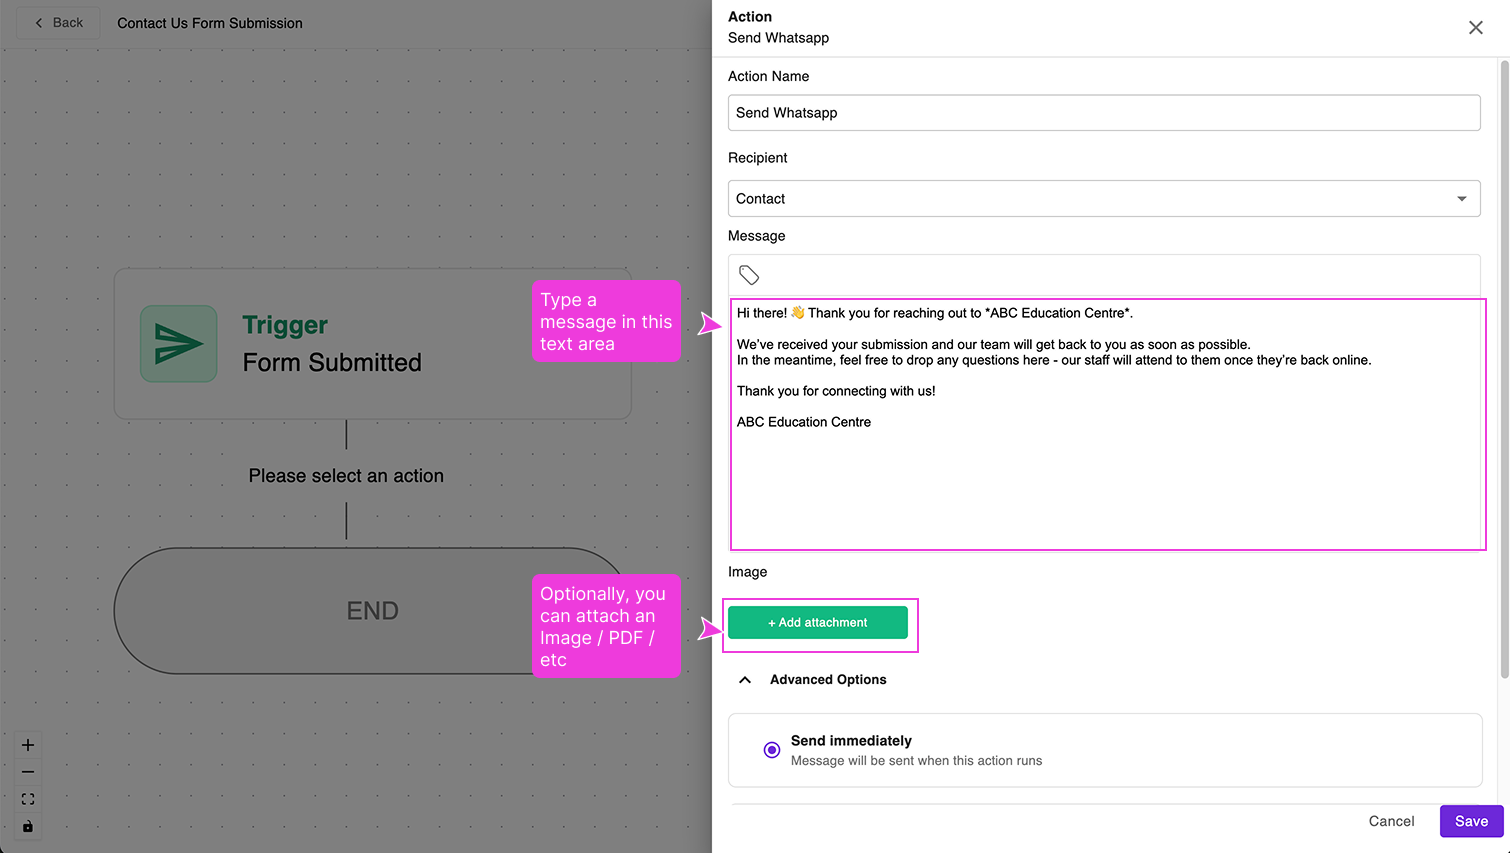
Click the + icon below the trigger, select Send WhatsApp, and write your message.
-
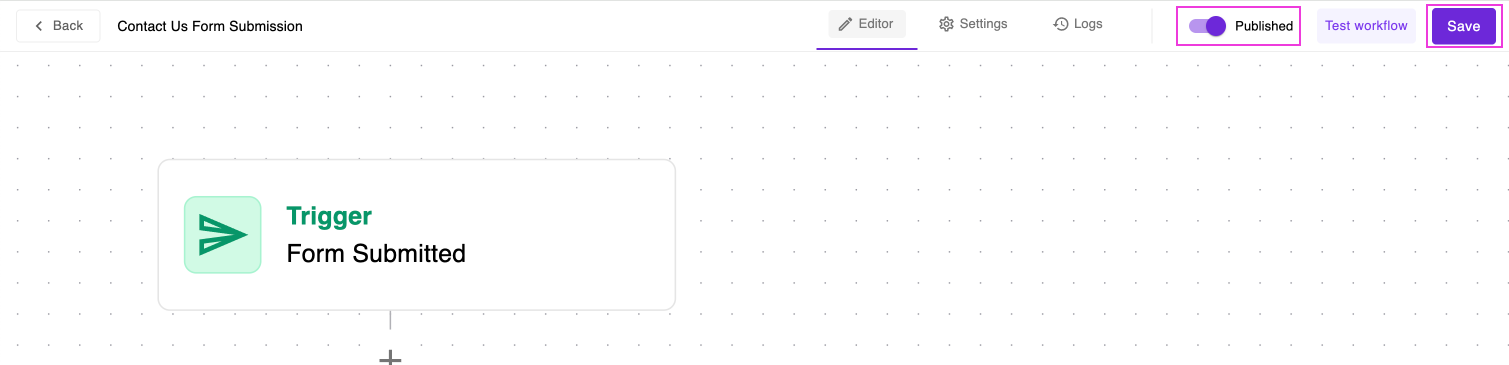
Click Save, then toggle Published to ON and click Save again.
Test
- Submit your form again using your phone number.
- Within a few minutes, you should receive the WhatsApp message on your phone.
Troubleshooting
Not receiving WhatsApp messages?
- Verify your WhatsApp is connected in Settings > Social Channels
- Check that the workflow is published
- Ensure the phone number in the form submission is valid
Workflow not triggering?
- Confirm the form name in the trigger matches your form exactly
- Make sure you clicked Save after publishing