Set Up the WhatsApp Chat Widget
Add a WhatsApp chat button to your website so visitors can contact you directly.
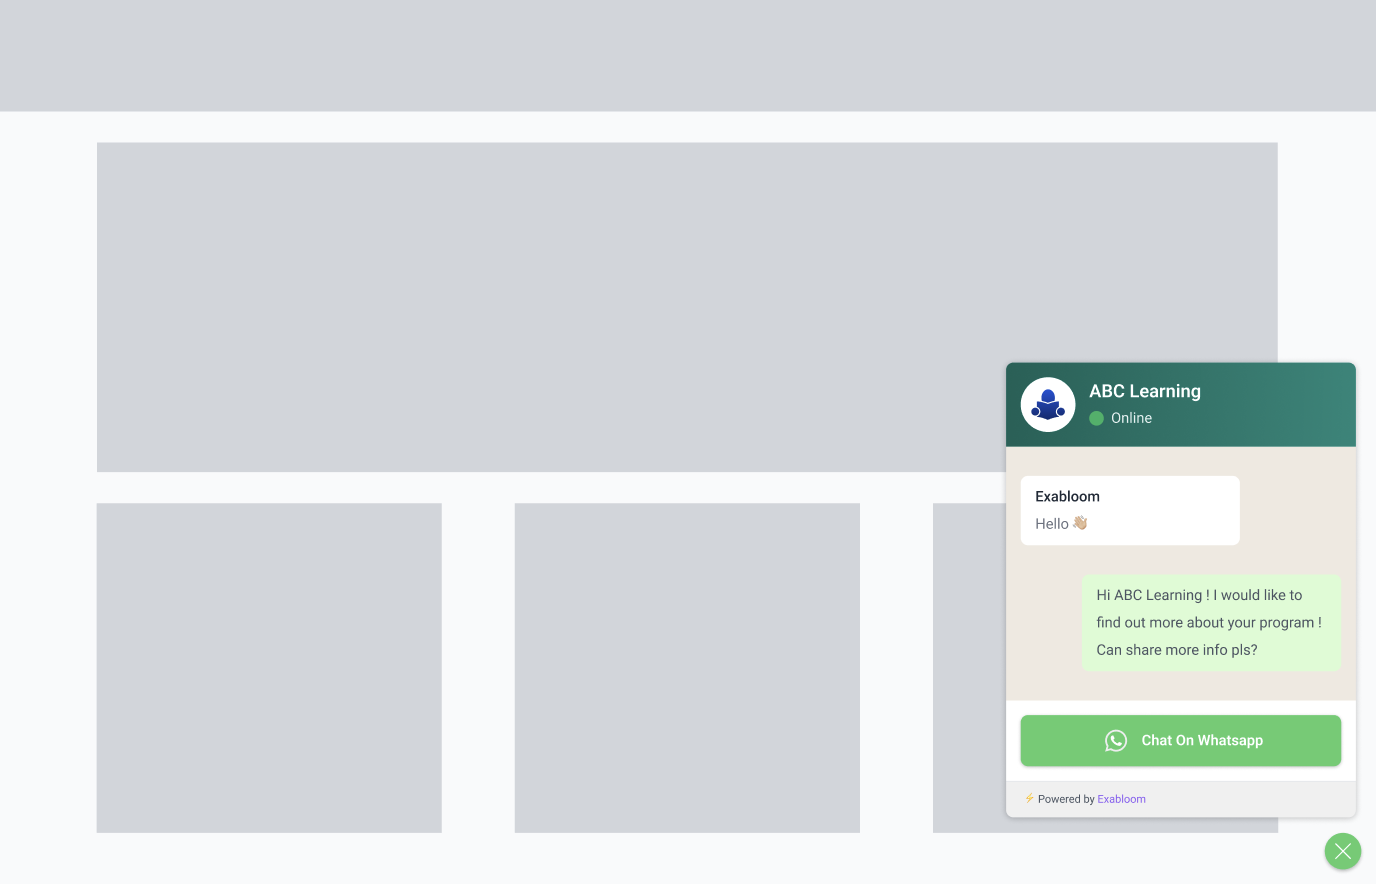
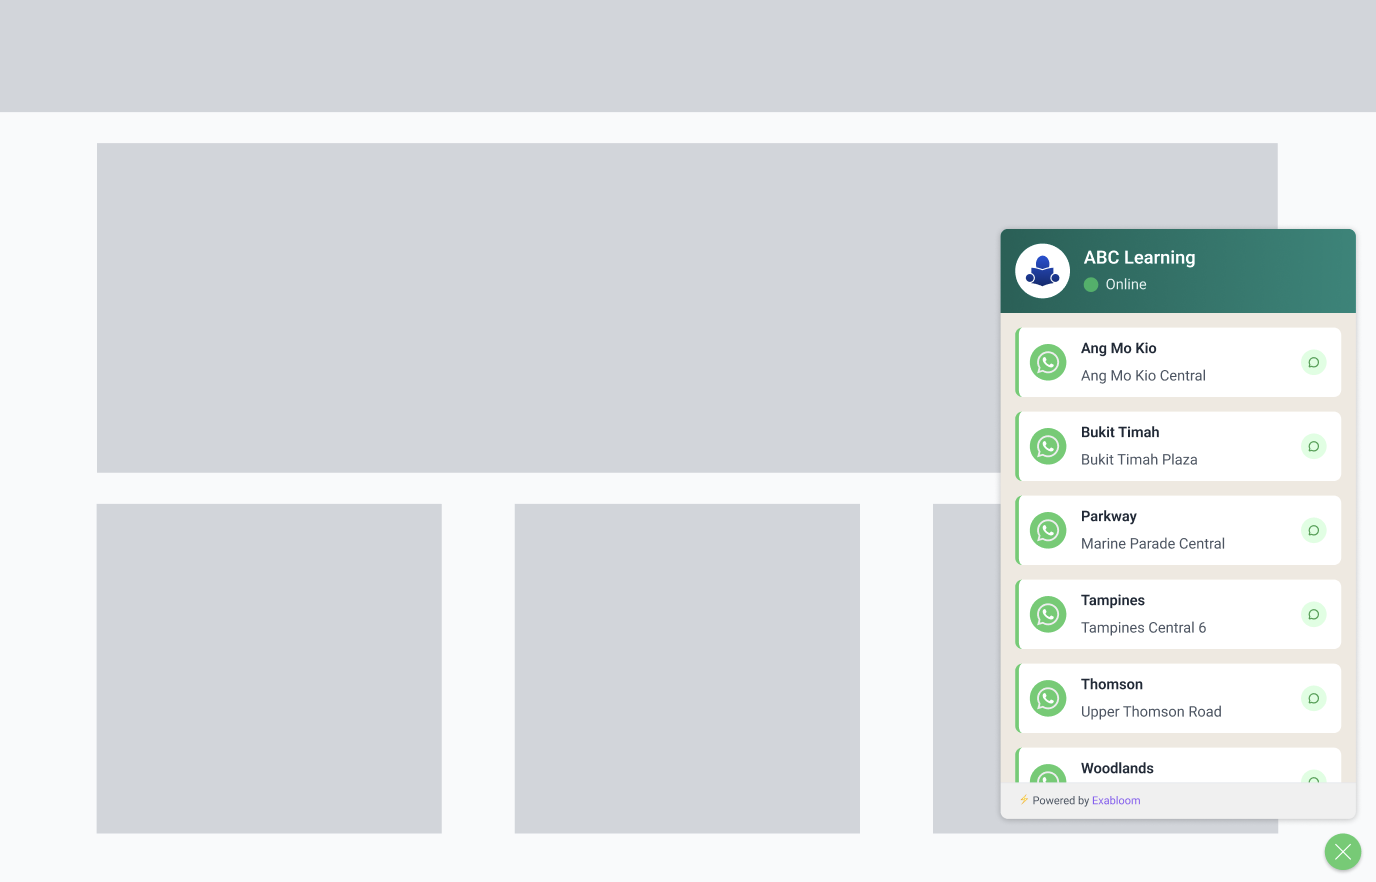
The widget appears in the bottom-right corner of your website. You can configure it with a single WhatsApp number or multiple numbers (for businesses with multiple locations or departments). All settings can be updated from the admin panel without developer help.
Configure the widget
-
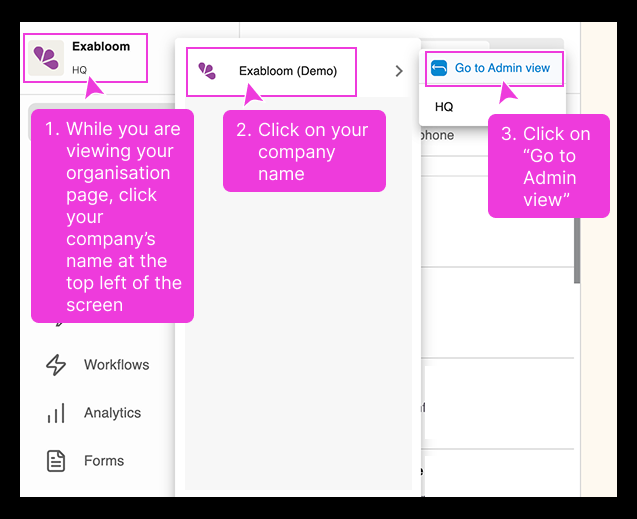
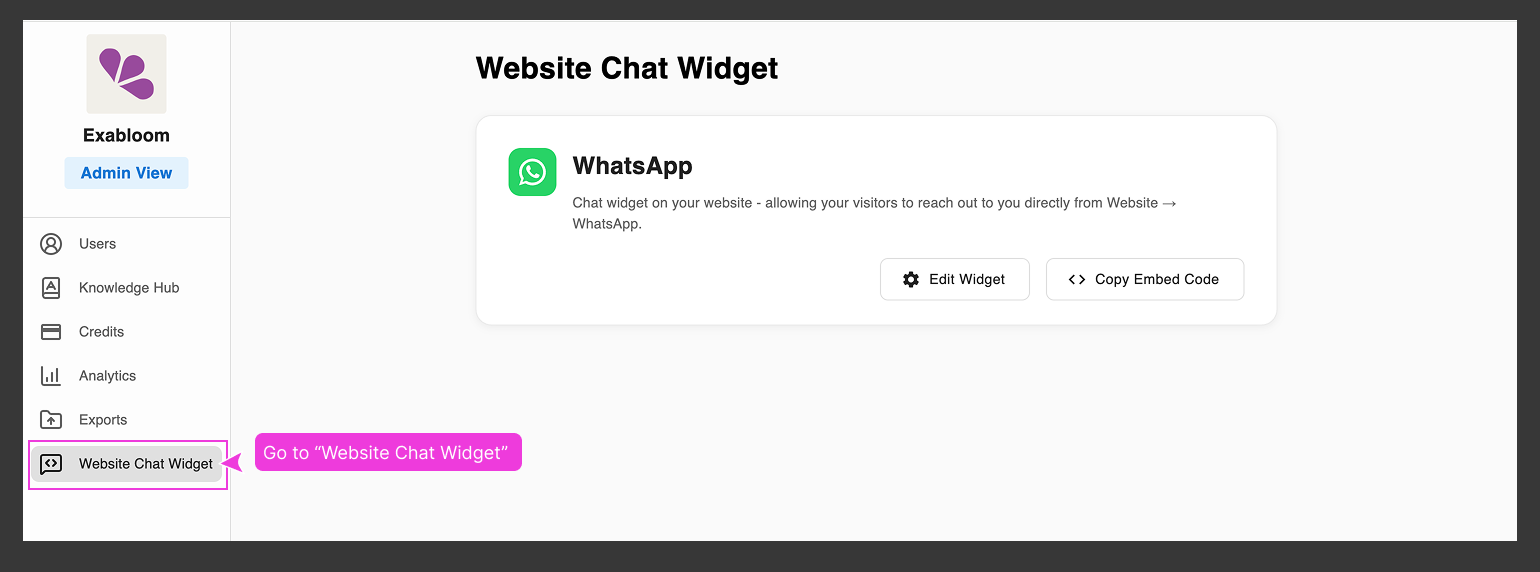
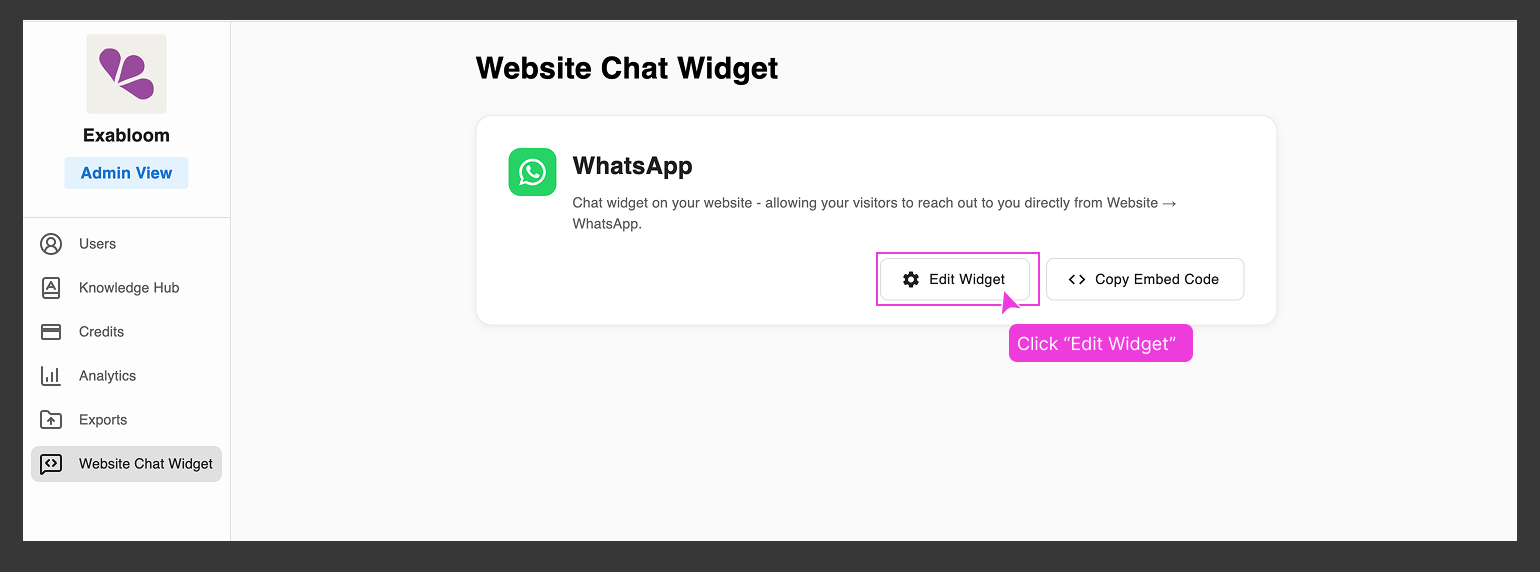
Go to Admin View and click Website Chat Widget in the left menu.
-
Find the WhatsApp widget and click Edit Widget.
-
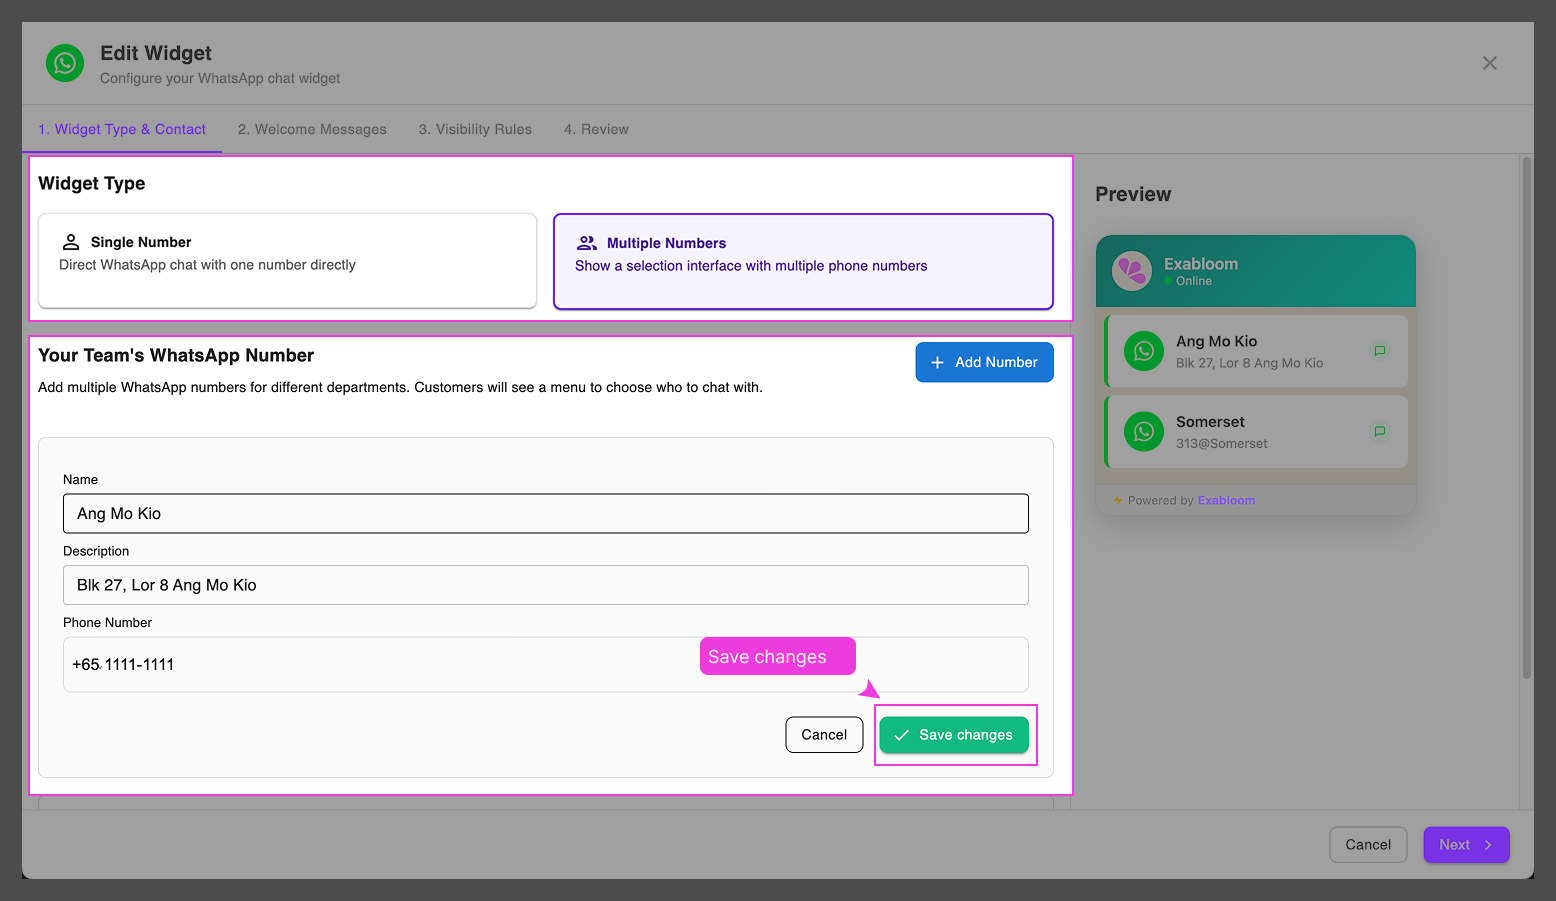
Choose Single Number or Multiple Numbers.
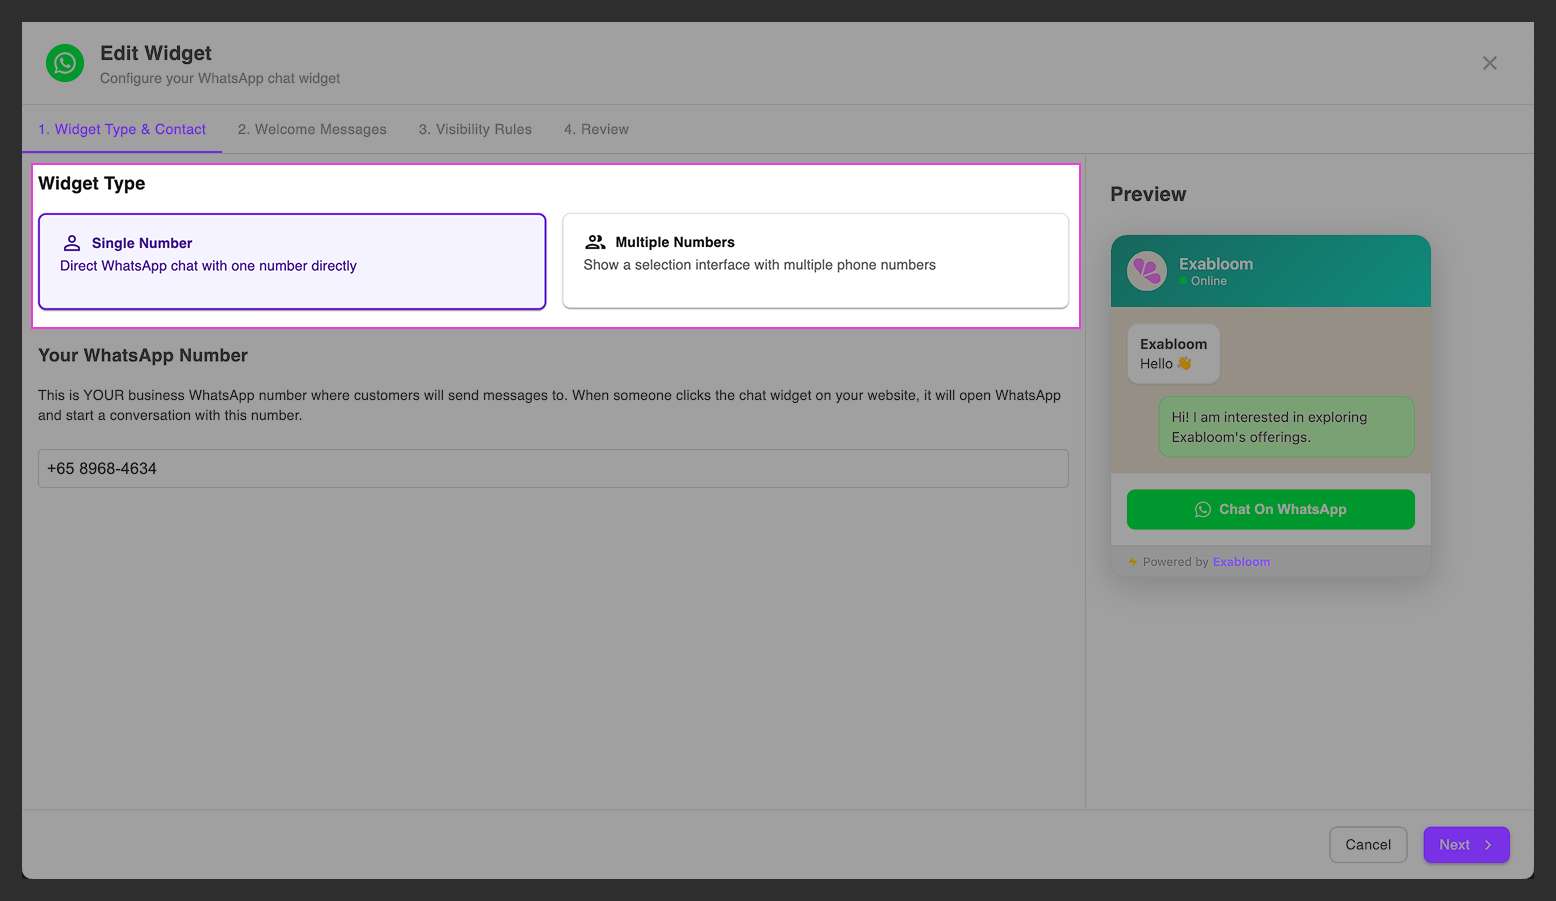
Single number setup
Enter the WhatsApp number including country code (e.g., +65 for Singapore).
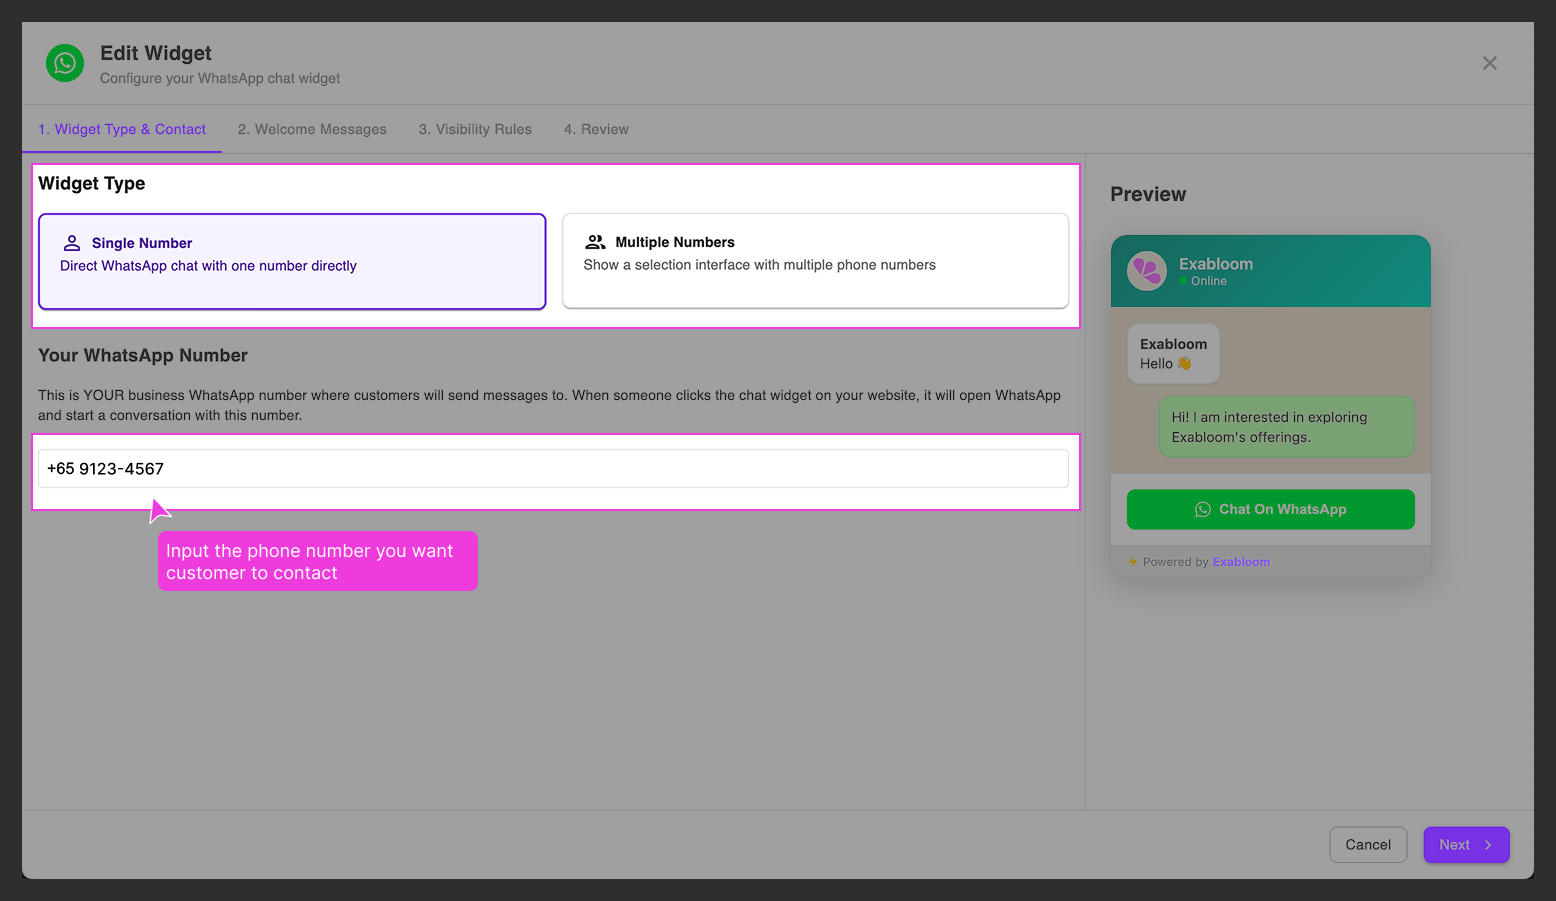
Multiple numbers setup
Add numbers with a Name (required) and optional Description for each. Use + Add Number to add more.
- Click the pencil icon to edit a number
- Use the up/down arrows to reorder (the first number appears as the default)
- Click Save Changes after editing
-
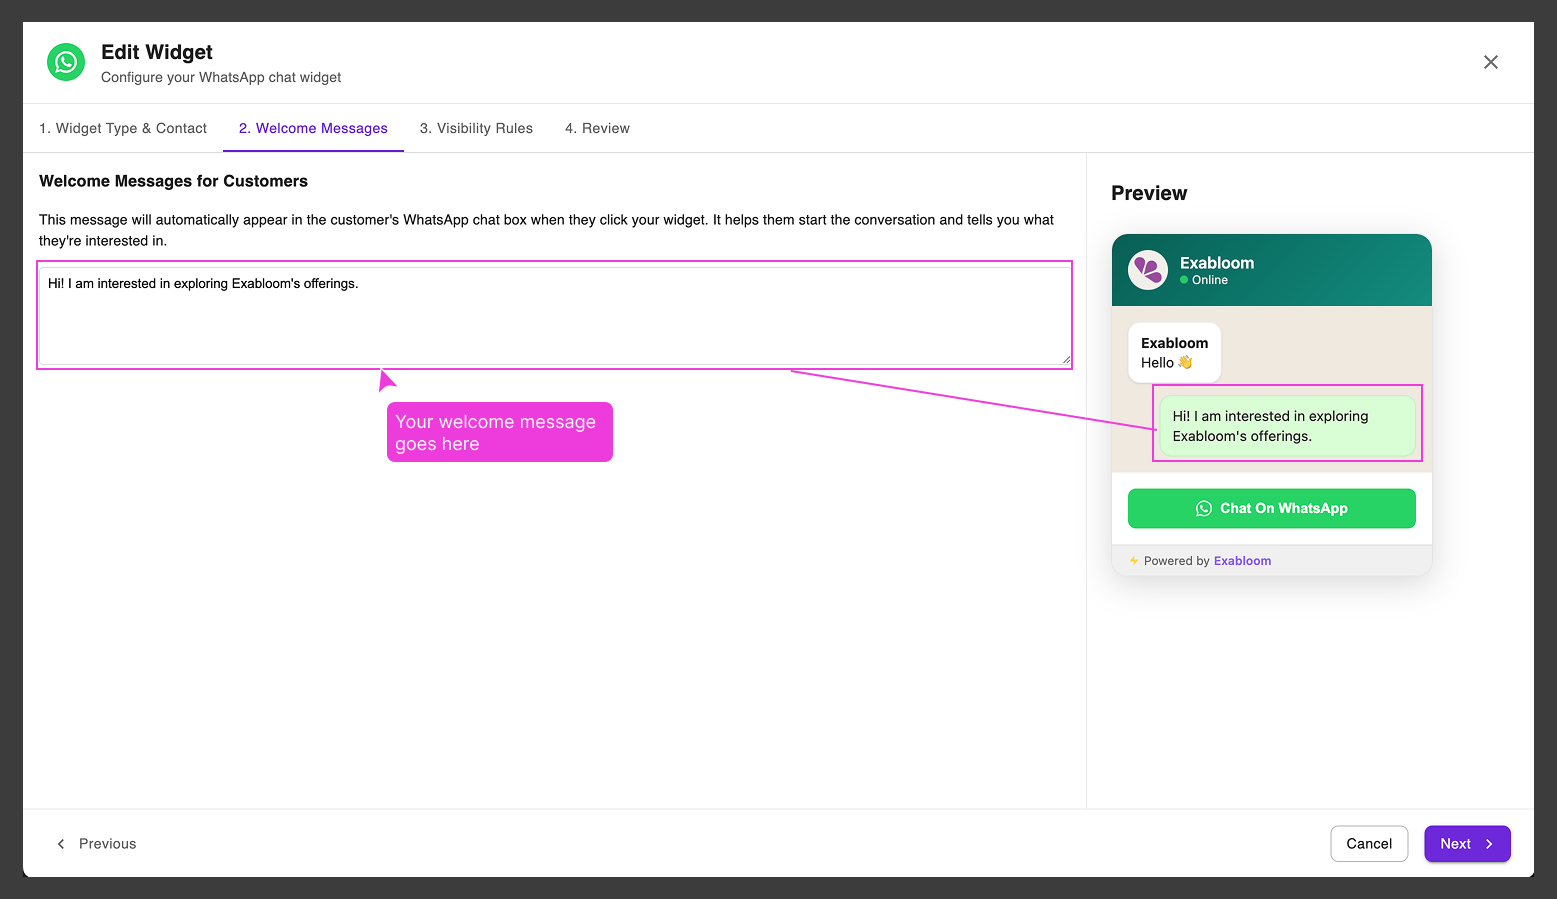
Set a Welcome Message — this pre-fills the WhatsApp chat box when a visitor clicks the widget. Visitors can edit it before sending.
-
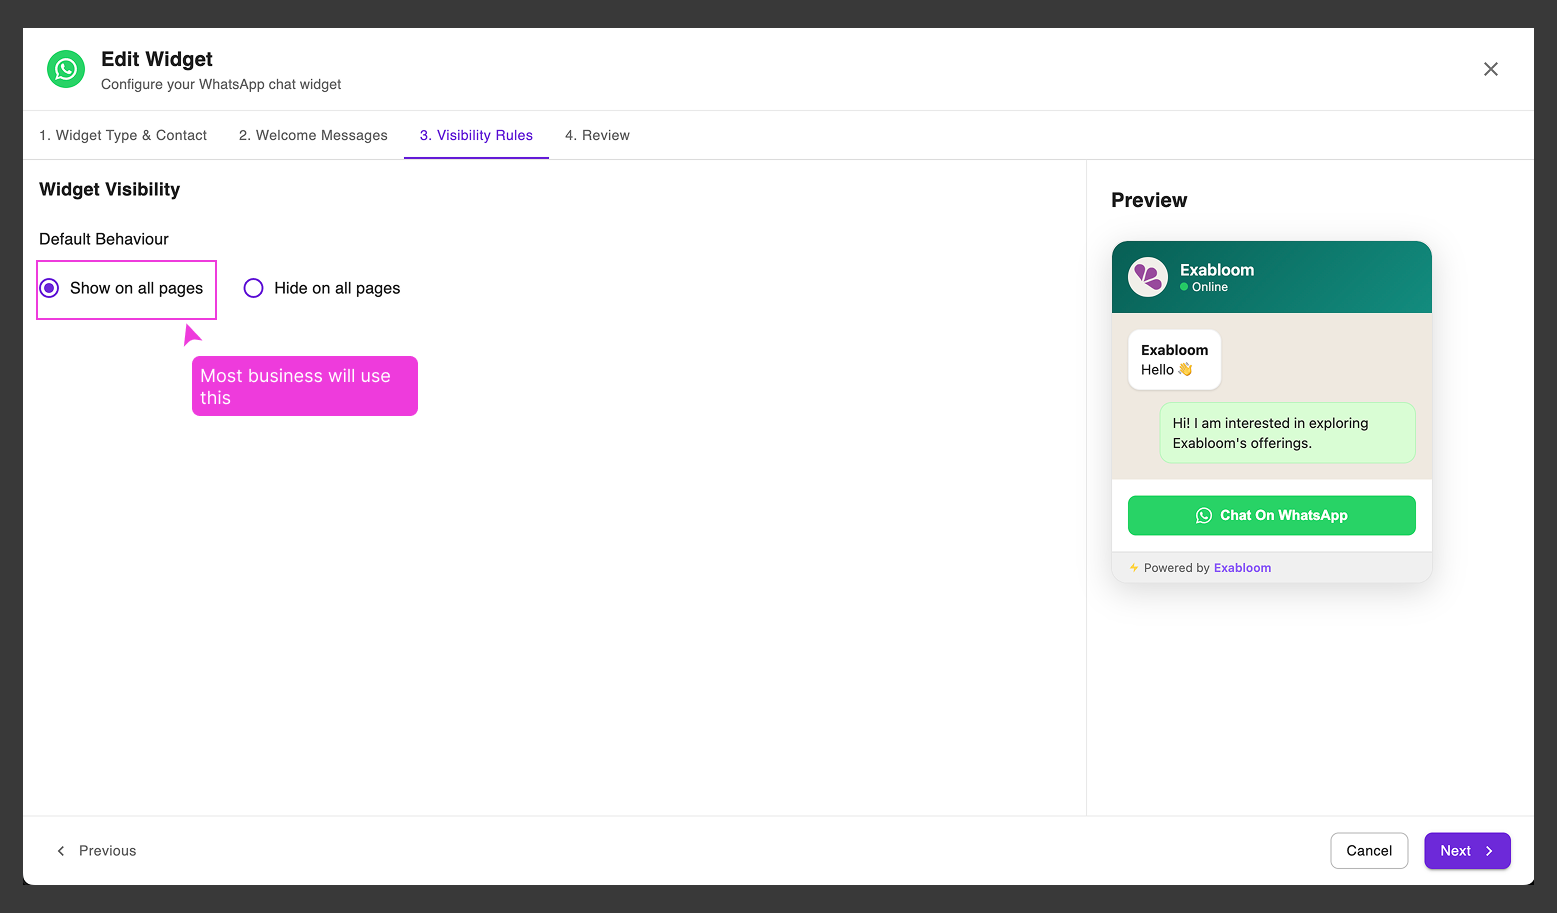
Set Visibility Rules to control which pages show the widget (default: all pages).
-
Click Save Widget.
Add the widget to your website
This step requires adding code to your website. You may need a developer's help.
-
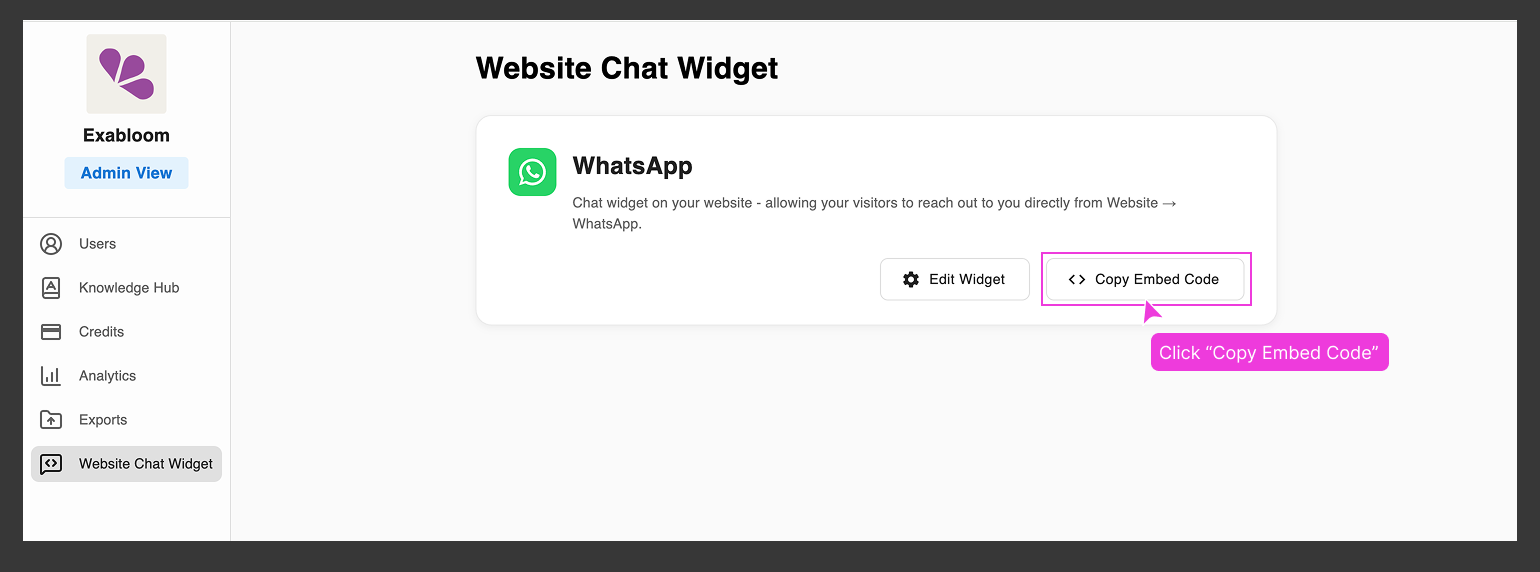
In Admin View > Website Chat Widget, click Copy Embed Code on your widget.
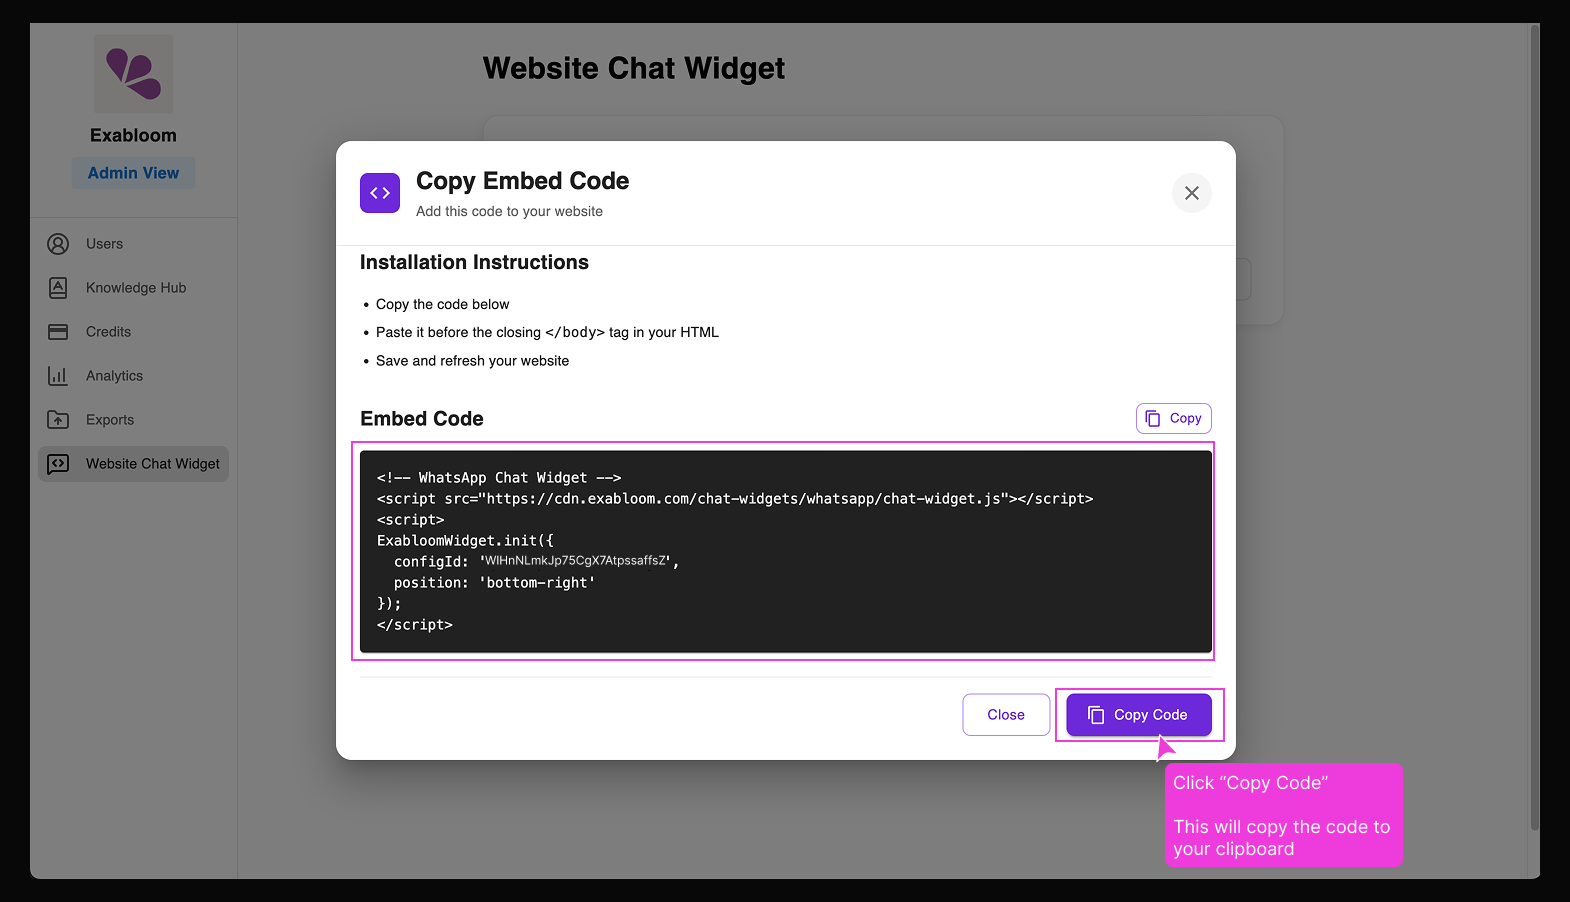
-
Paste the code into the
<body>section of your website's HTML.Elementor users
- Go to Elementor > Custom Code and click Add New.
- Name it (e.g., "Exabloom Chat Widget"), paste the script, set location to Body End, and publish.
- If you have an existing chat widget plugin, deactivate it under Plugins.
-
Visit your website and verify the WhatsApp button appears in the bottom-right corner. Click it to confirm the welcome message is correct.