Connect Facebook Ads
Connect your Facebook Ads account to Exabloom so leads from Facebook Instant Forms are automatically received and processed.
Prerequisites
- A Facebook account with Full Control over the Ads Account and Facebook Page running your ads
Part 1: Connect Facebook Ads to Exabloom
-
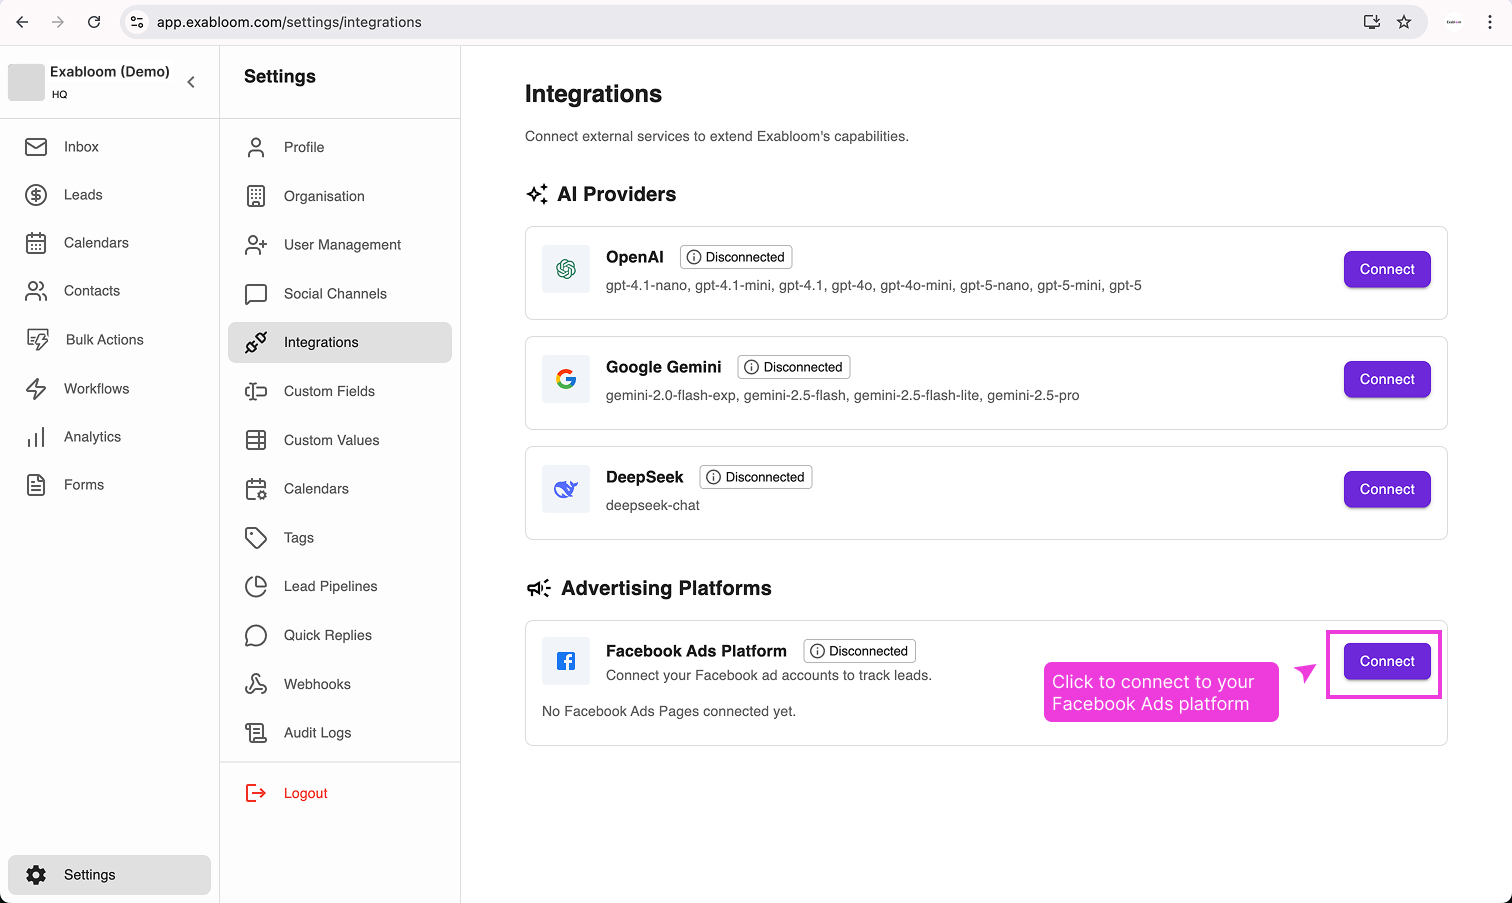
In Exabloom, go to Settings > Integrations.
-
Find Facebook Ads Platform and click Connect.
-
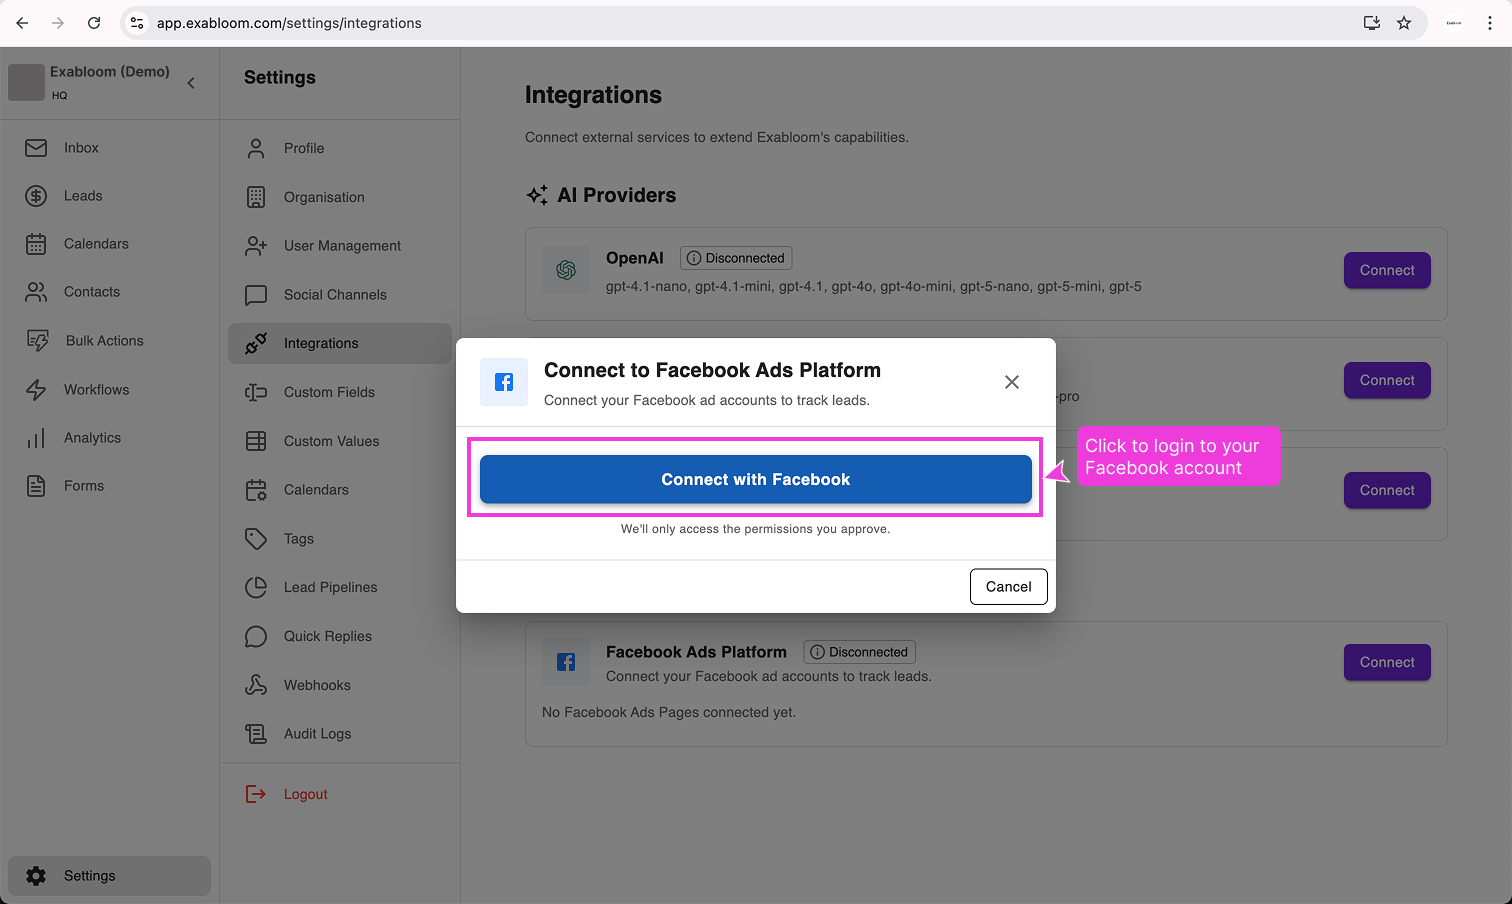
In the Facebook login window, sign in with your account.
-
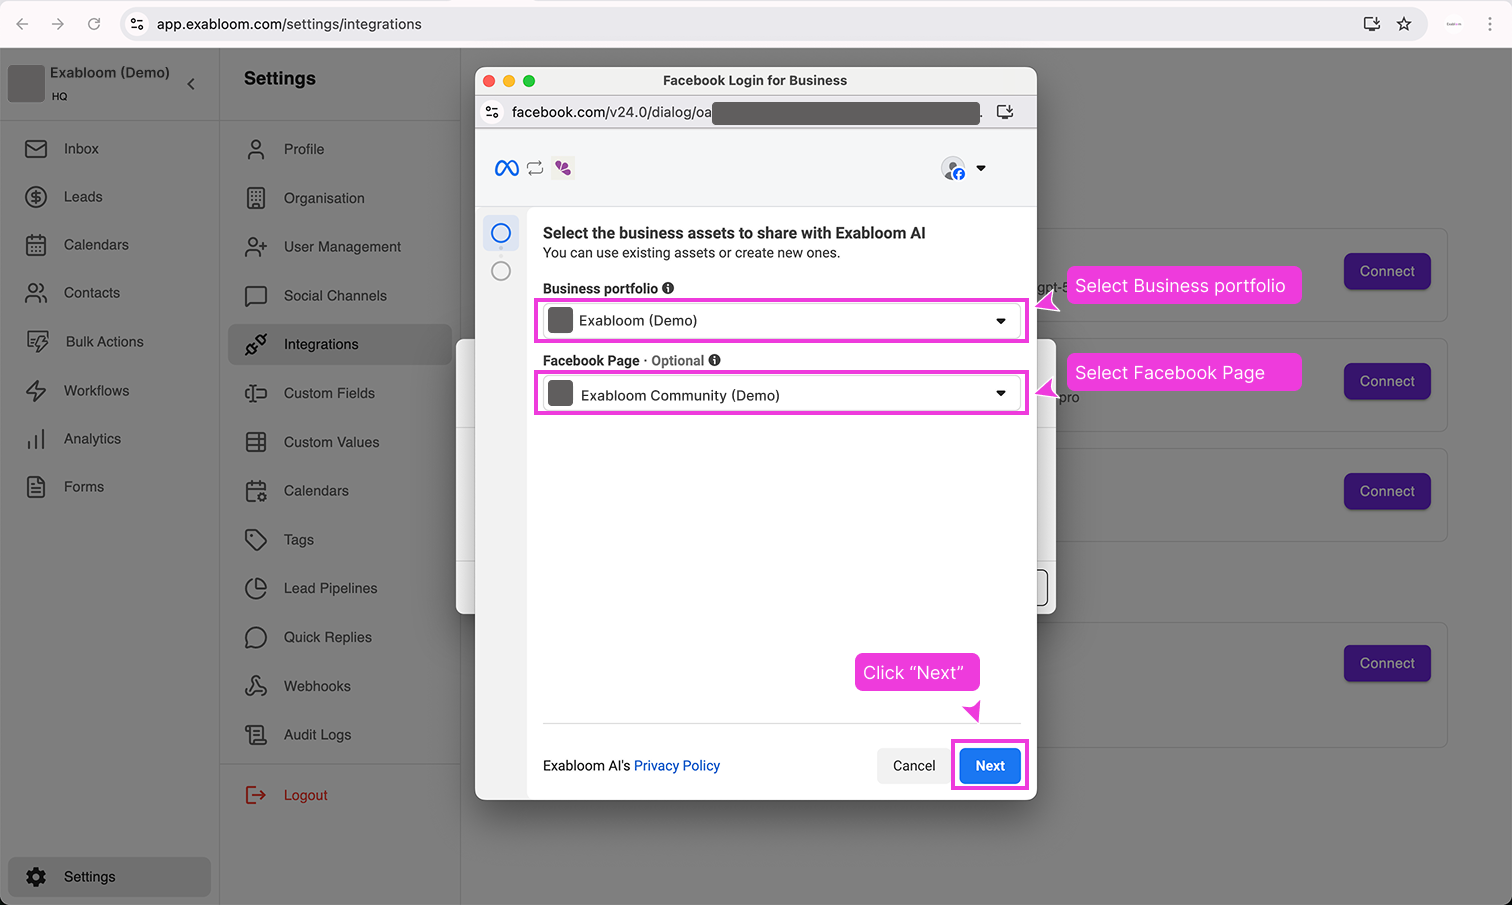
Select your Business Portfolio and Facebook Page, then click Next.
-
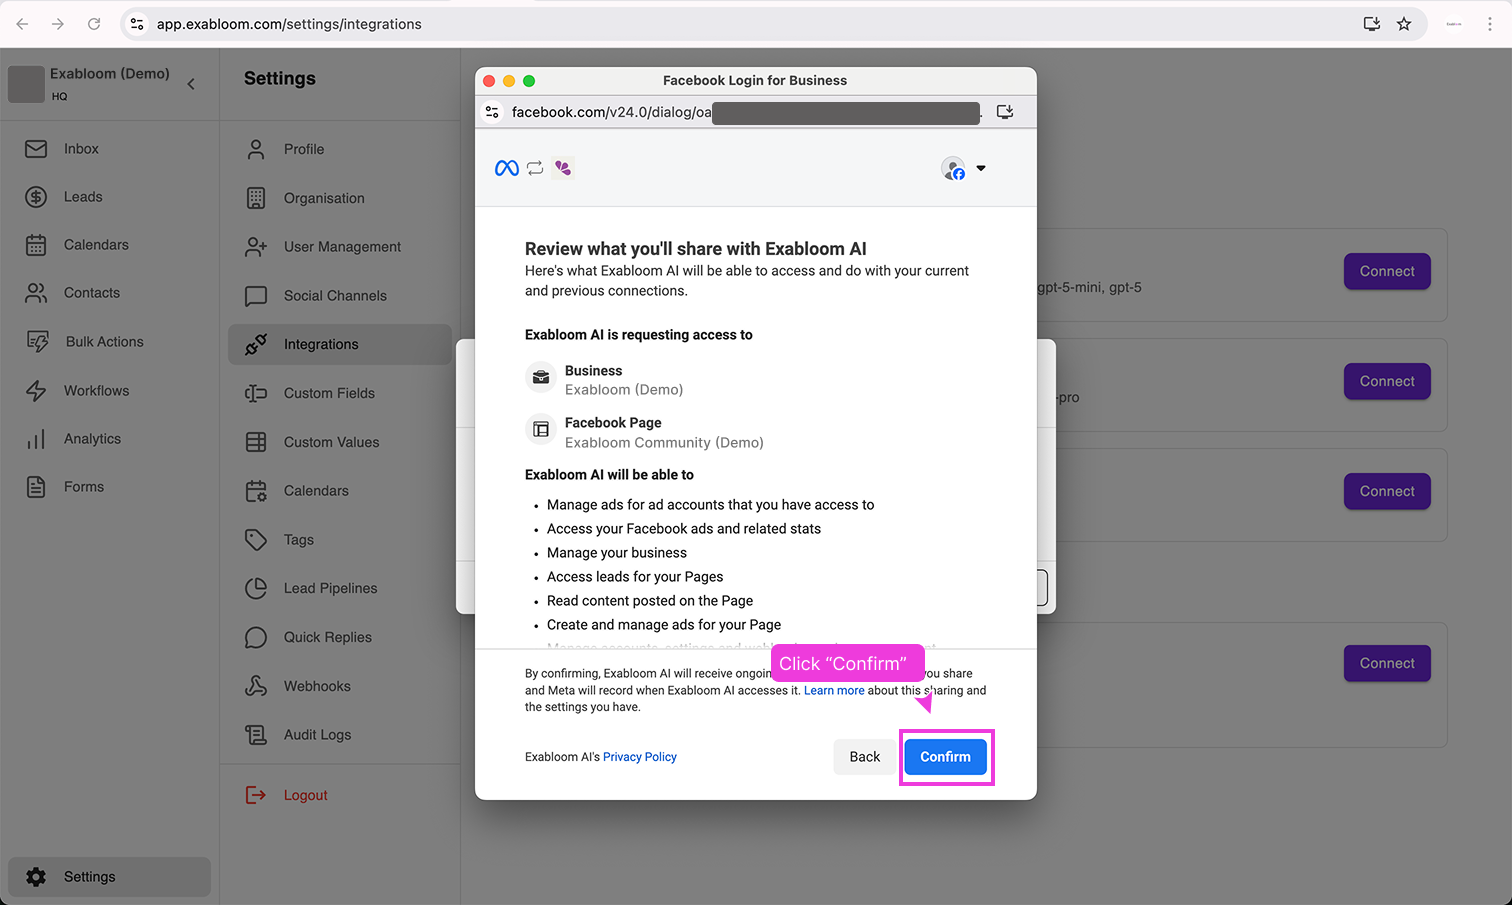
Review the permissions and click Confirm.
-
Click Finish and wait for the page to return to Exabloom.
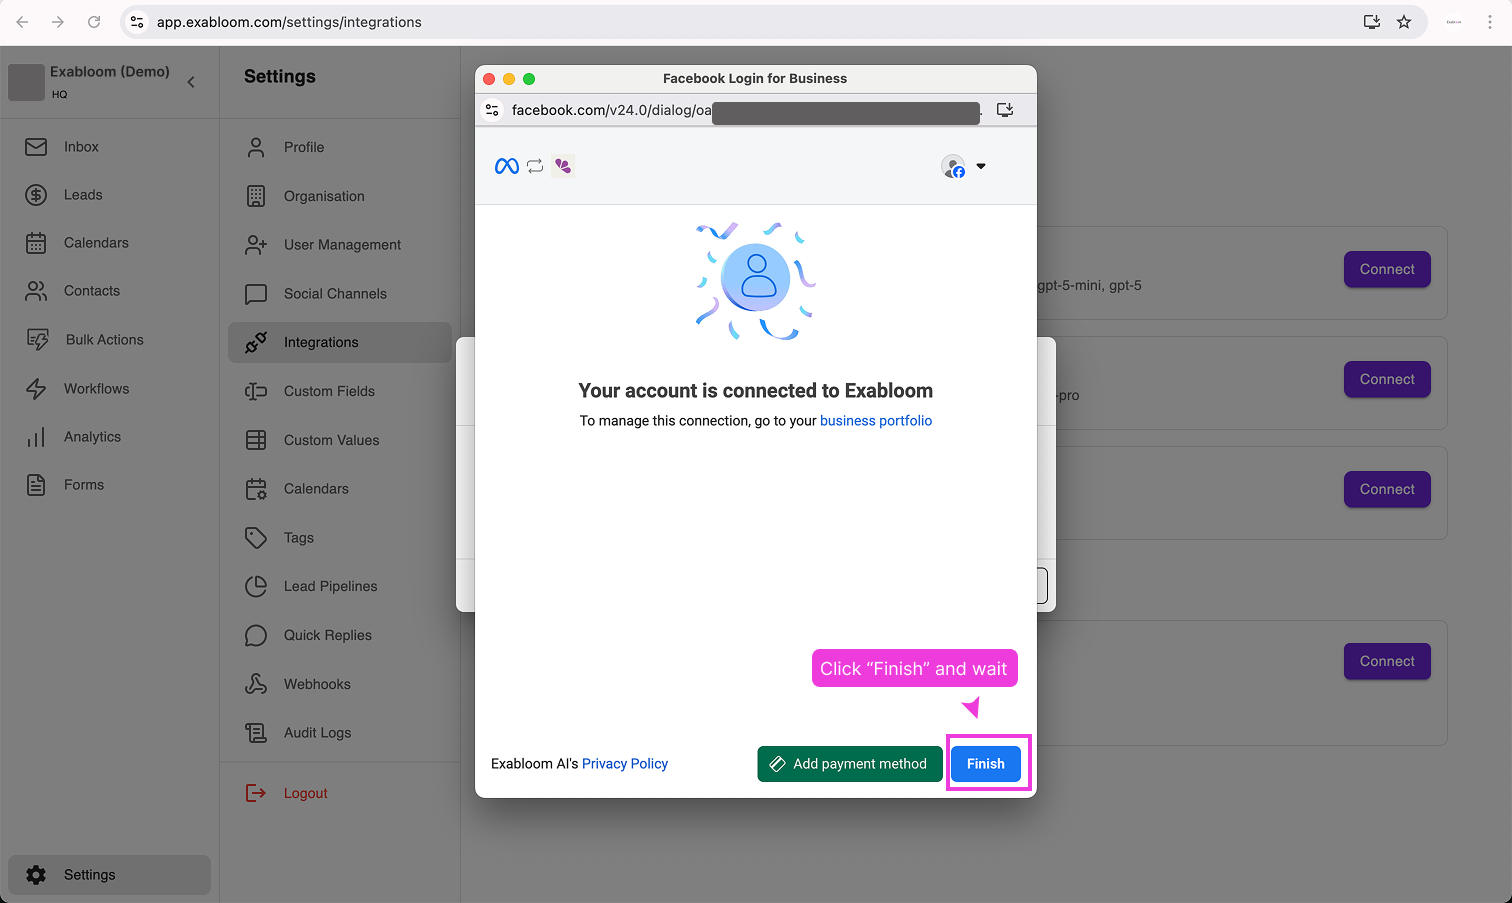 warning
Do not close the browser until the page fully loads back into Exabloom.
-
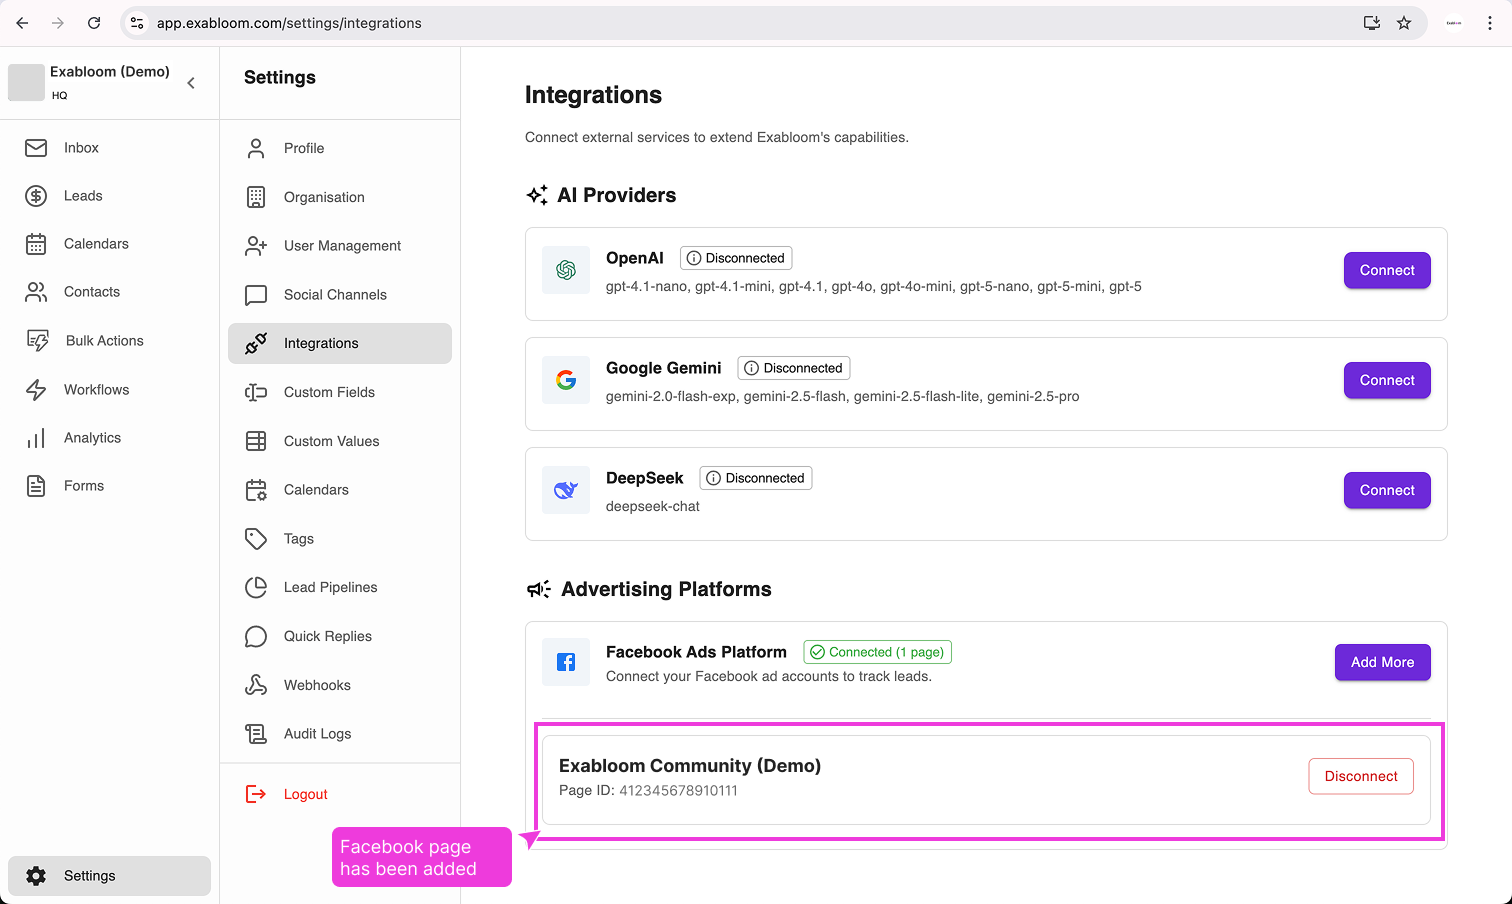
Verify your Facebook Page appears in Exabloom.
Part 2: Grant Exabloom leads access
-
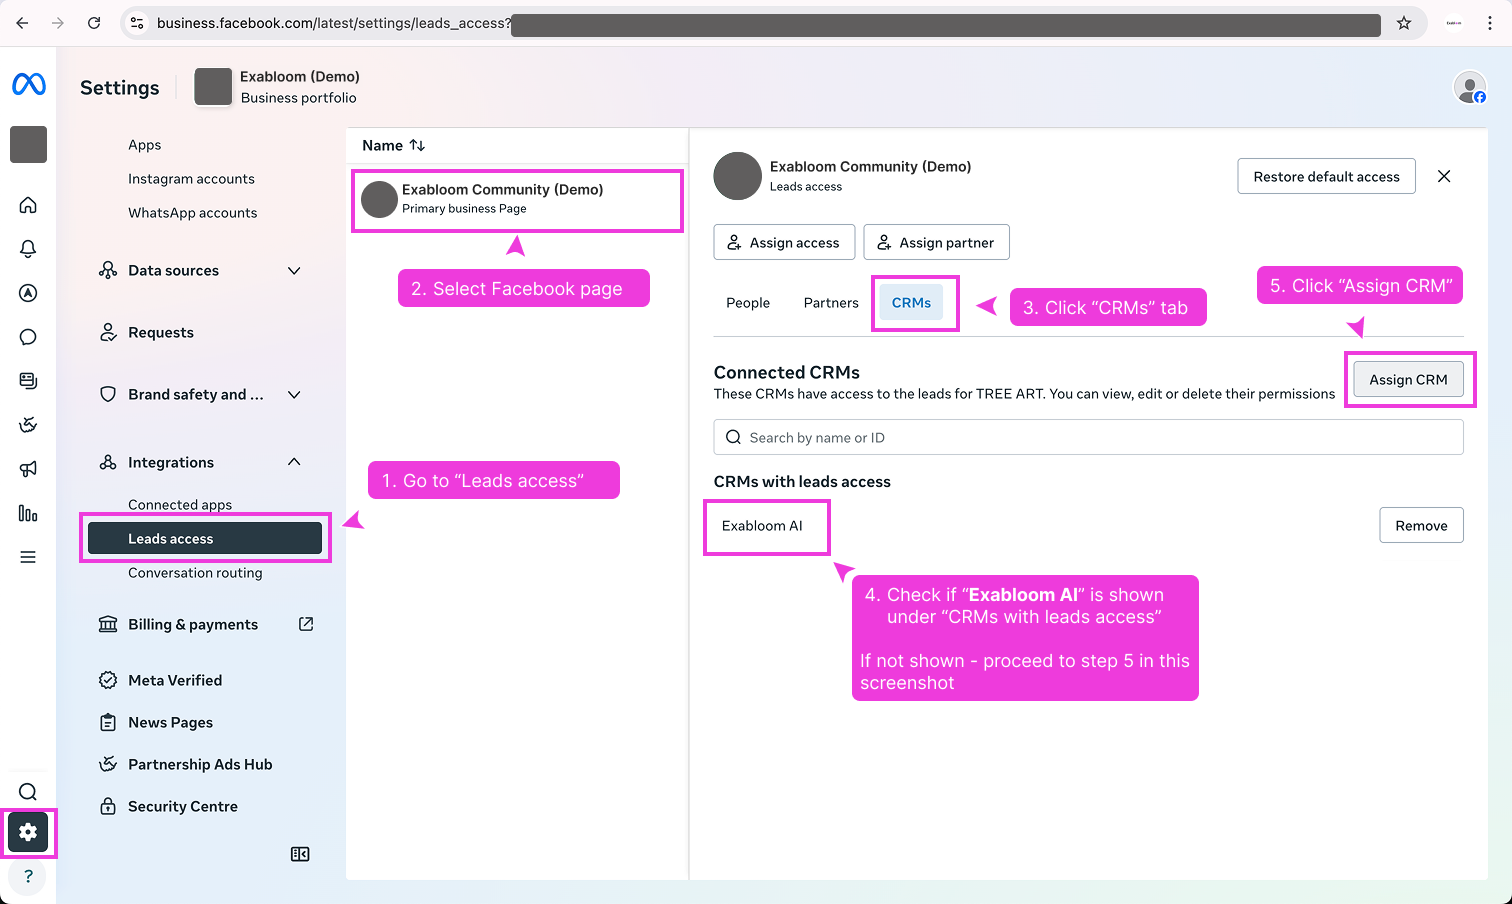
Open business.facebook.com in a new tab and go to Settings.
-
Click Leads access in the left sidebar.
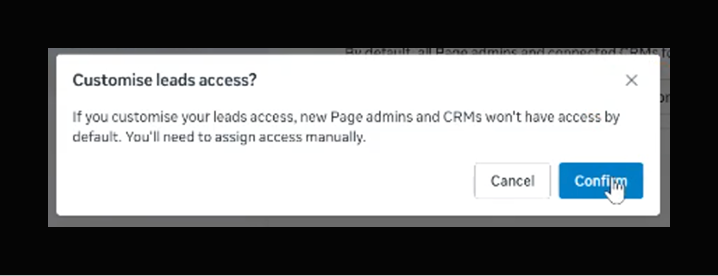
If you see a "Customise access" option
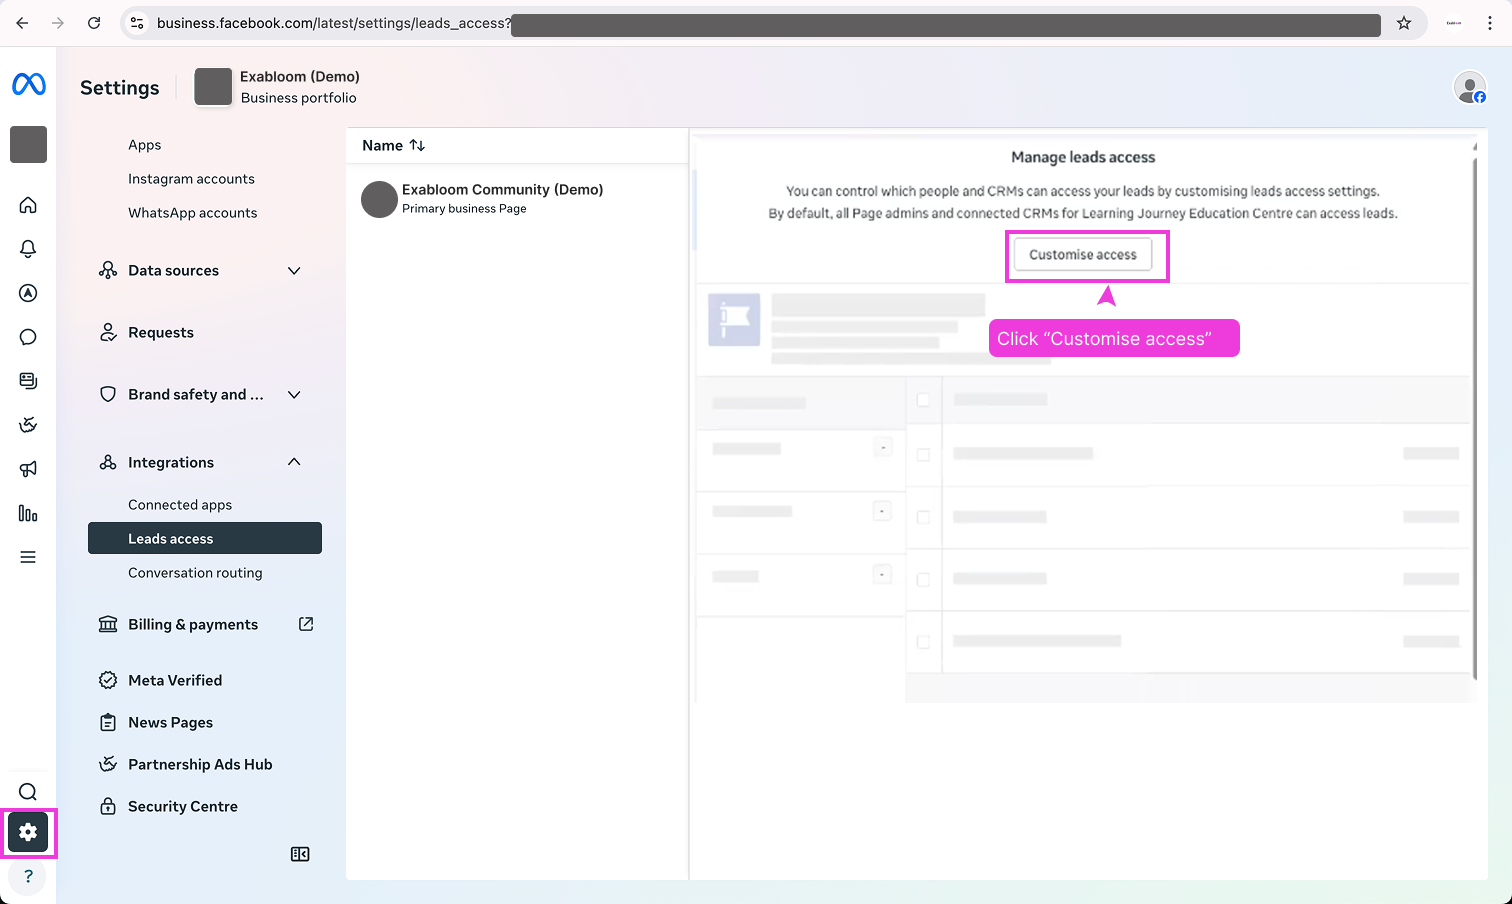
Click Confirm when prompted.
-
Select your Facebook Page and click the CRMs tab.
-
If Exabloom AI is not listed under CRMs with leads access, click Assign CRM and select Exabloom AI.
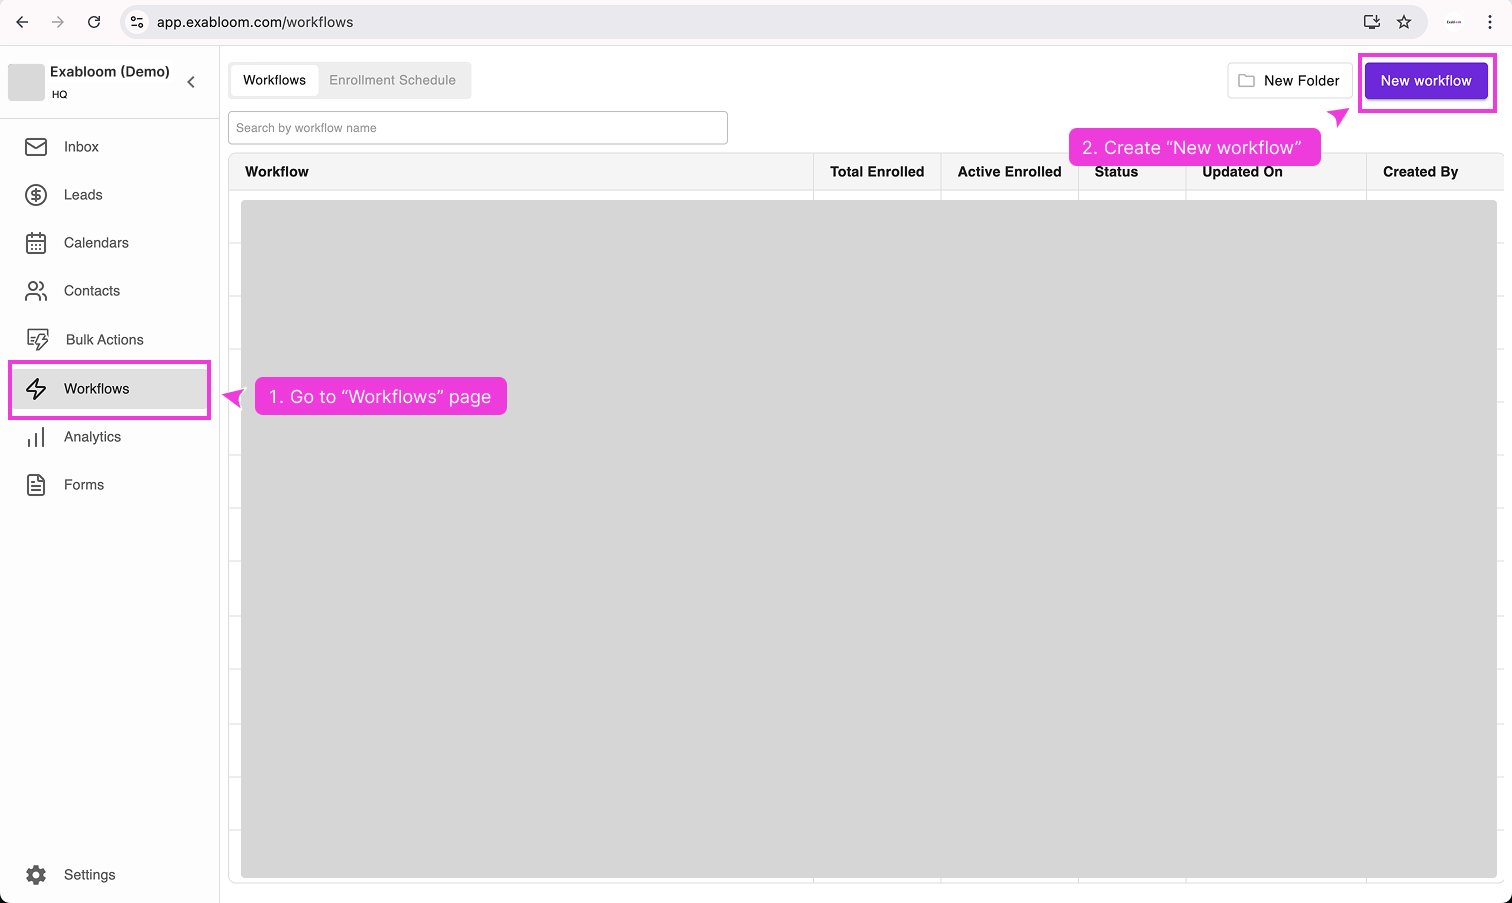
Part 3: Create a test workflow
-
In Exabloom, go to Workflows and create a new workflow. Name it "TEST - Facebook Instant Form".

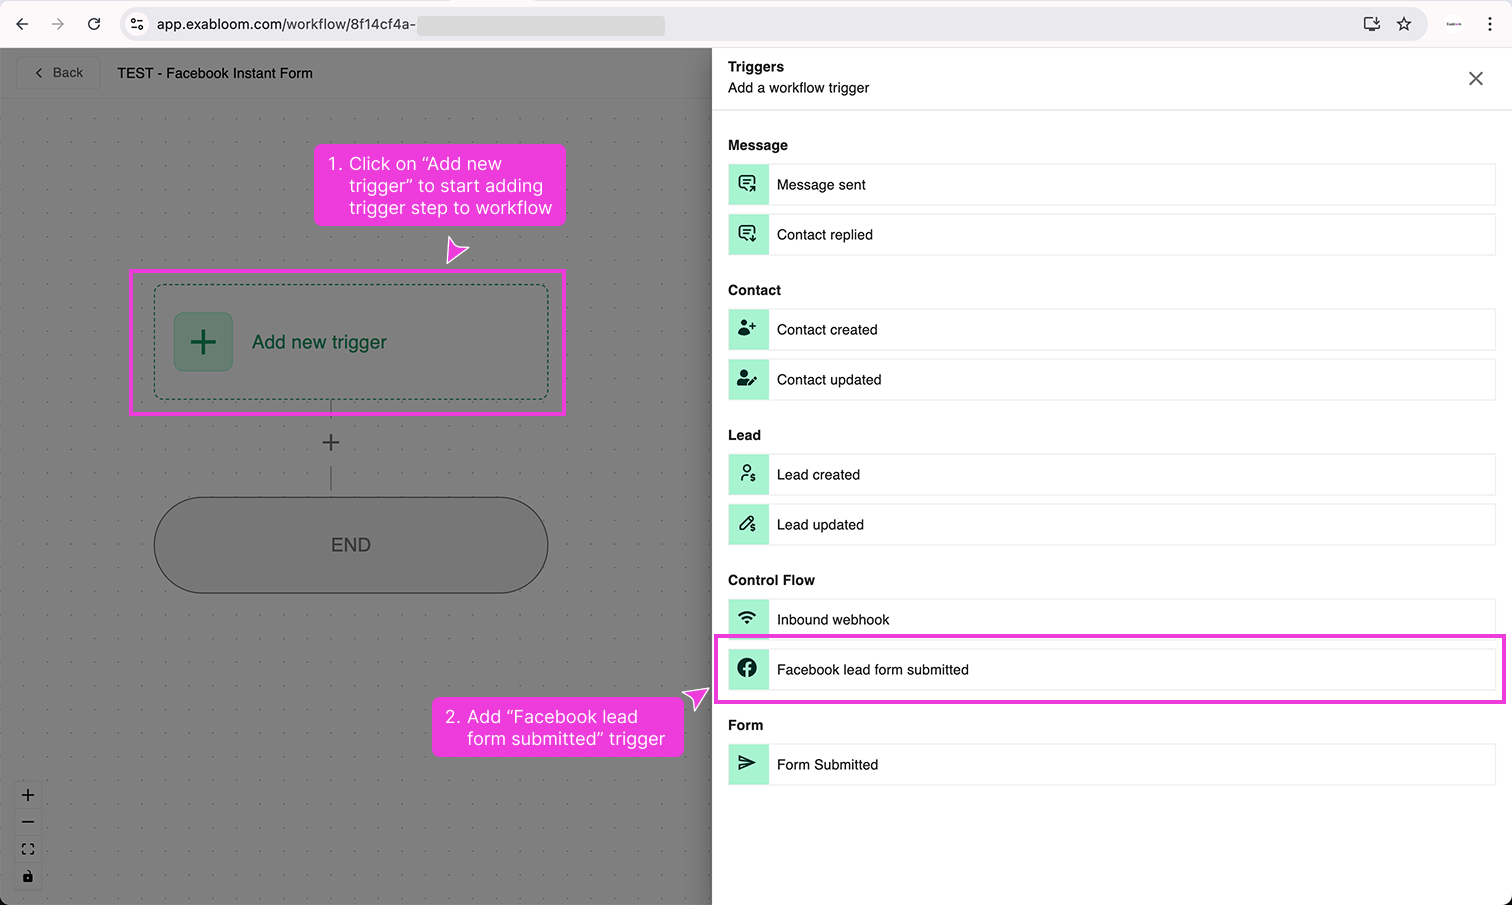
-
Add a trigger and select Facebook lead form submitted.
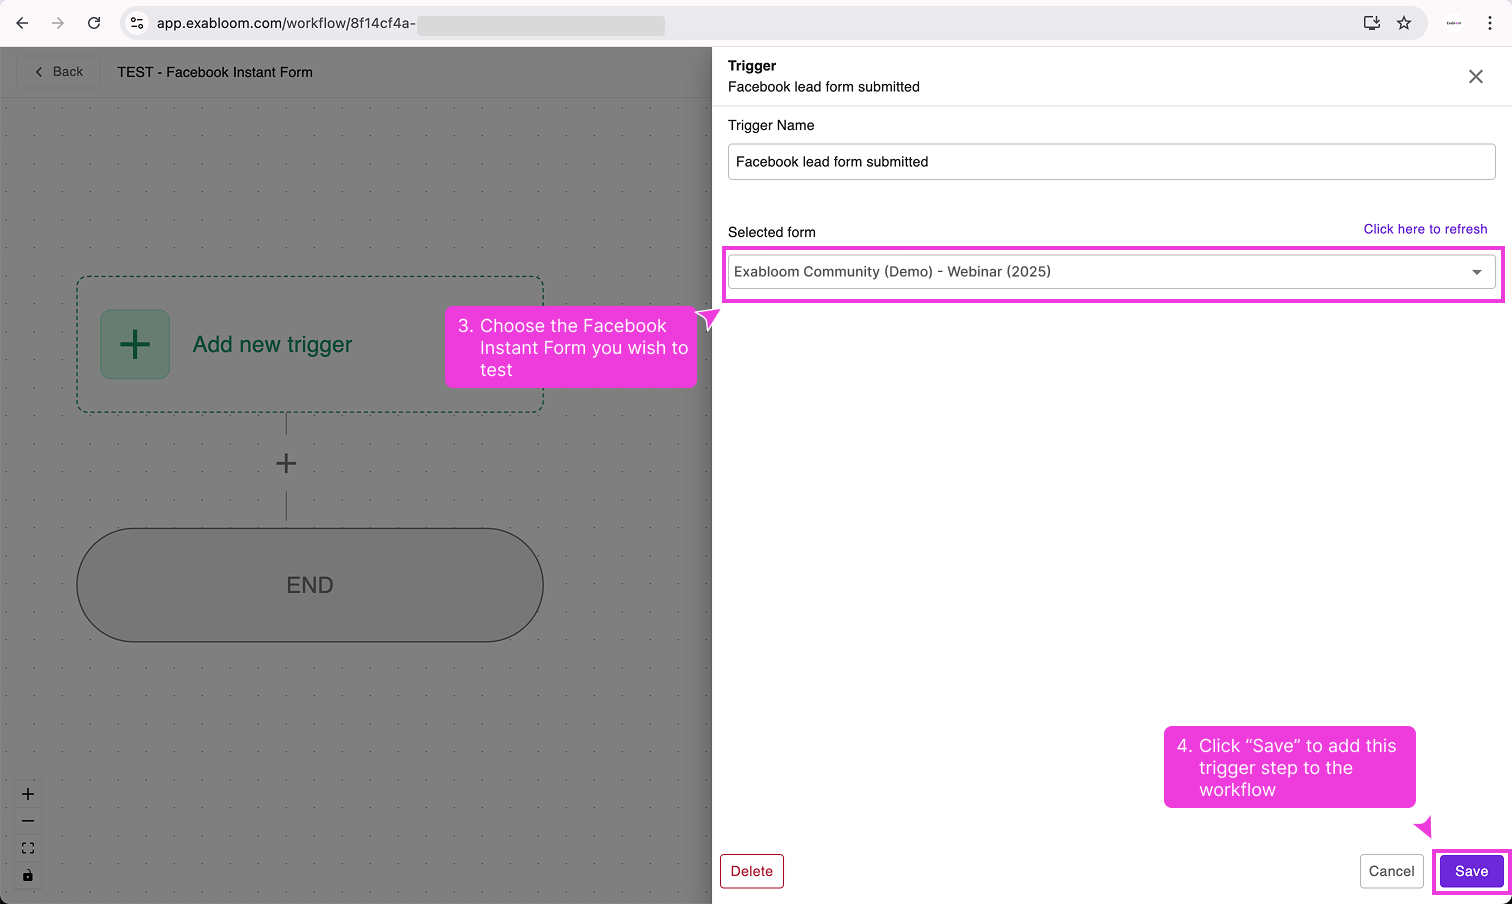
-
In the trigger settings, select your Facebook Instant Form.
-
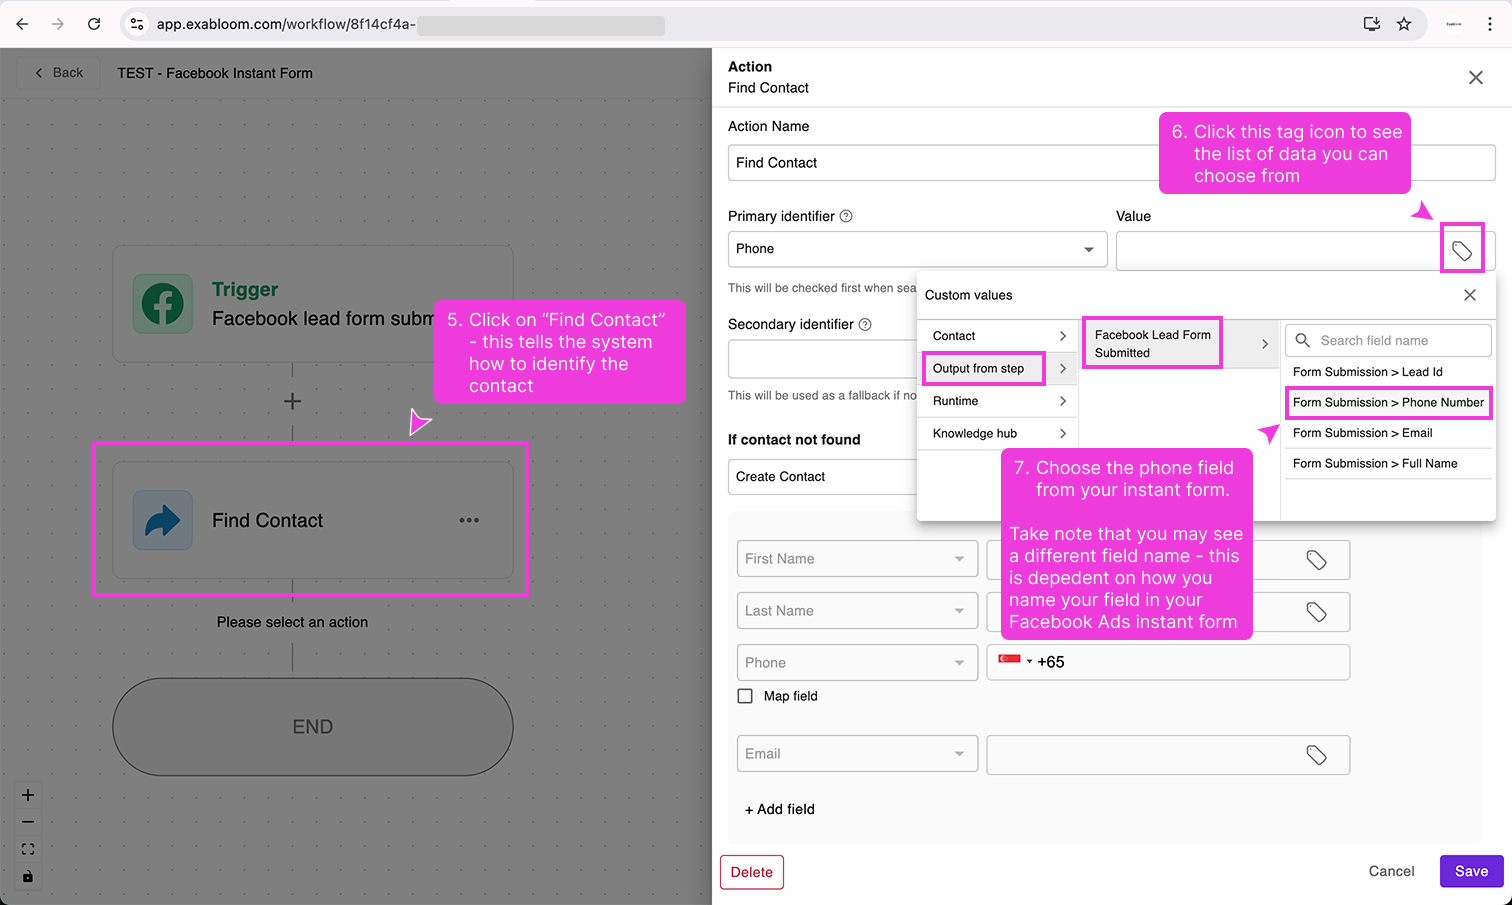
Configure the Find Contact step (added automatically):
- Map the Primary Identifier to the phone number field from your form
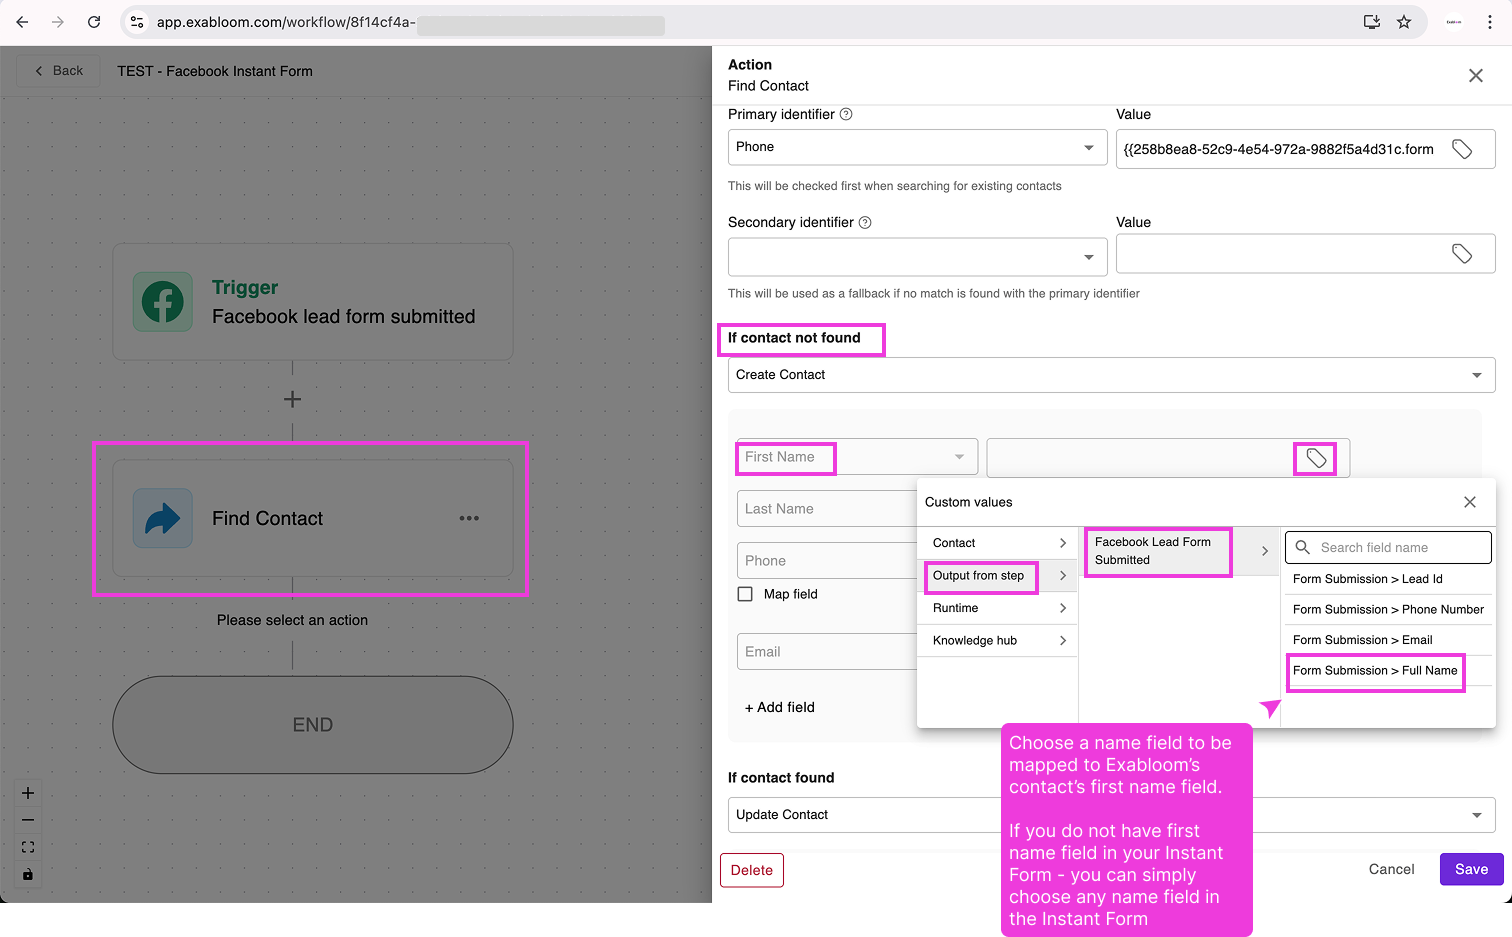
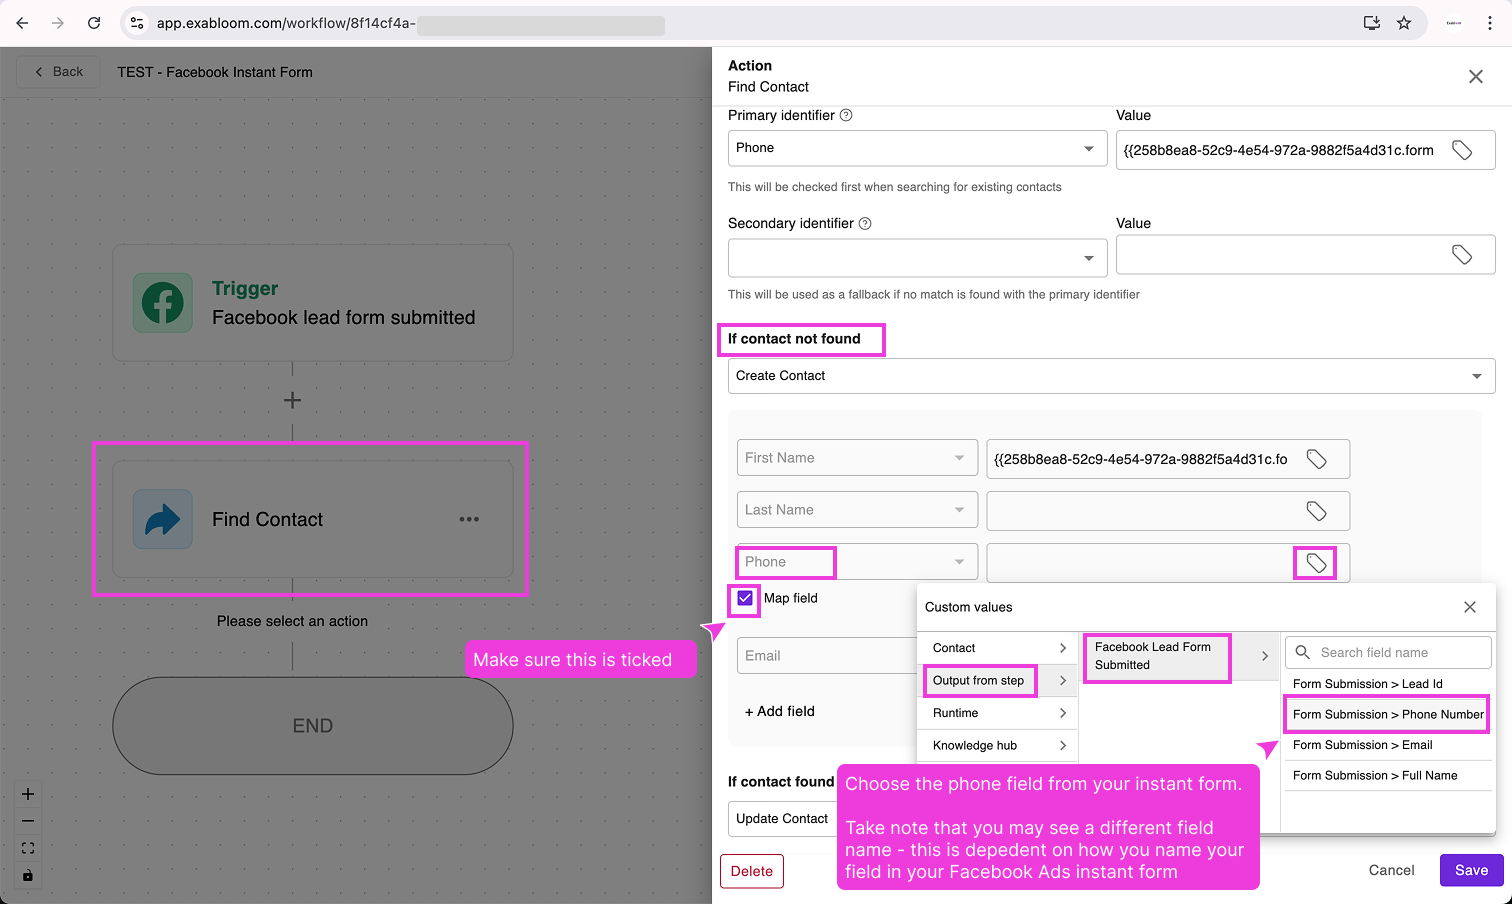
- Under "If not found", map the First Name and Phone fields
- Set "If contact found" to Do Not Update Contact
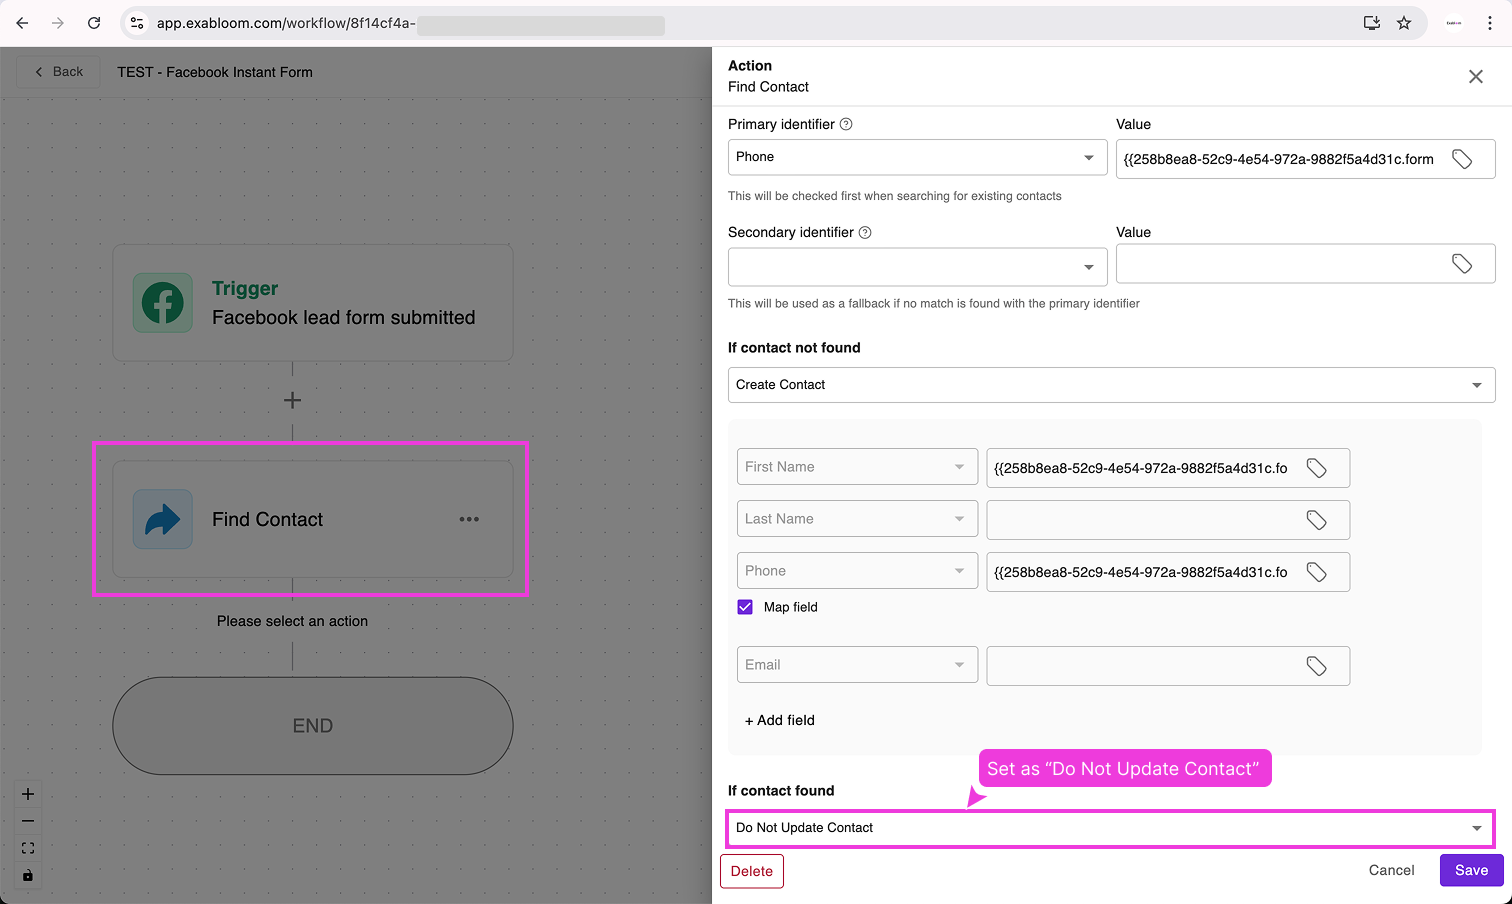
- Click Save
-
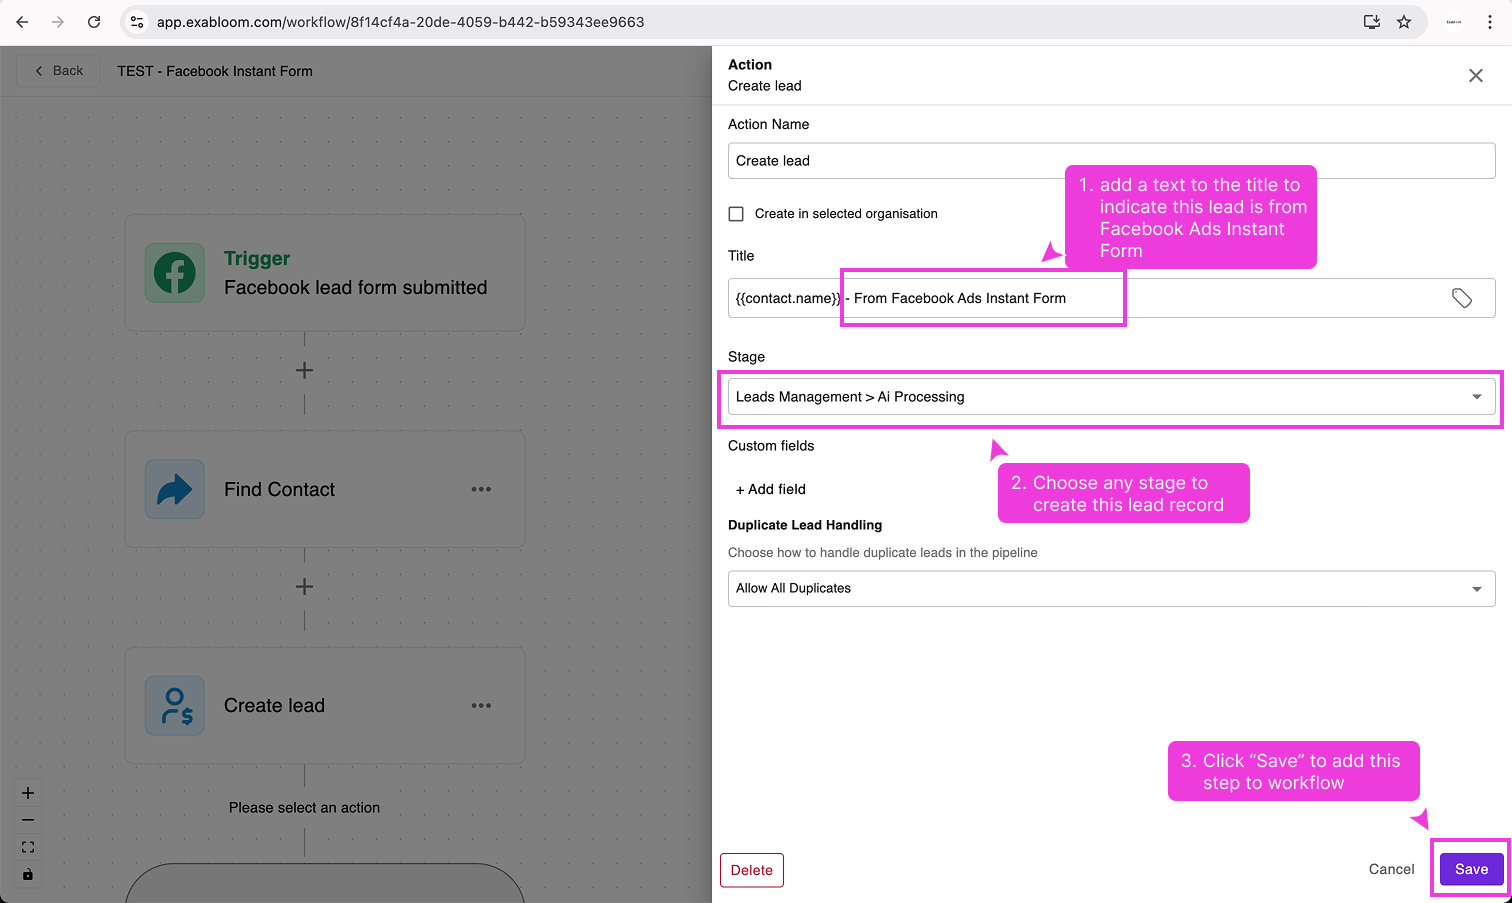
Add a Create Lead action after Find Contact. Set the title to include " - From Facebook Ads Instant Form" and select any pipeline stage.
-
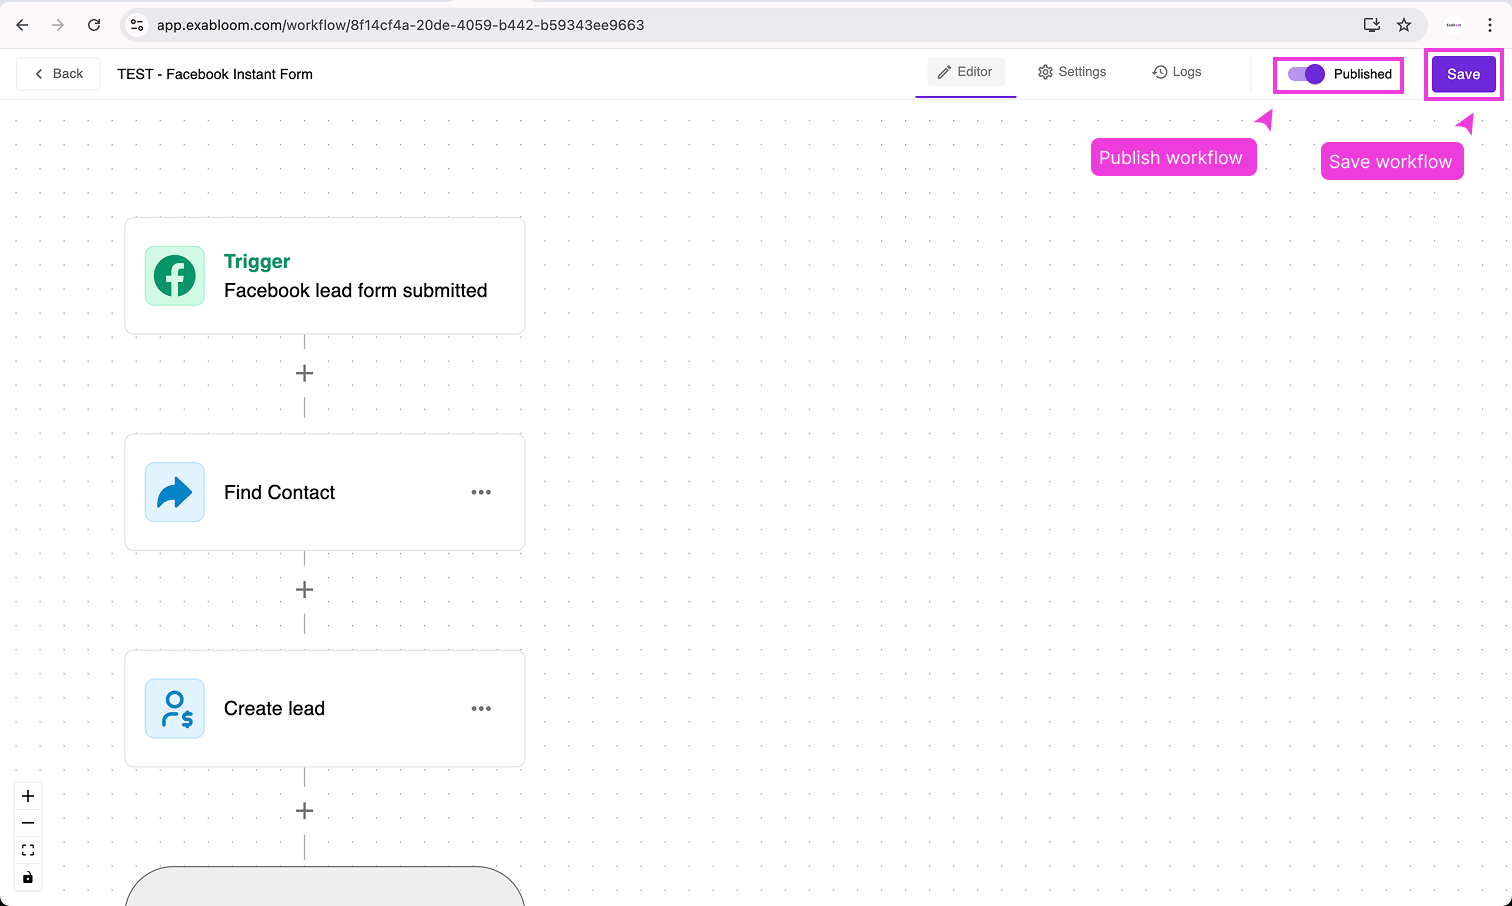
Publish and Save the workflow.
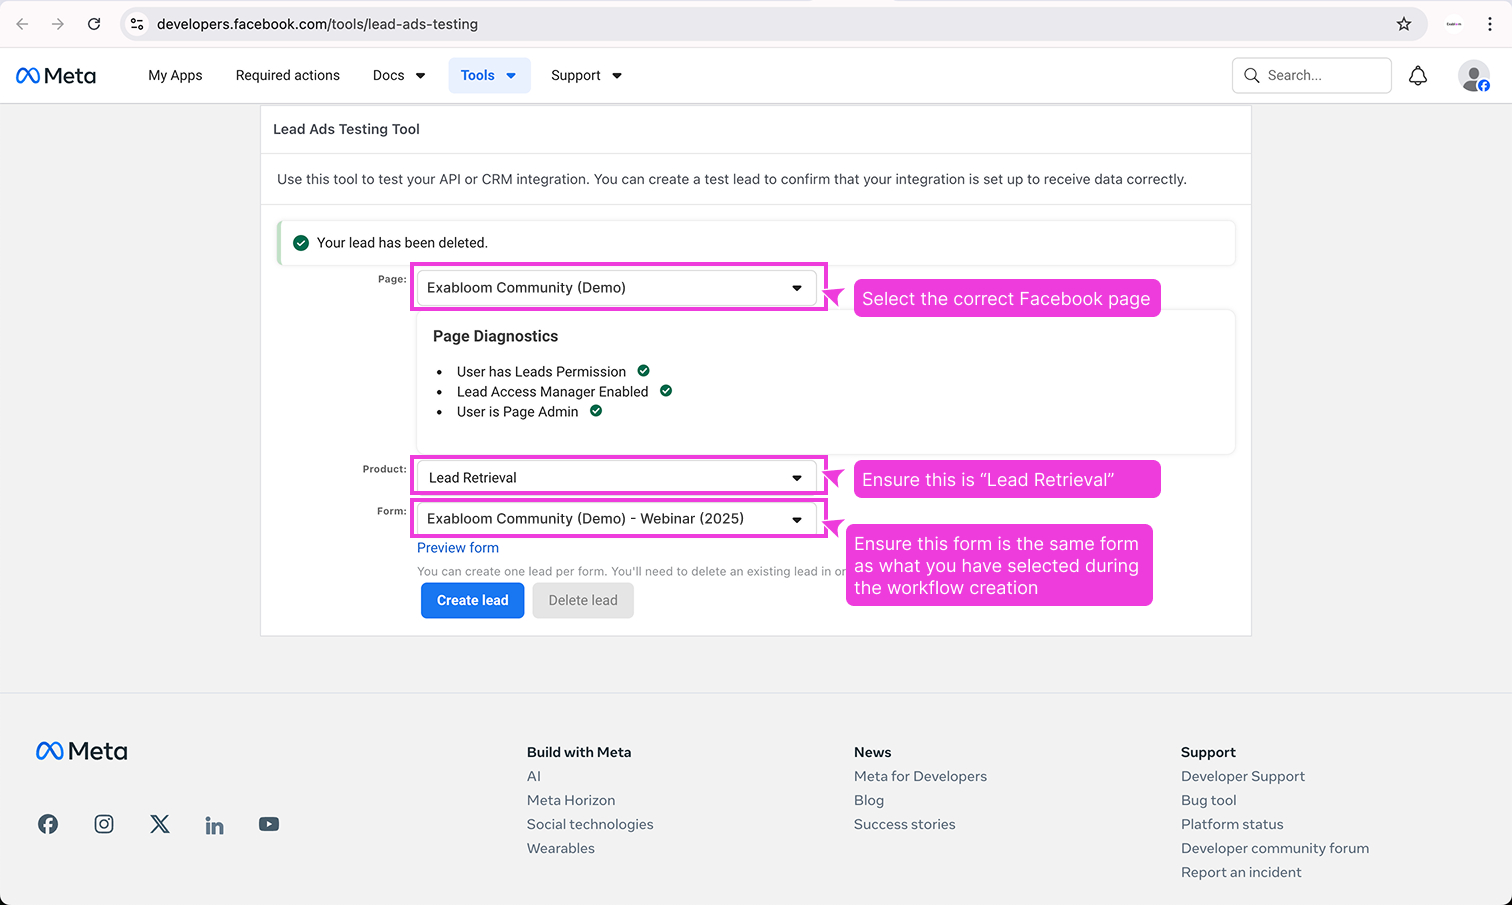
Part 4: Test the integration
-
Select the correct Business Portfolio, Facebook Page, and set Product to Lead Retrieval.
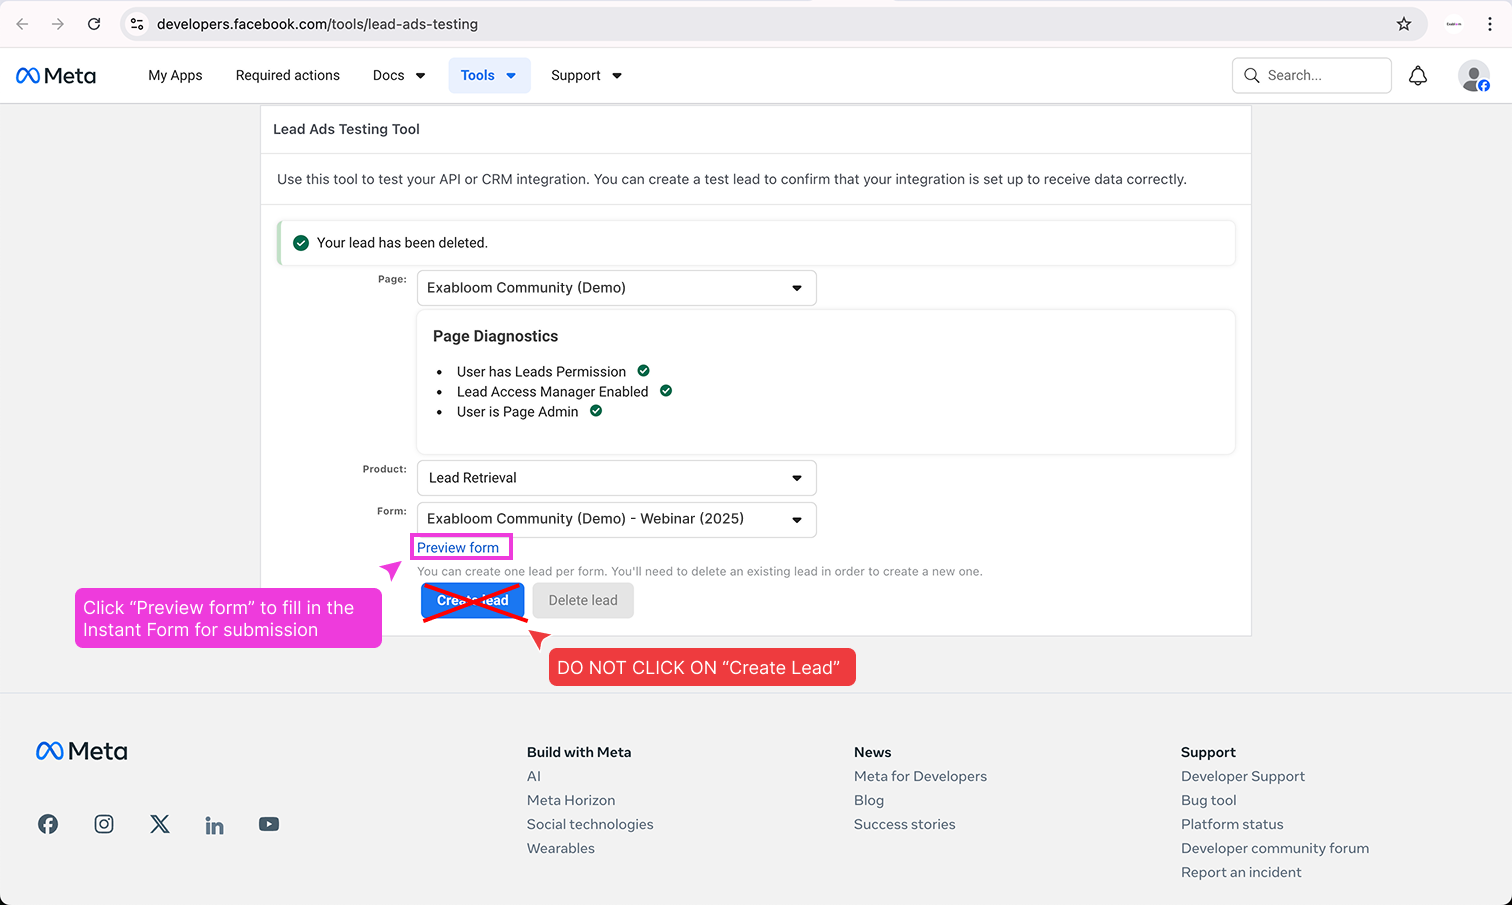
-
Click Preview form, fill in the test fields, and submit.
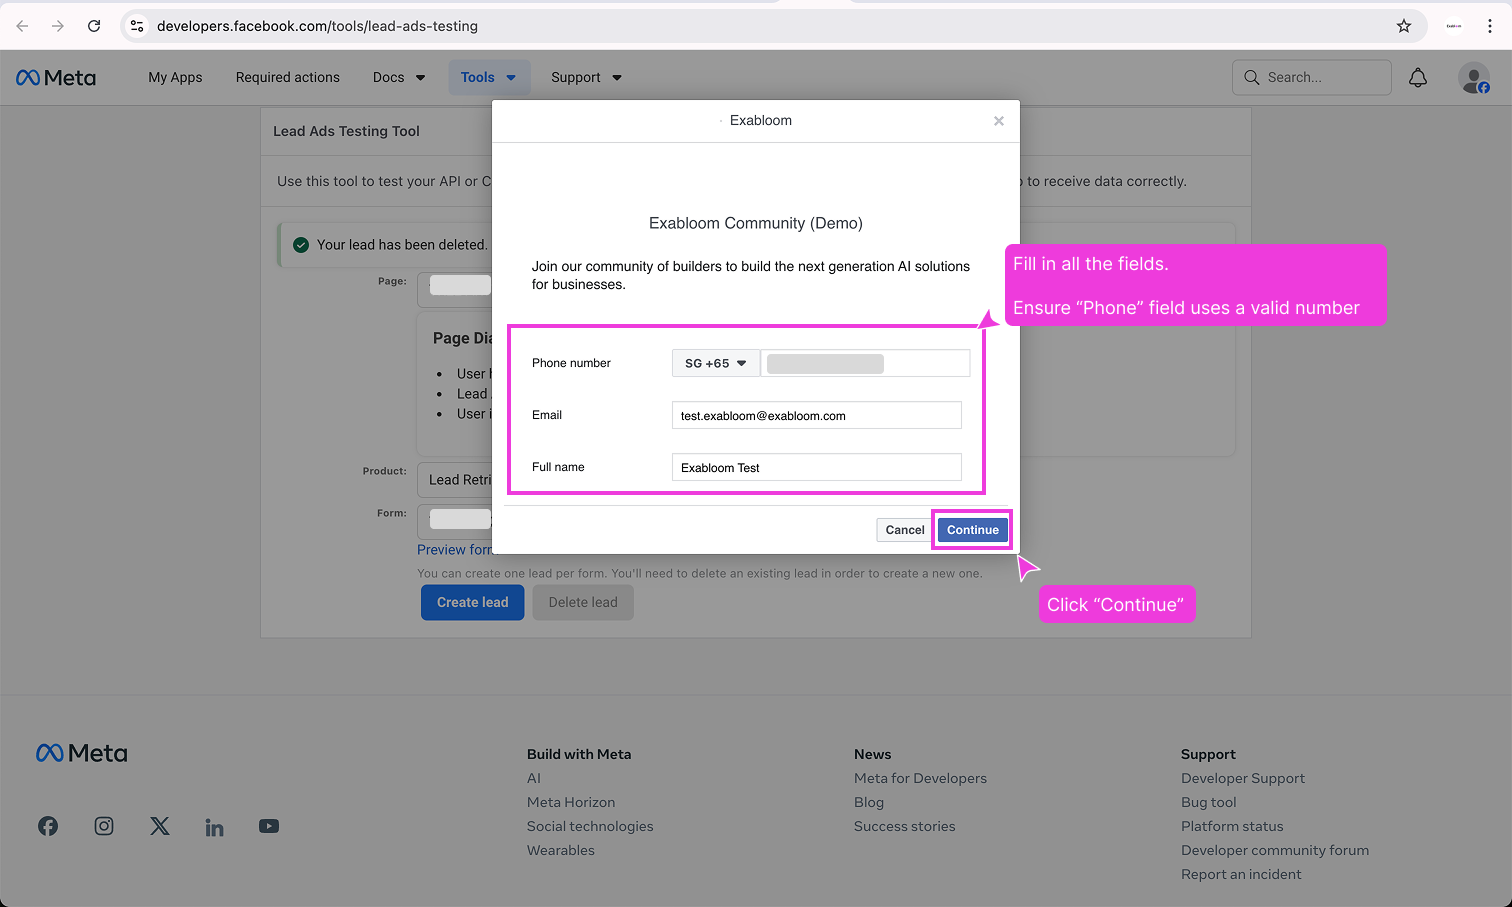
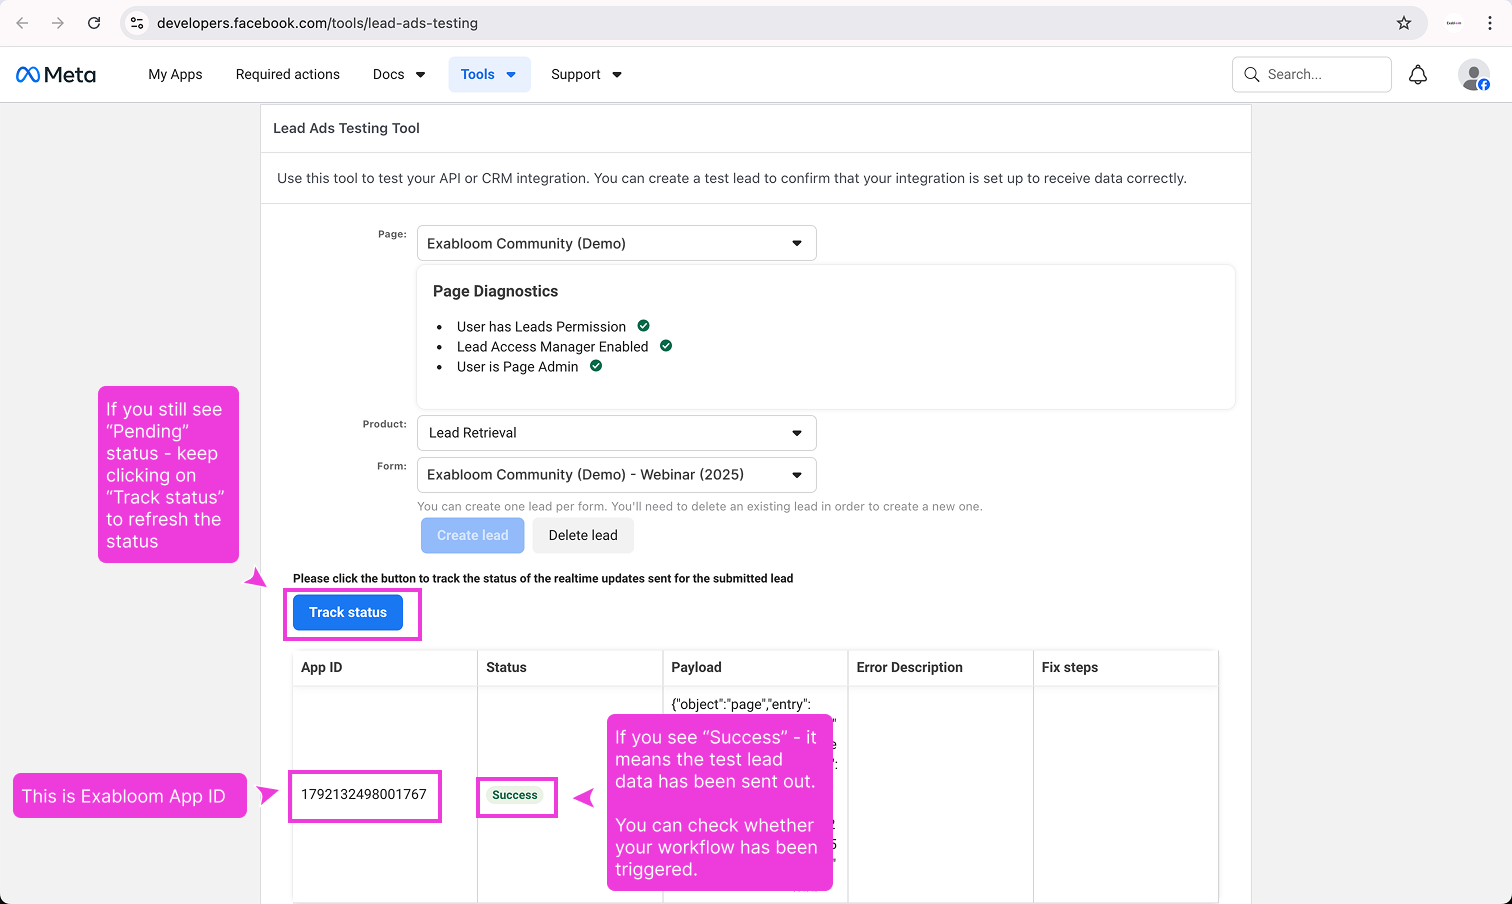
-
Wait for the status to show Success.
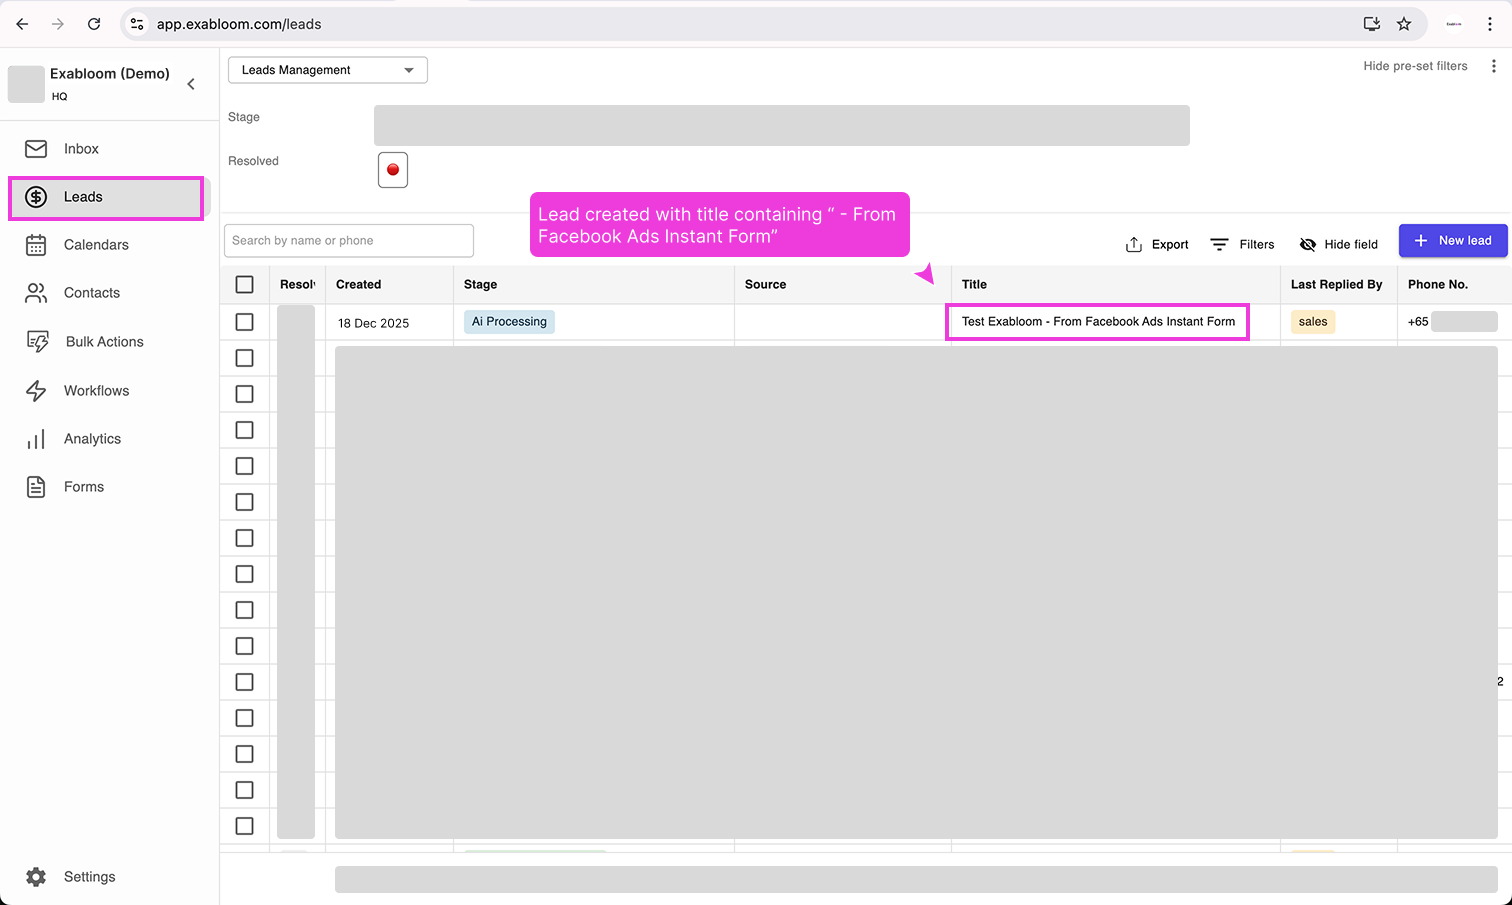
-
In Exabloom, go to Leads and look for a lead with "- From Facebook Ads Instant Form" in the title.
Troubleshooting
Lead not appearing?
- Verify the workflow is published (not just saved)
- Check you selected the correct form in the trigger
- Confirm Exabloom AI has leads access in Meta Business Suite (Part 2)
- Wait 1-2 minutes and refresh the Leads page