Import Contacts
Import your existing contacts into Exabloom using a CSV file.
Prepare your CSV file
Format your CSV with columns for contact details. The mobile phone number must include the country code with no spaces.
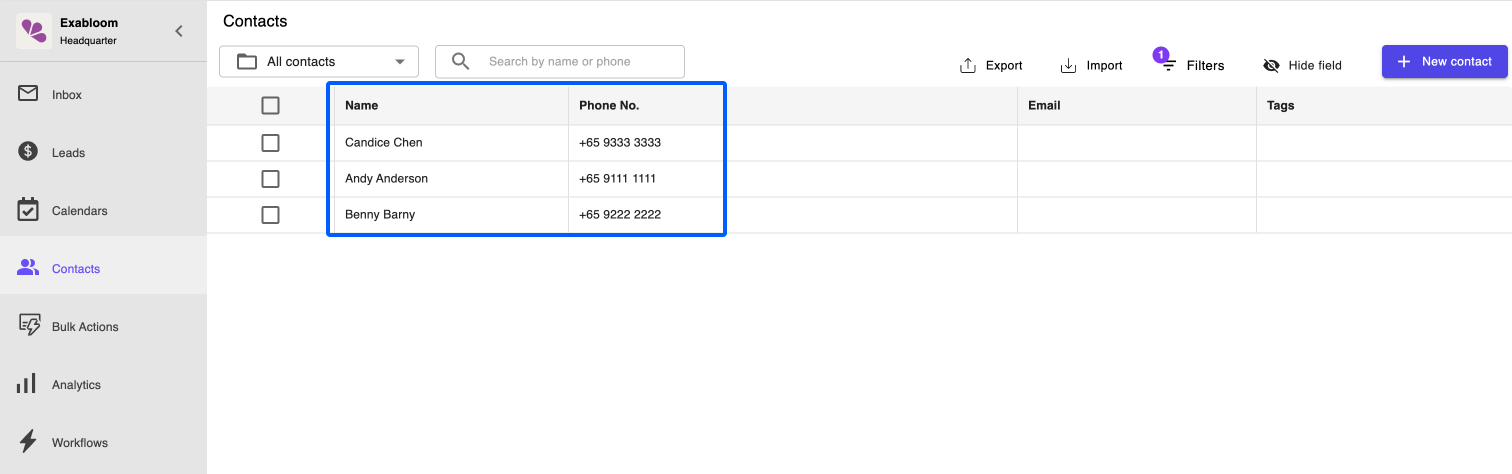
| First Name | Last Name | Mobile Phone |
|---|---|---|
| Andy | Anderson | 6591111111 |
| Benny | Barny | 6592222222 |
| Candice | Chen | 6593333333 |
Phone number format:
6591111111— valid65 9111 1111— not valid (contains spaces)91111111— not valid (missing country code)
Steps
-
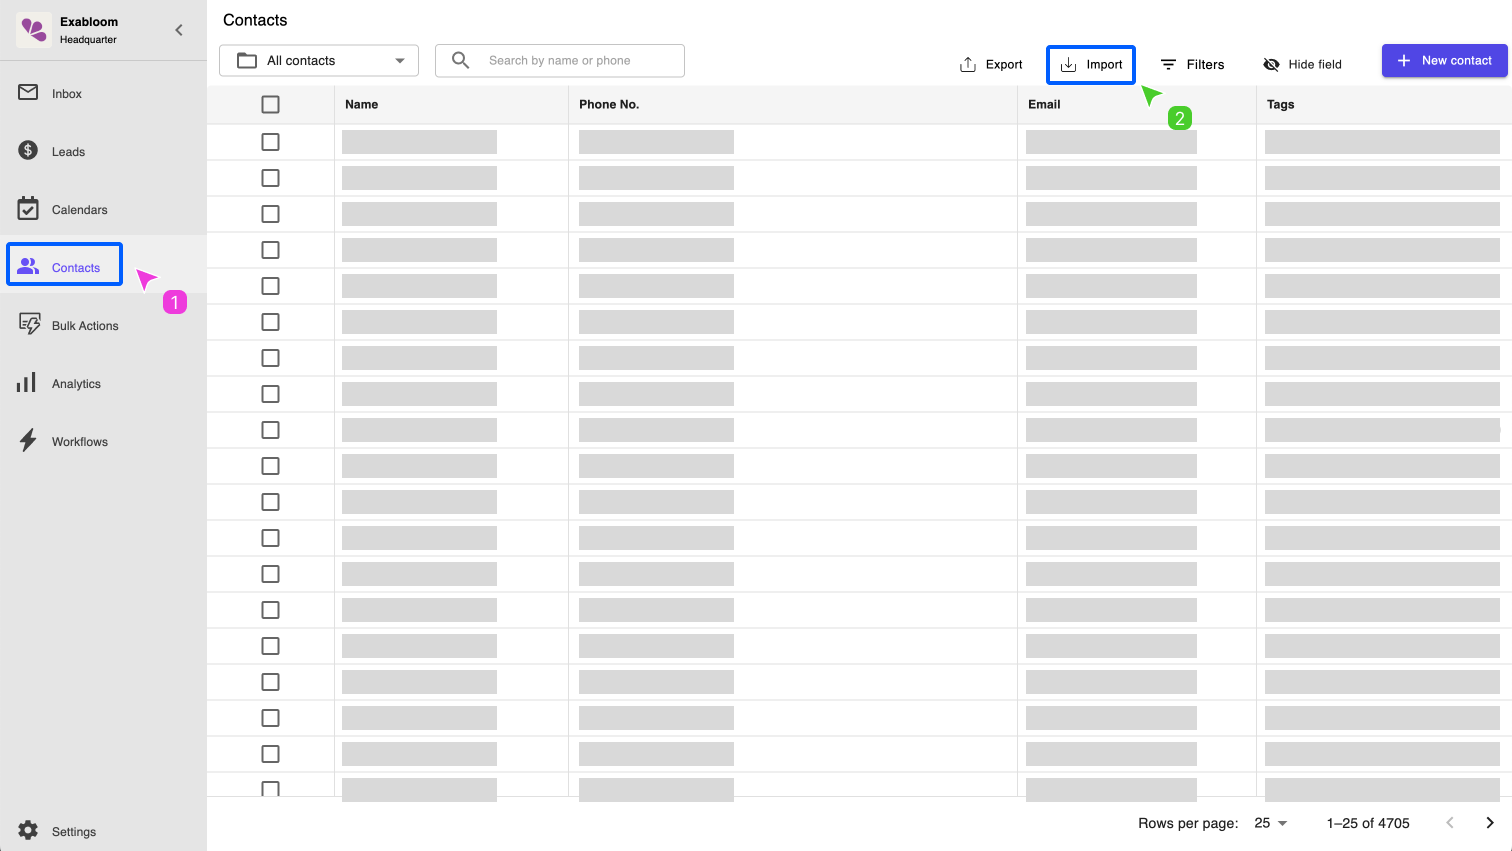
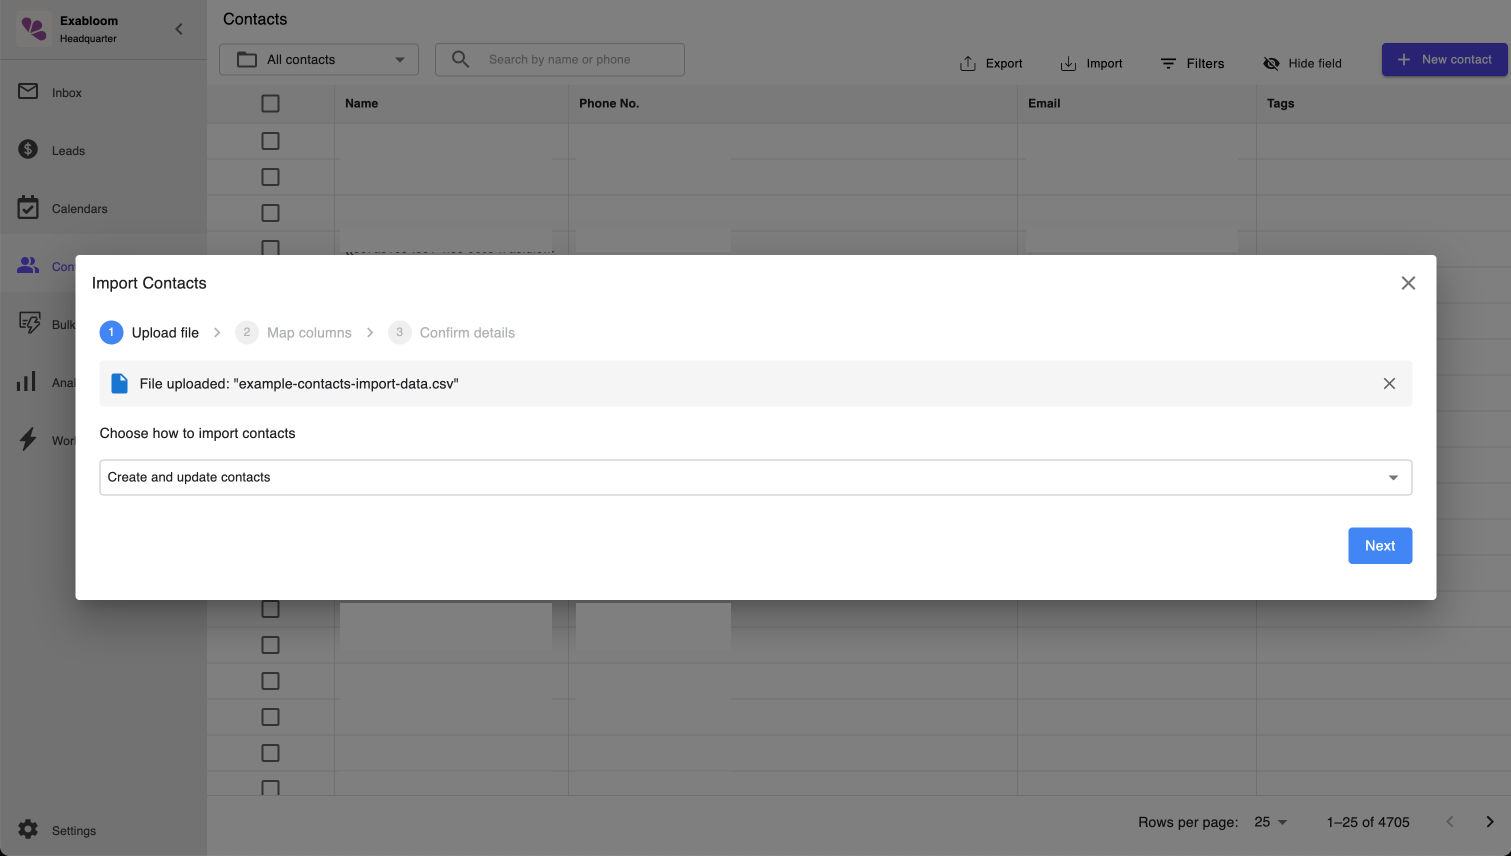
Go to Contacts and click Import.
-
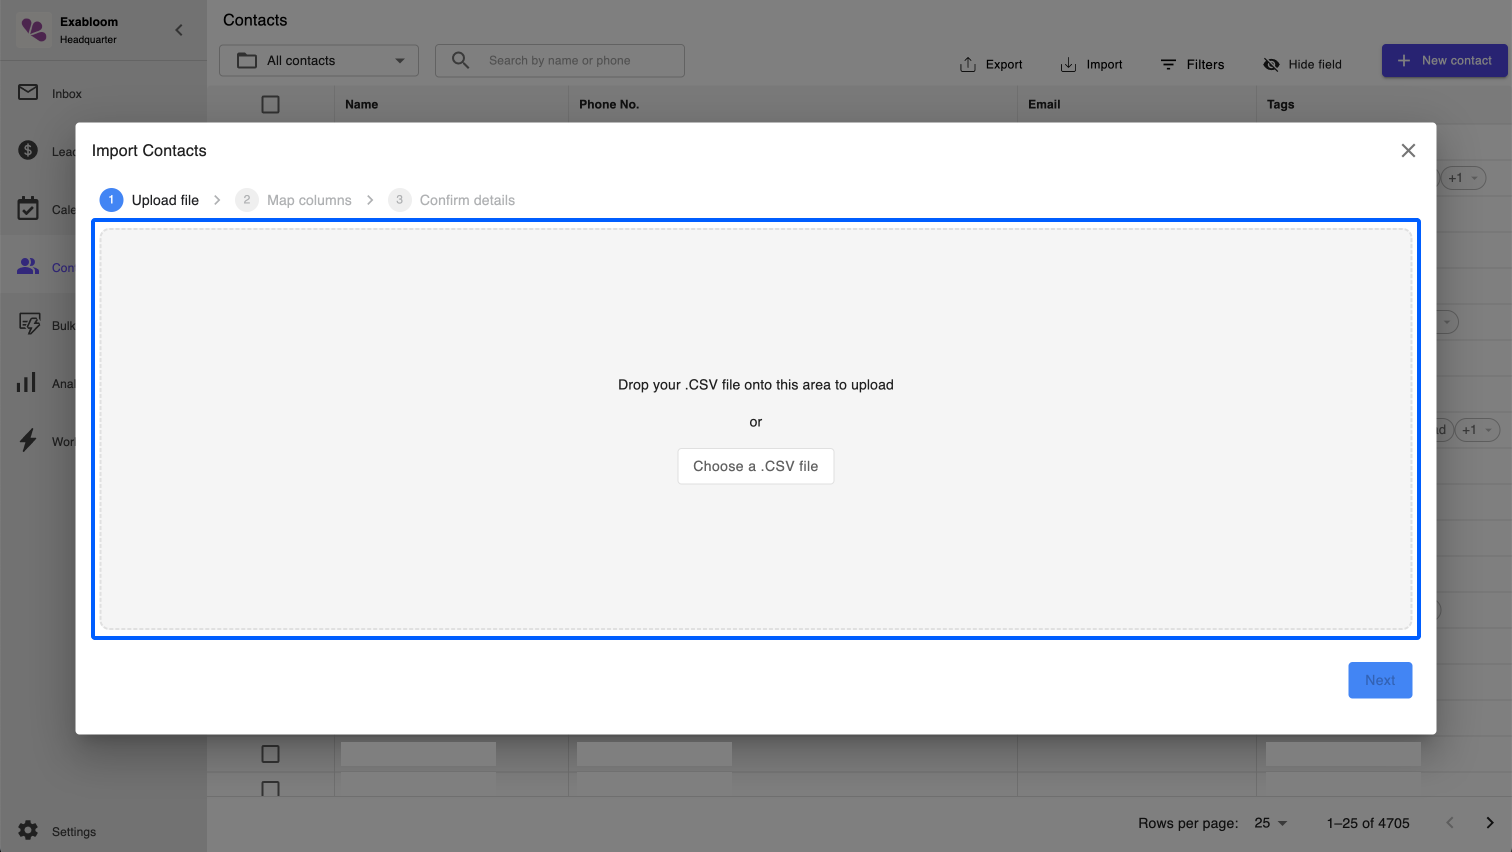
Drag and drop your CSV file, or click to select it manually.
-
Select an import option:
- Create and update contacts
- Create contacts only
- Update contacts only
Click Next.
-
Map each CSV column to the corresponding Exabloom contact field, then click Next.
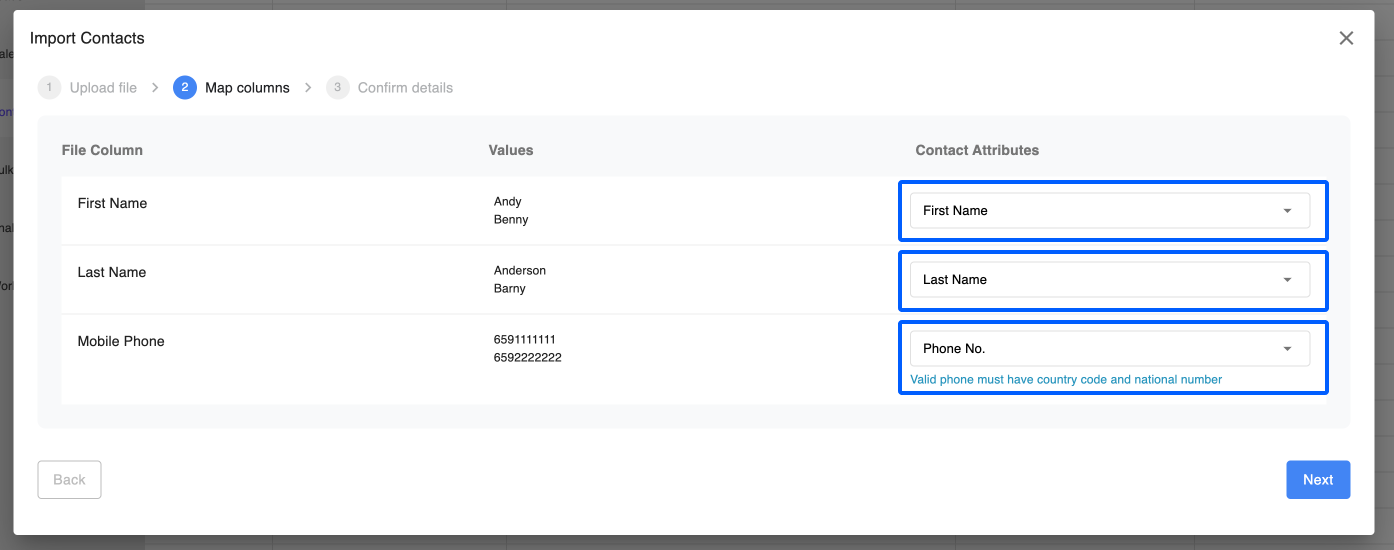
What is mapping?
Mapping tells Exabloom which CSV column corresponds to which contact field. For example, map your "Name" column to the "Full Name" field and your "Phone Number" column to the "Phone Number" field.
-
Enter a description for the import (e.g., "22-Feb-2024: New Enrollments For 2024") and click Submit.

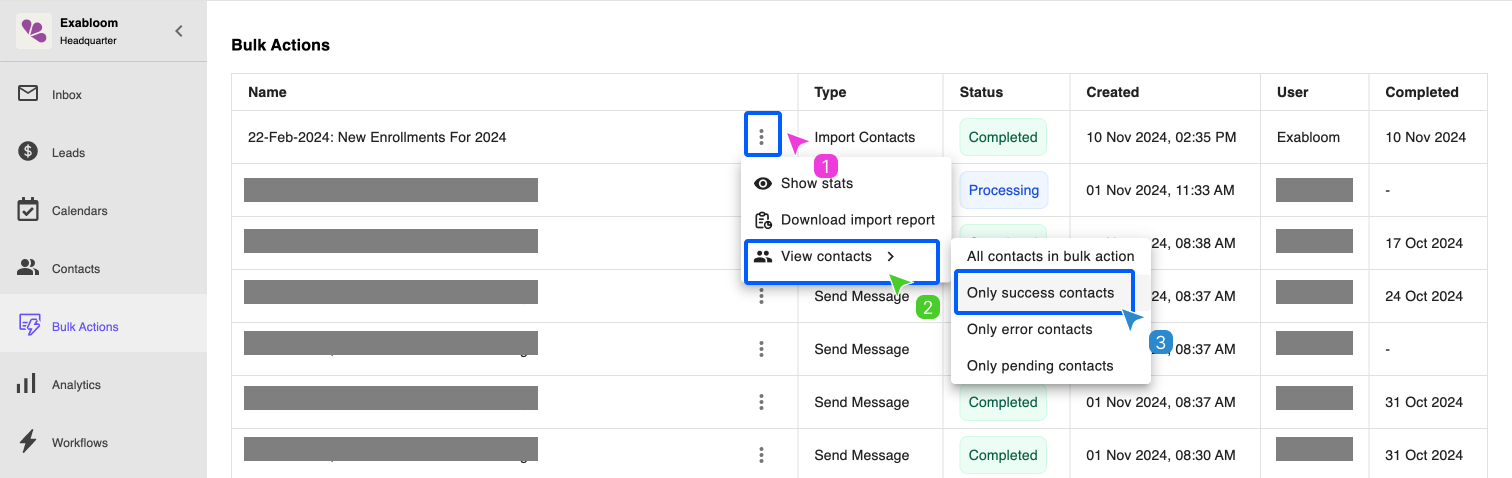
Check import progress
-
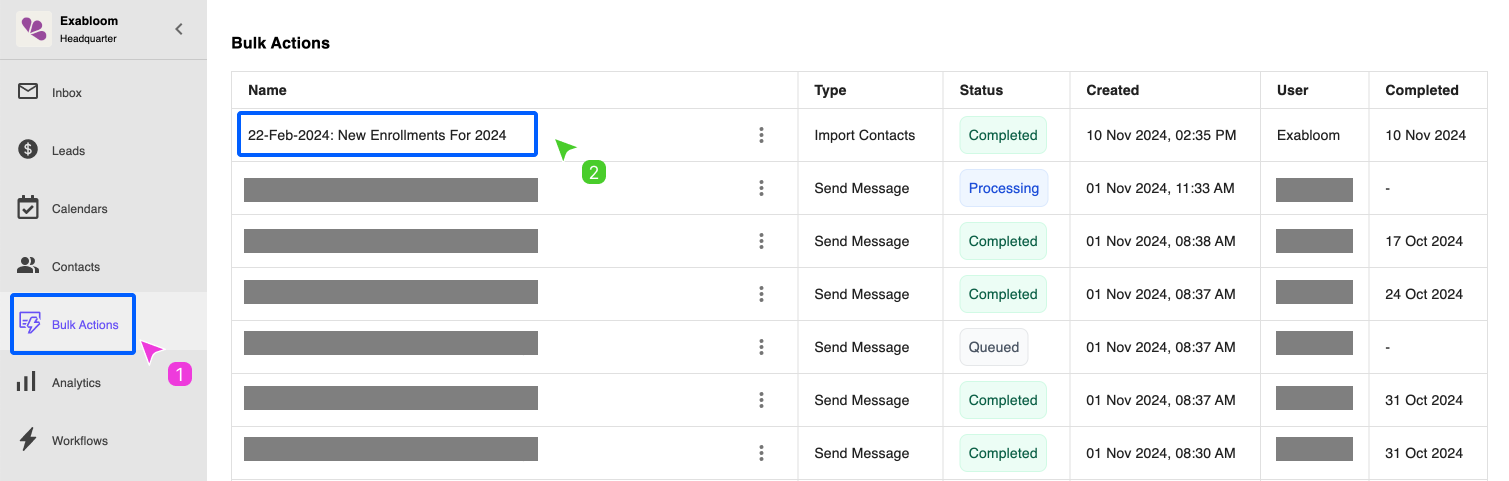
Go to Bulk Actions.
-
Find the entry matching your import description.
-
Check the Status column — it shows "Completed" when the import is finished.
-
To view the imported contacts, select View contacts > Only success contacts.